

Please give us a chance to make it right and do better !
Contact our friendly customer service department for help first.
Replacements for missing or damaged parts will be shipped ASAP !
Contact Us!
Do NOT return this item.
US office: Fontana UK office: Ipswich AU office: Truganina
DE office: Hamburg
FR office: Saint Vigor d'Ymonville
PL office: Gdańsk
US:cs.us@costway.com
UK:cs.uk@costway.com
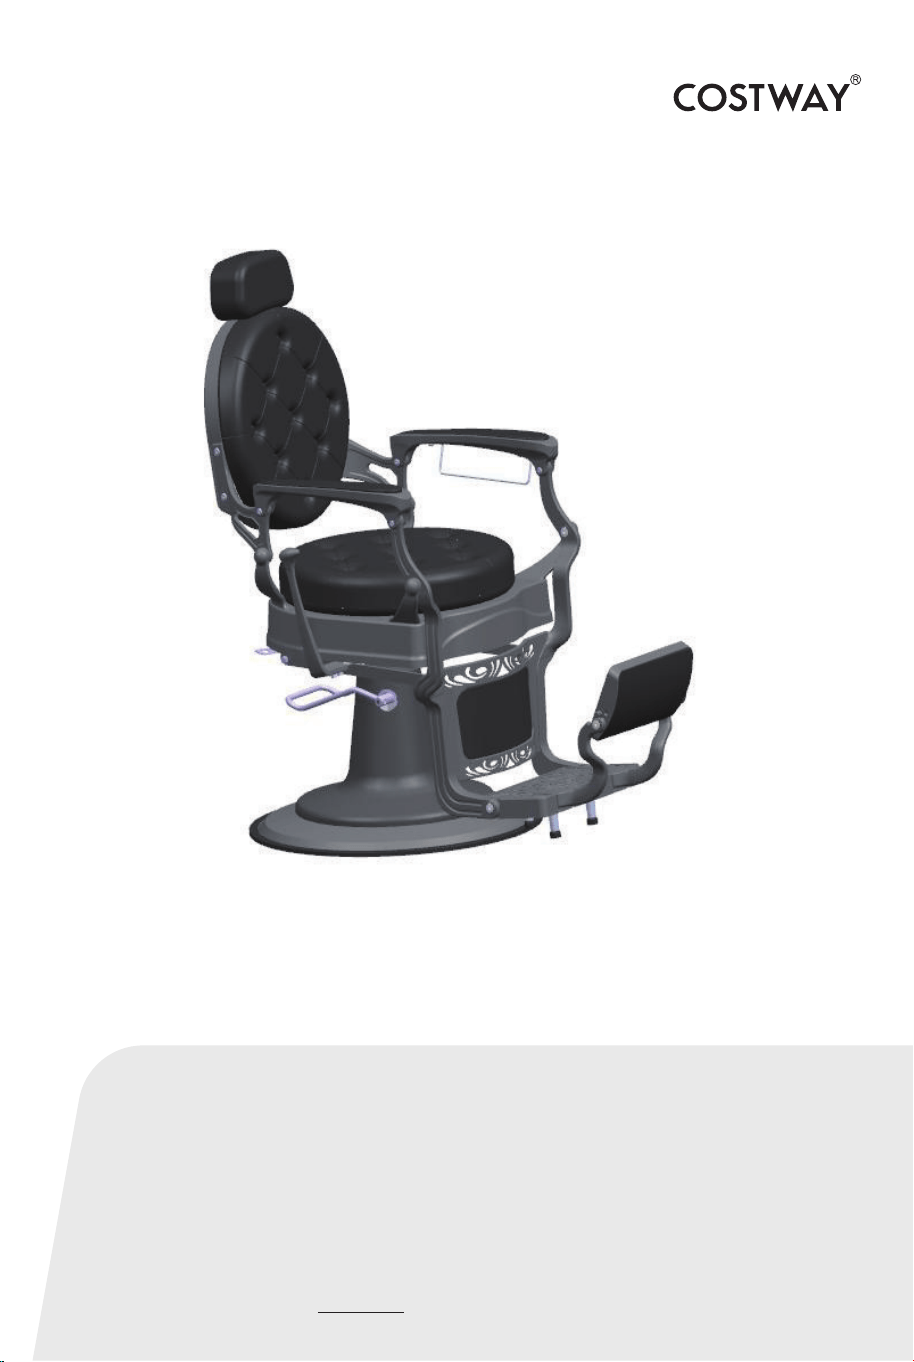
Hairdressing Chair
JB10002
USER’S MANUAL
THIS INSTRUCTION BOOKLET CONTAINS IMPORTANT SAFETY INFORMATION. PLEASE READ AND KEEP FOR FUTURE REFERENCE.
Before You Start
Please read all instructions carefully.
Retain instructions for future reference.
Separate and count all parts and hardware.
Read through each step carefully and follow the proper order.
We recommend that, where possible, all items are assembled
near to the area in which they will be placed in use, to avoid
moving the product unnecessarily once assembled.
Always place the product on a flat, steady and stable surface.
Keep all small parts and packaging materials for this product
away from babies and children as they potentially pose a serious
choking hazard.
02
NOTICE:
If your package has missing parts or you are having issues with
assembly, please call us directly or message us, our customer
service team will address any questions or concerns you may have.
Keep this manual for future reference.
03
SAFETY
To reduce risk of injury when assembling & using the chair,
follow these precautions:
• Read all of these instructions before assembling and using
your salon chair.
• It is helpful to have 2 people assemble and turn the chair
upright after assembling.
• Do not over-extend the chair(weight capacity 150 kg),
otherwise it may cause the risk of falls or tipping the chair, and
its occupant over, resulting in injury.
04
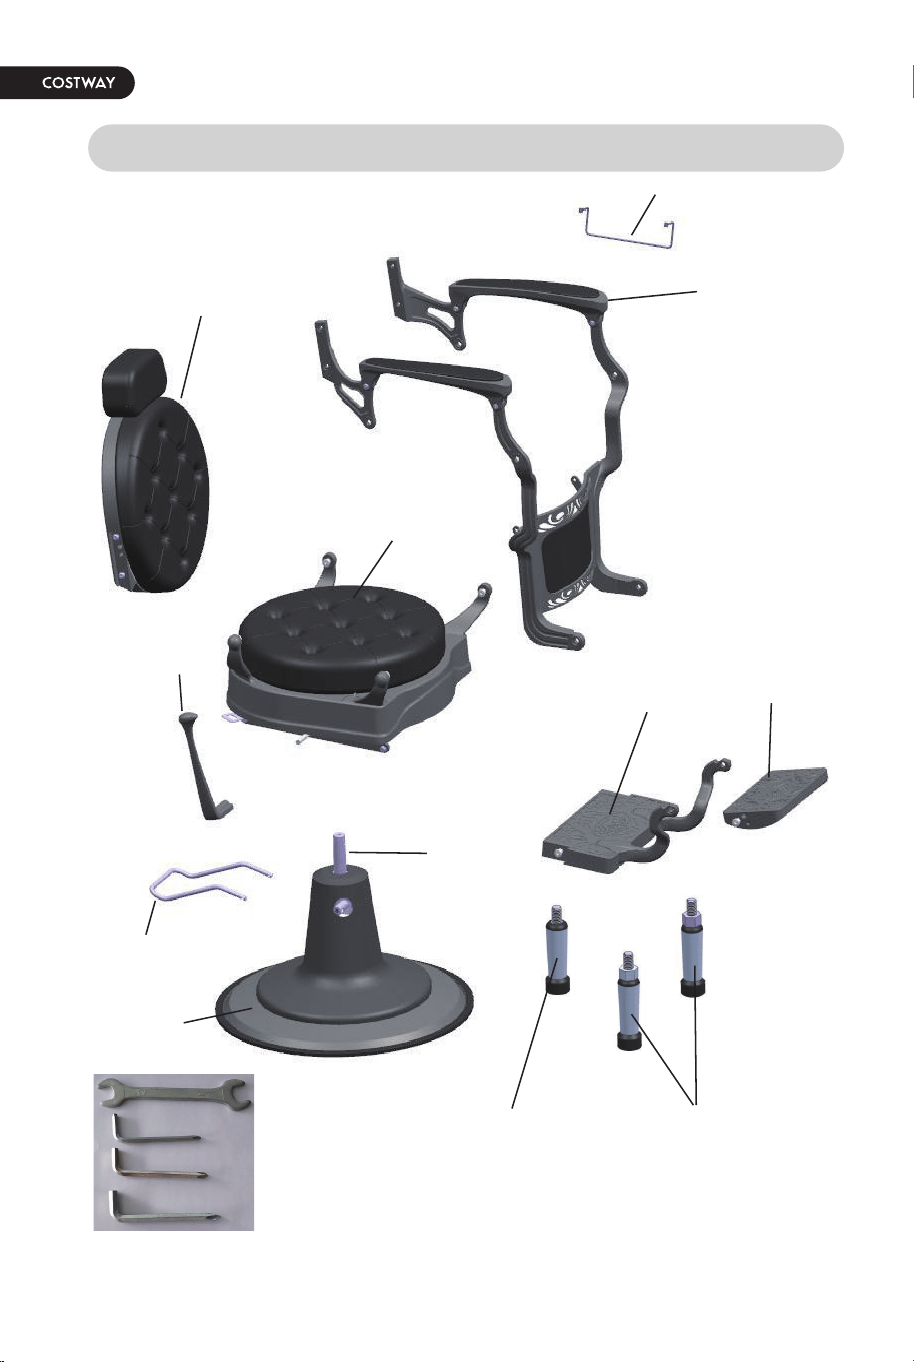
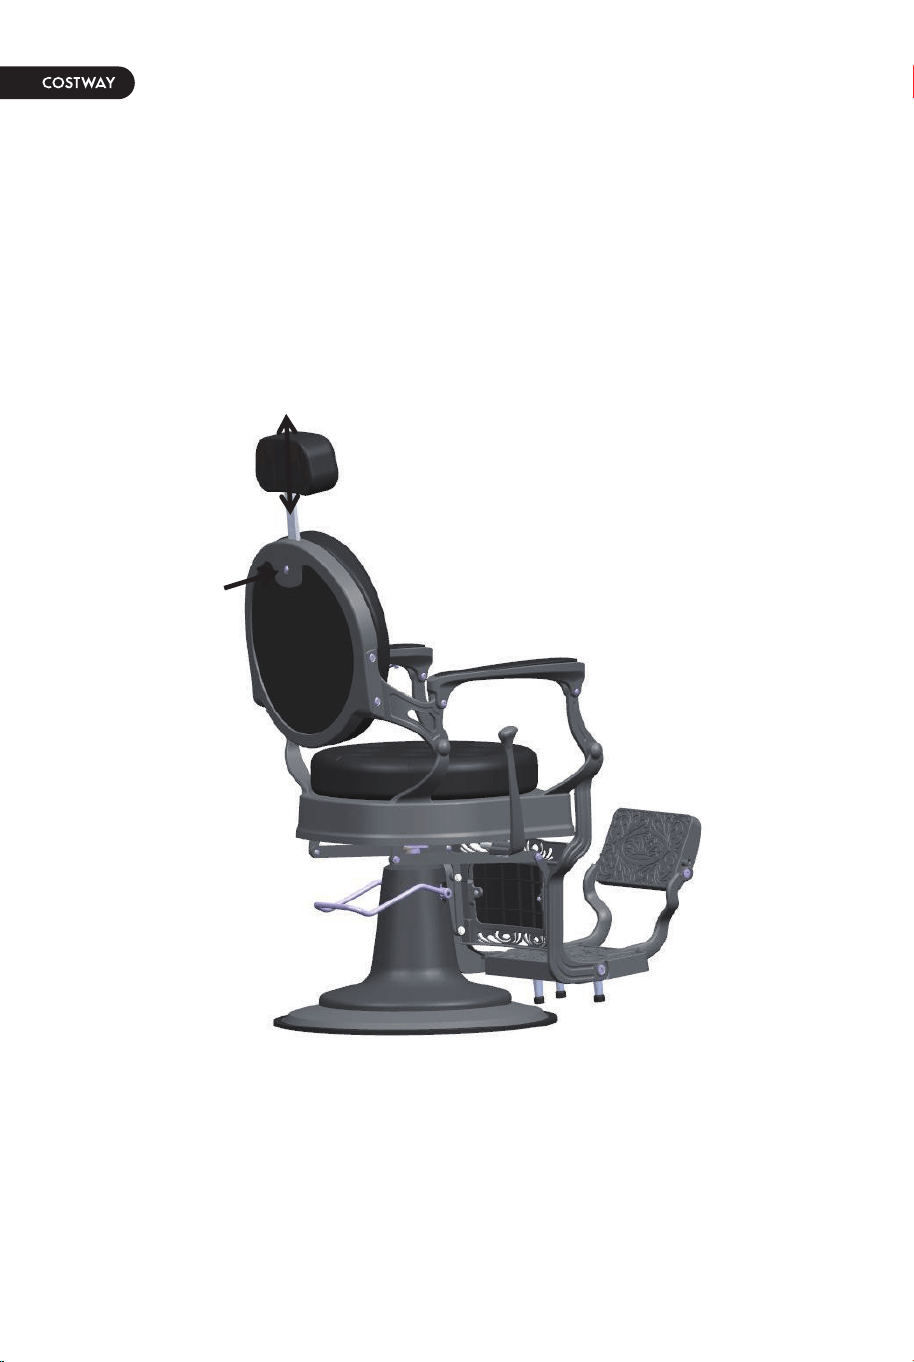
PARTS & FEATURES
Pump
Foot bar
Footrest
Towel hook
Hand rest
Seat
Backrest
Leg-rest
Base
Footrest High
support
Footrest Low
support
Reclining
Lever
Hand Tools
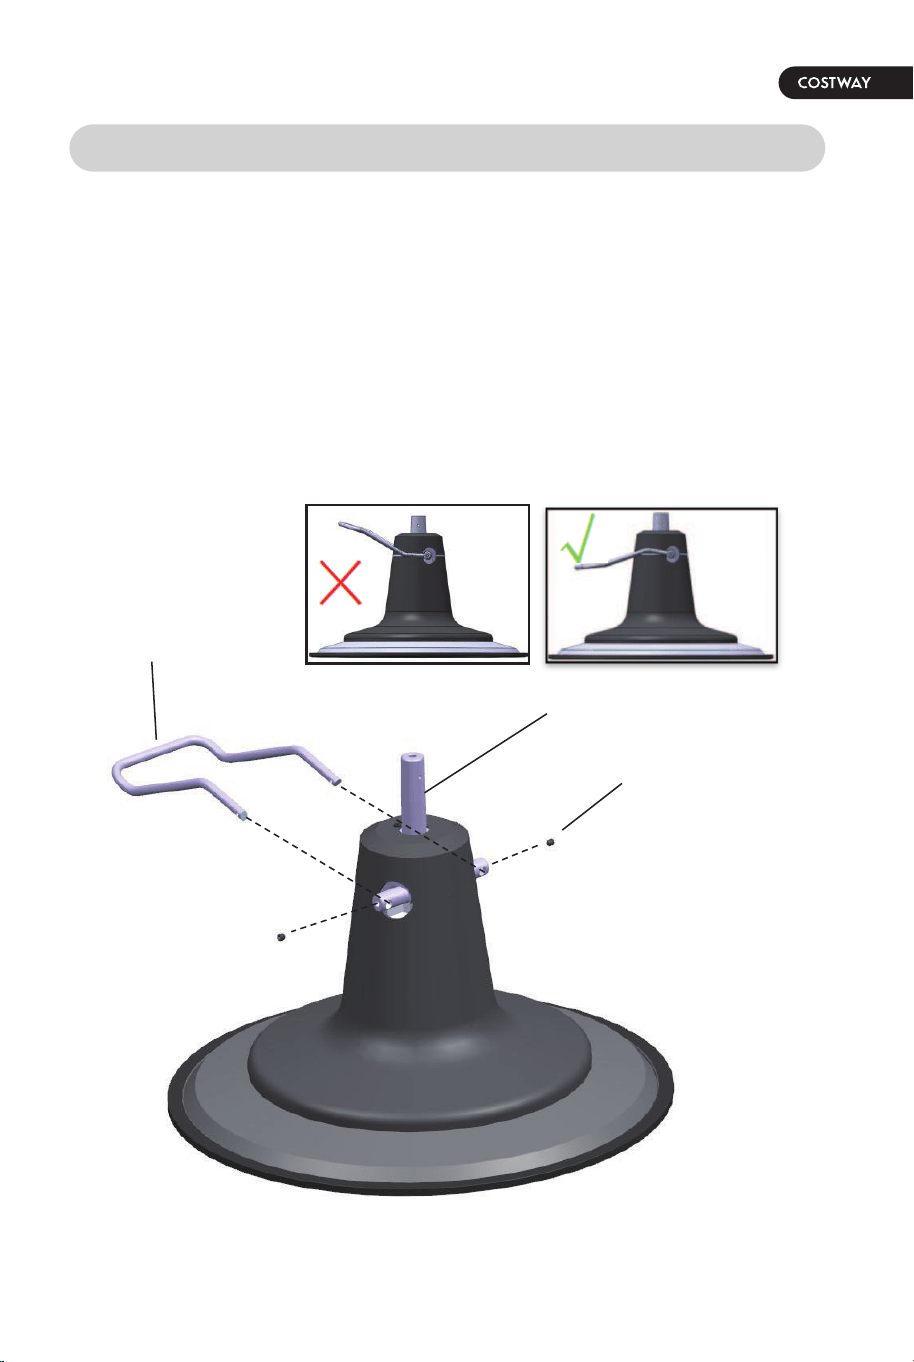
First: Install foot bar to the pump
Step 1. Place Base & Pump on floor. Use Allen Wrench to loosen the
screws in the crossbar. Please follow the diagram as shown. Insert Foot
Bar into the holes of the crossbar. (It may be necessary to slightly
squeeze ends of Foot Bar towards each other, and some maneuvering for
thebar ends to go into place.)
Step 2. Tighten the 2 set screws to firmly hold the Foot Bar in place.
05
INSTALLATION INSTRUCTION
Pump
Foot bar
Set screw
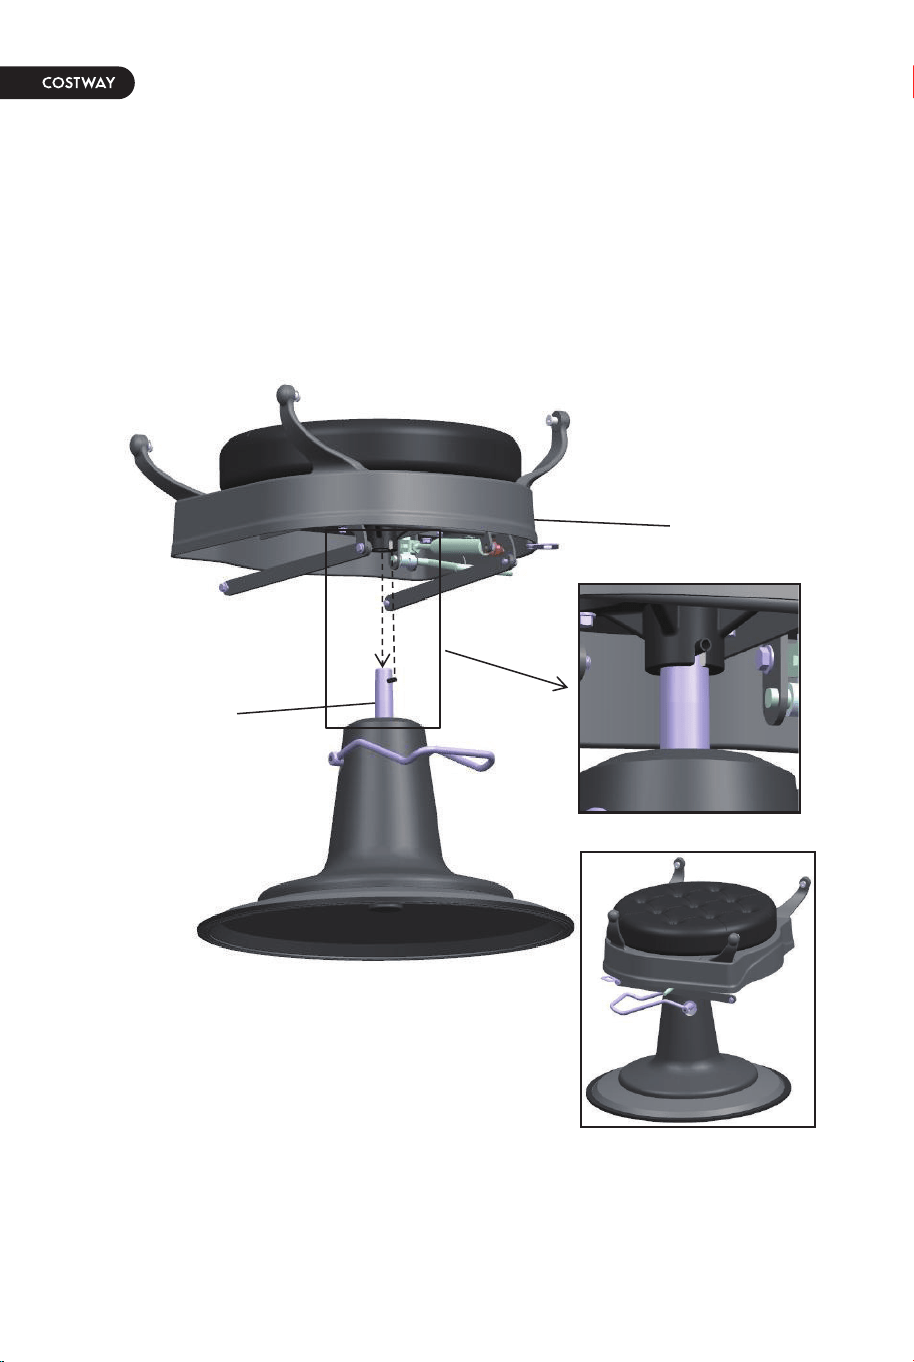
Second: Set the Seat onto the top of Pump
Step 1. Locate the slot in the short column under the Seat. Align this slot
with the black pin at the top of pump and press seat down to set Seat
onto top of pump.
Please follow the diagram as shown.
06
Pump
Seat
07
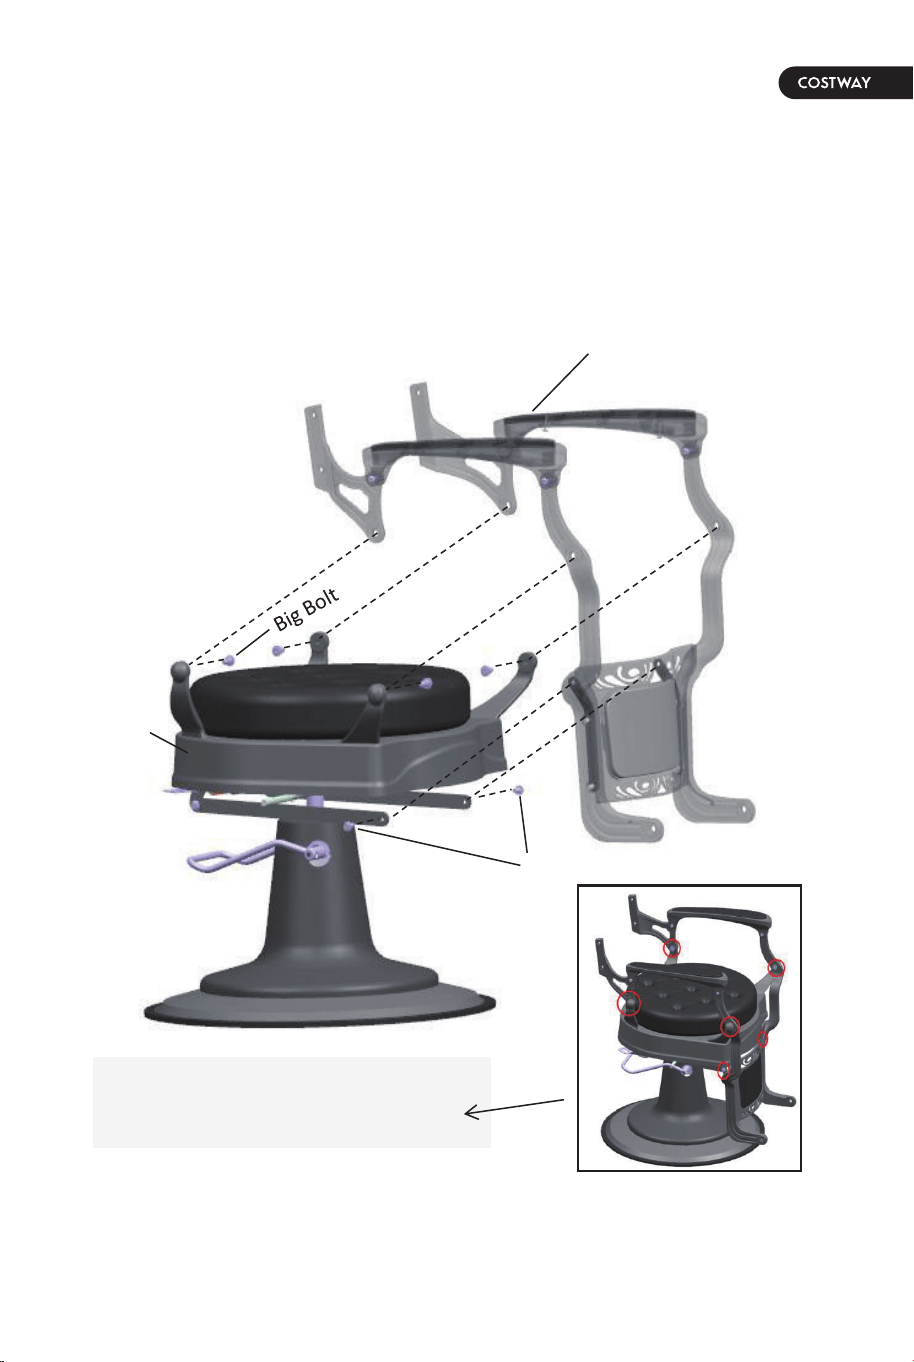
Third: Install the hand rest to the seat
Step 1. Remove the 4 big bolts and 2 small bolts which Pre-fixed in seat.
Step 2. Install the hand rest to the seat with 4 big bolts and 2 small bolts
which removed from seat.
Please follow the diagram as shown.
Hand rest
Seat
Small Bolt
The circle is the conncting
position of big bolt or small bolt.
08
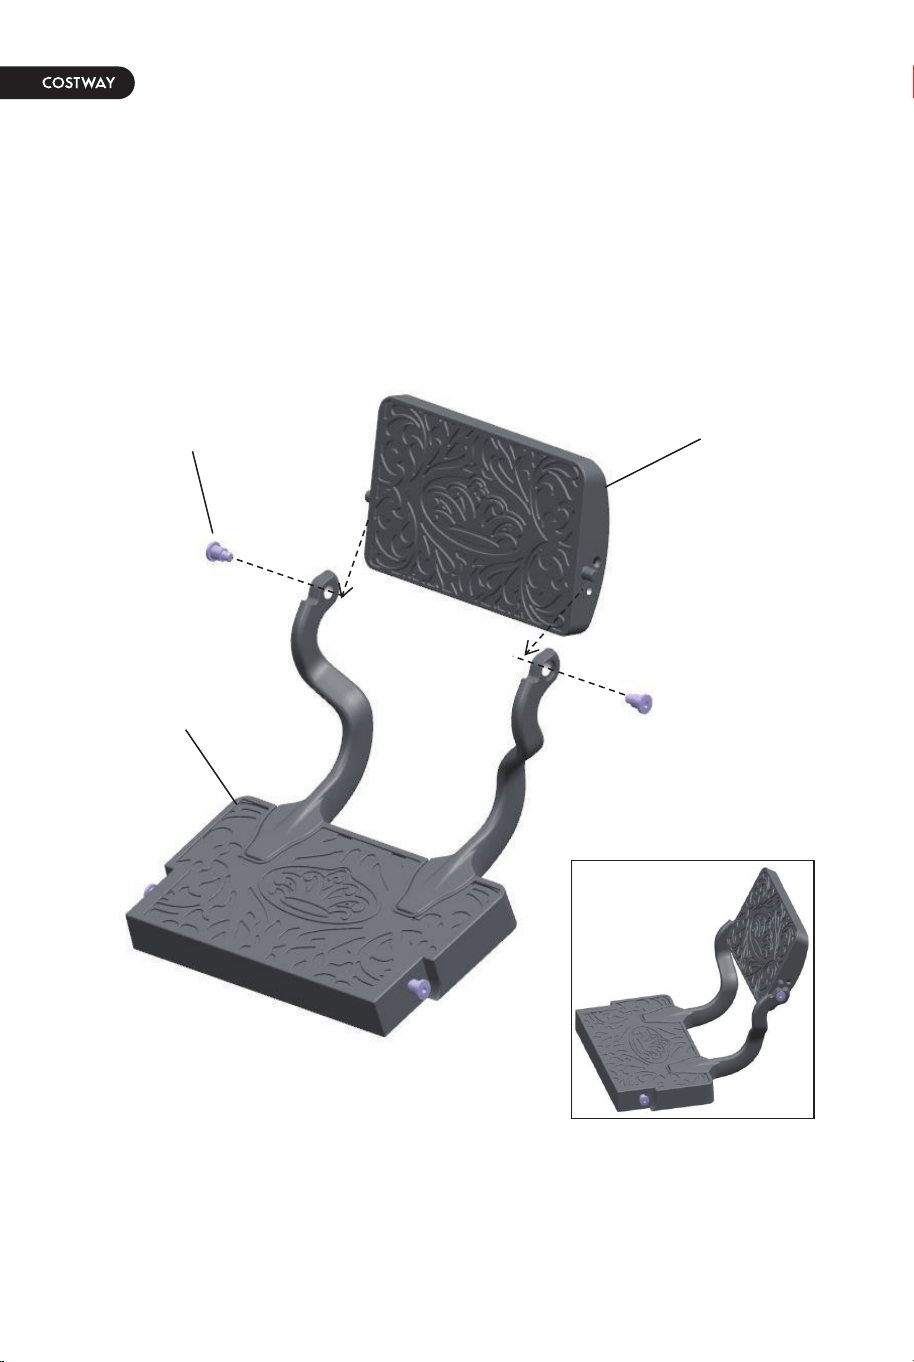
Fourth: Install Leg-rest to the foot-rest
Step 1. Remove 2 big bolts which pre-fixed in the leg-rest then install the
leg-rest to the foot-rest with 2 big bolts which removed from the leg-rest.
Please follow the diagram as shown.
Footrest
Big Bolt
Leg-rest
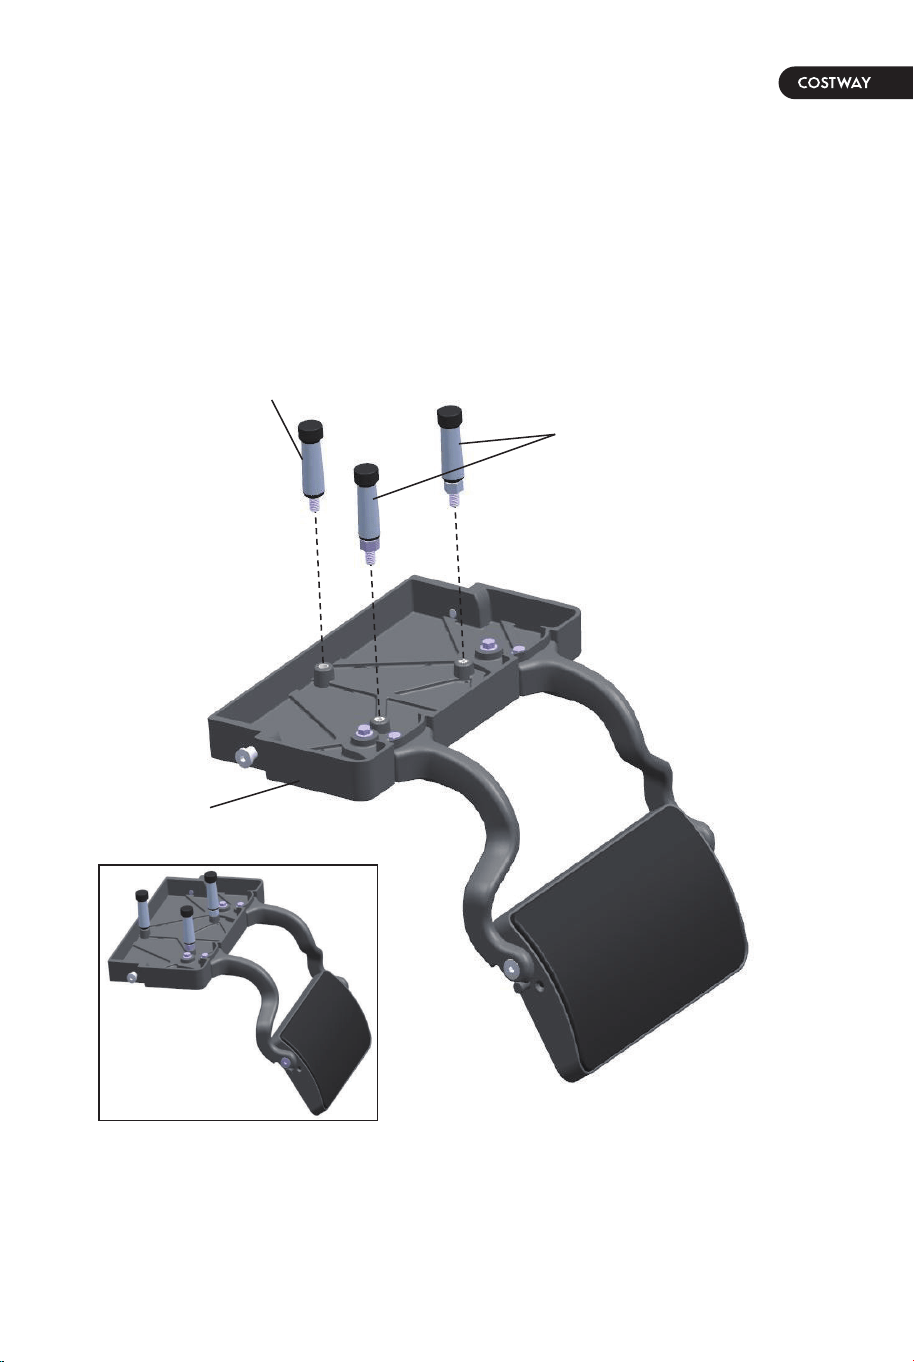
09
Fifth: Install Footrest low support and footrest high supports
to foot-rest
Step 1. Install 1 footrest low support and 2 footrest high supports to the
bottom of foot-rest.
Please follow the diagram as shown.
Footrest
Footrest low support
Footrest high supports
10
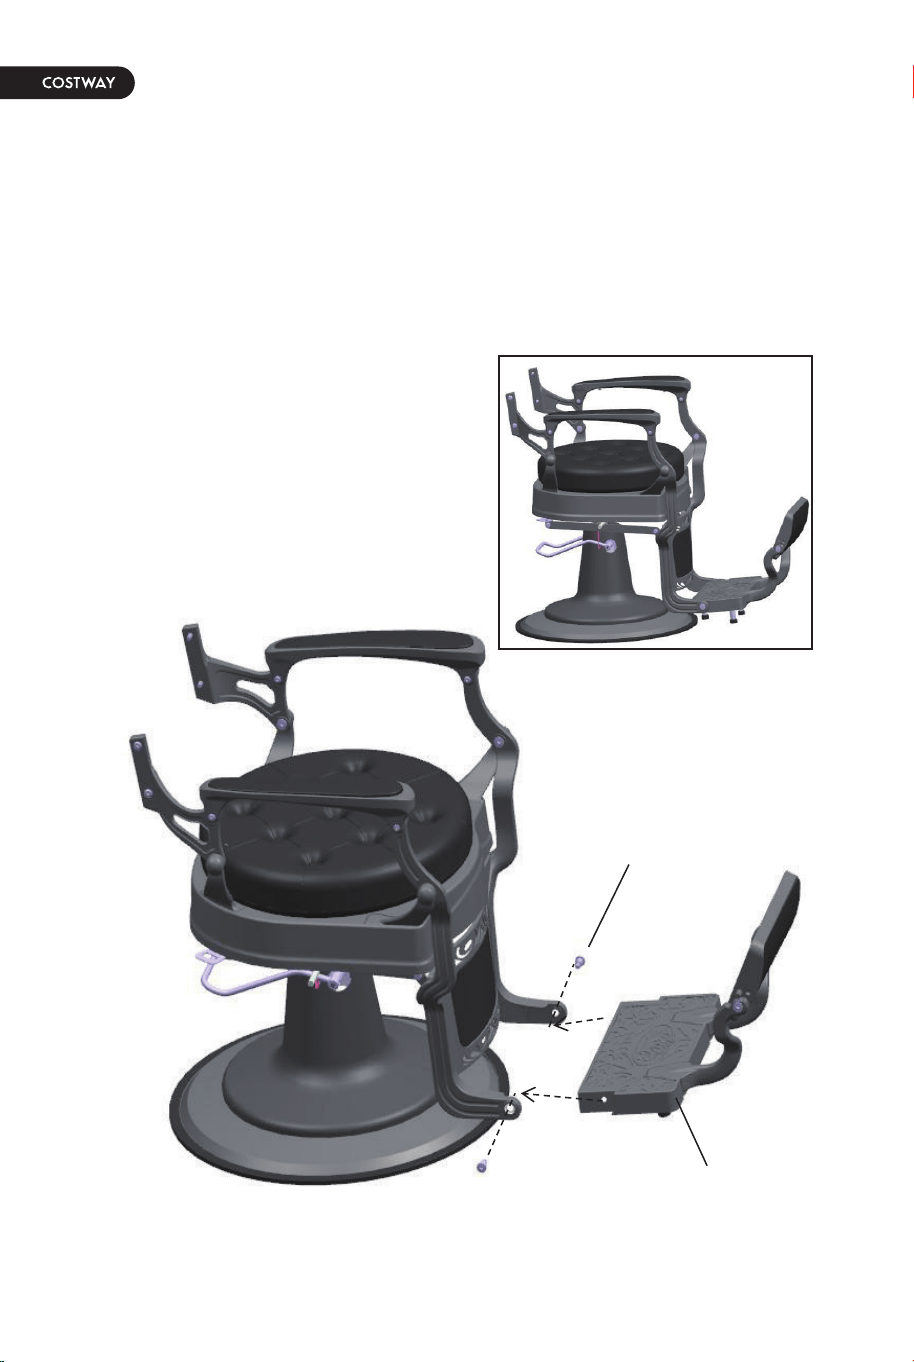
Sixth: Install foot-rest to the chair
Step 1. Removed 2 big bolts which pre-fixed in the foot-rest.
Step 2. Install foot-rest to the chair with the big bolts which removed
from the foot-rest.
Please follow the diagram as shown.
Foot-rest
Big Bolt
11
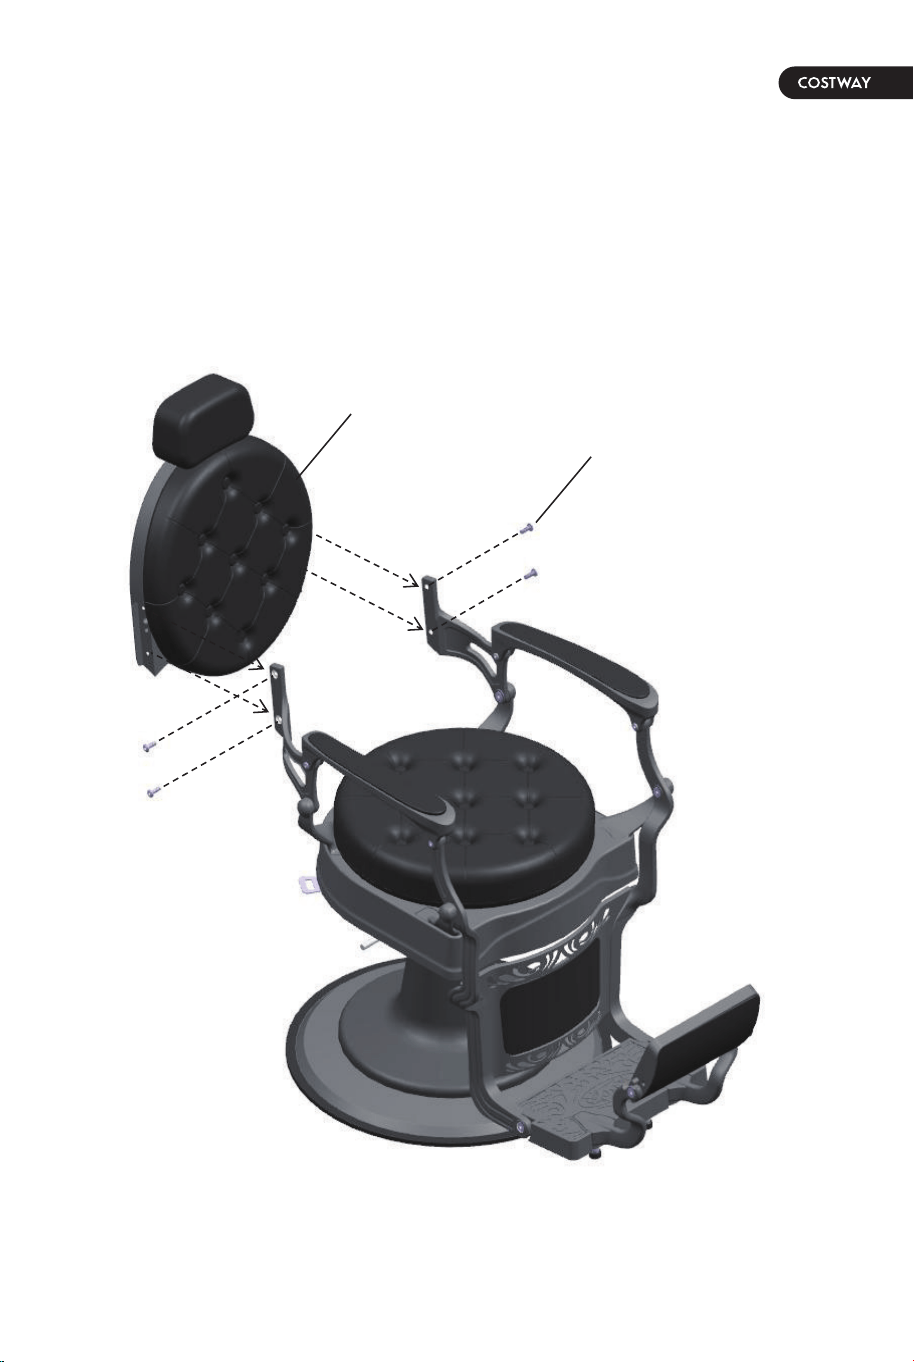
Seventh: Install back-rest to the chair
Step 1. Removed 4 bolts which pre-fixed in the Back-rest.
Step 2. Install Back-rest to the chair with 4 bolts which removed from
the Back-rest.
Please follow the diagram as shown.
Foot-rest
Bolt
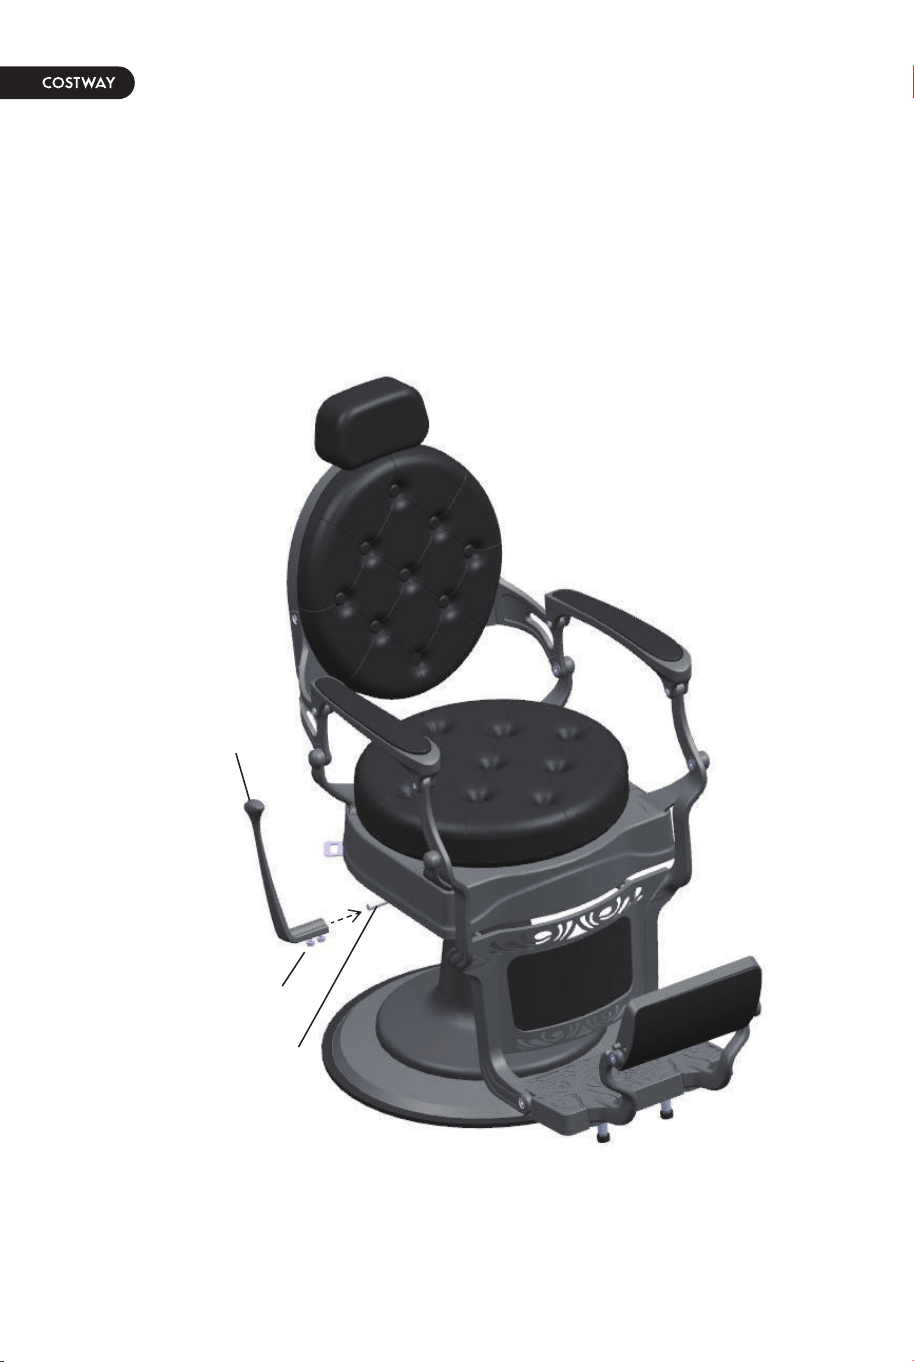
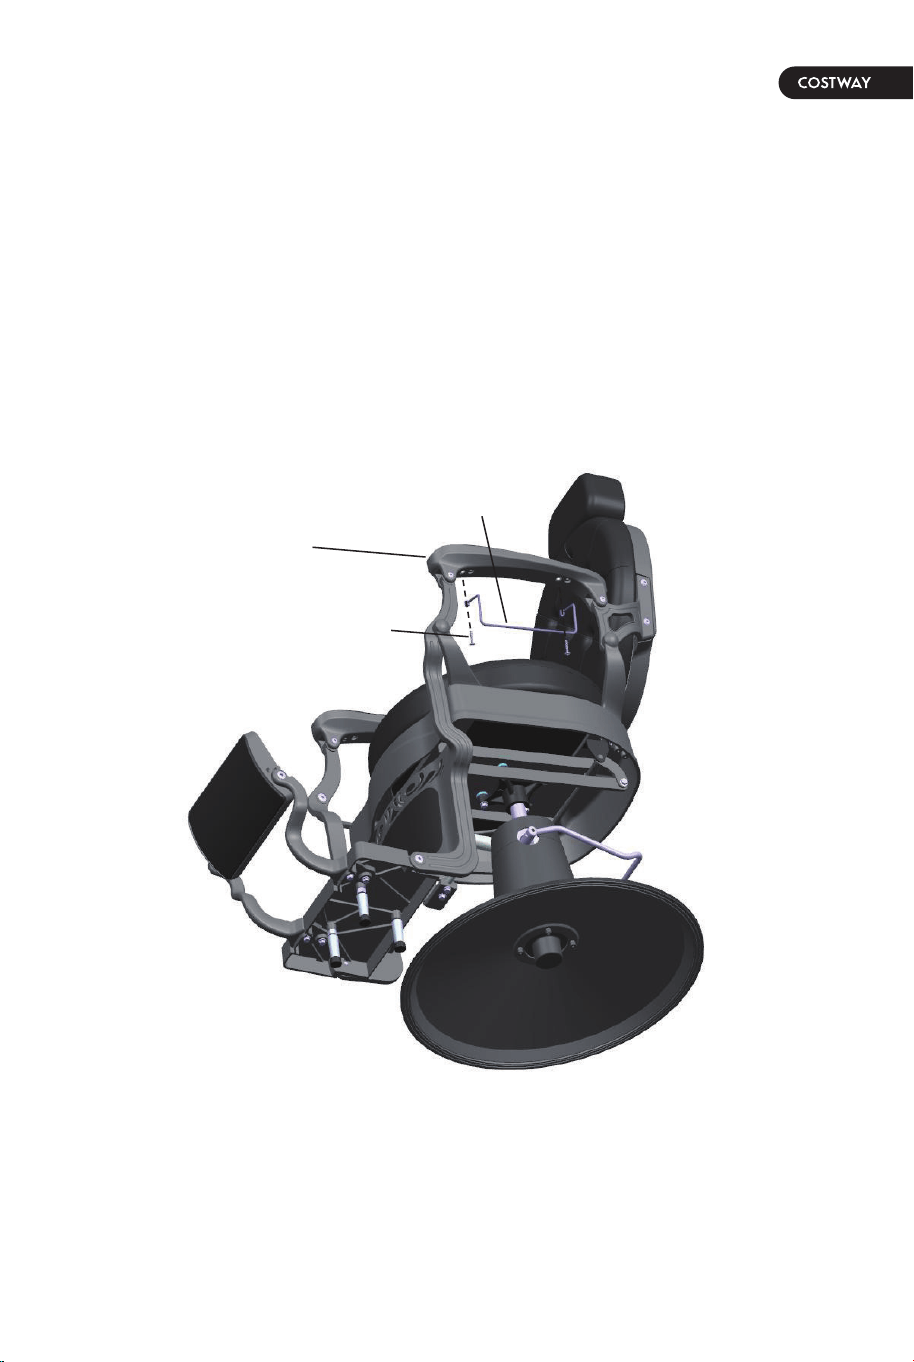
Eighth: Install Reclining Lever to chair
Step 1. Loosen the bolts which pre-fixed in the bottom of Reclining Lever.
Step 2. Set Reclining Lever on to the bent iron bar of the chair.
Step 3. Tighten the bolt which pre-fixed in the bottom of Reclining Lever.
Please follow the diagram as shown.
Reclining Lever
Locking bolt
Bent iron bar
12
Ninth: Install Towel hook to hand-rest
Step 1. Removed 2 bolts which pre-fixed in the hand-rest.
Step 2. Install the Towel hook to hand-rest with 2 bolts which removed
from hand-rest.
Please follow the diagram as shown.
Bolt
Towel hook
Hand-rest
13
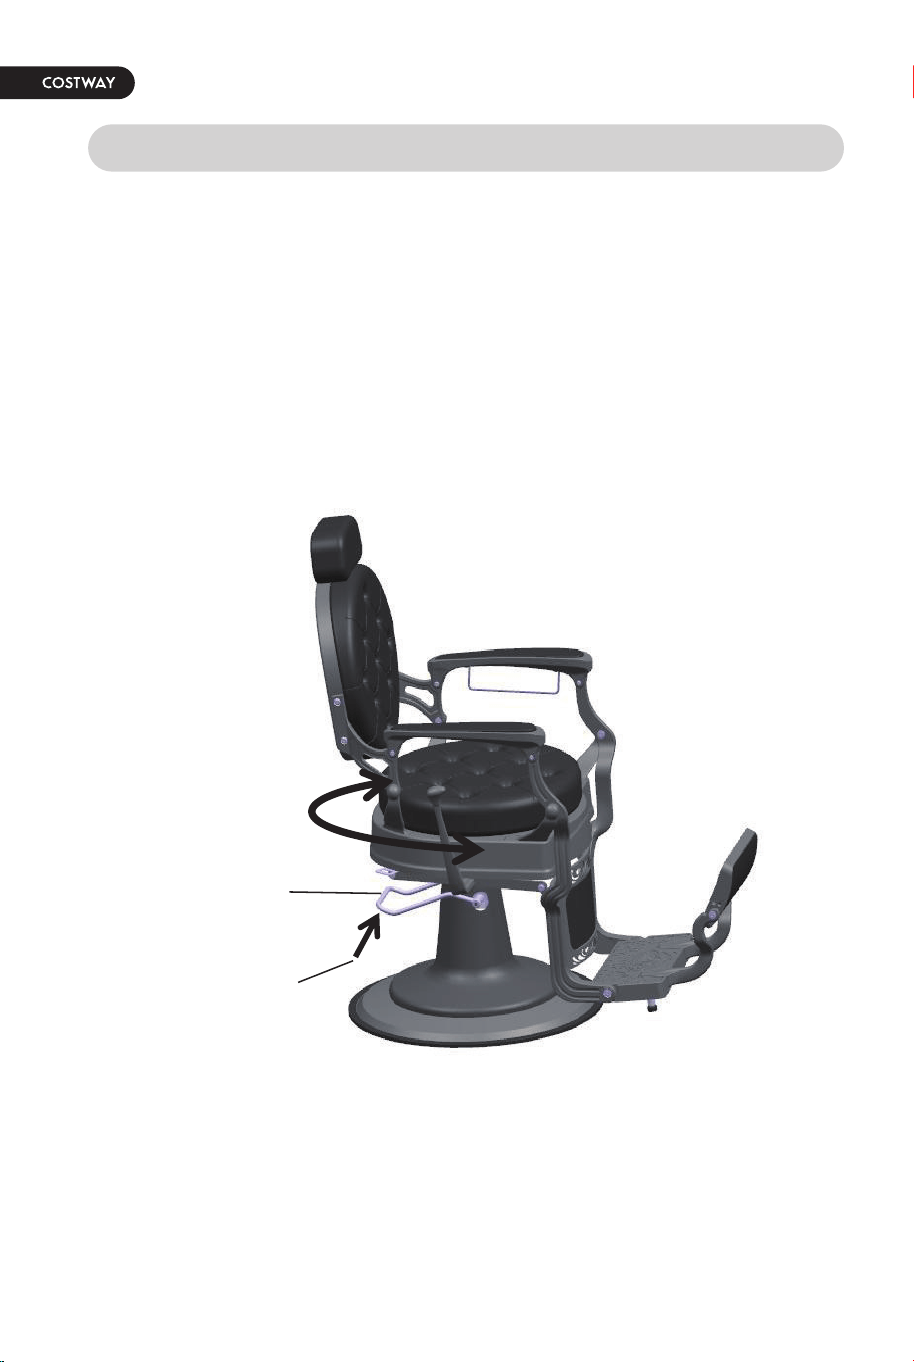
OPERATING THE CHAIR
First:
1. In the natural state, the upper part of the pump can rotate freely on
the rotation axis of the pump;
2. Elevate the foot bar to lock the rotating.
Hold up
Foot bar
14
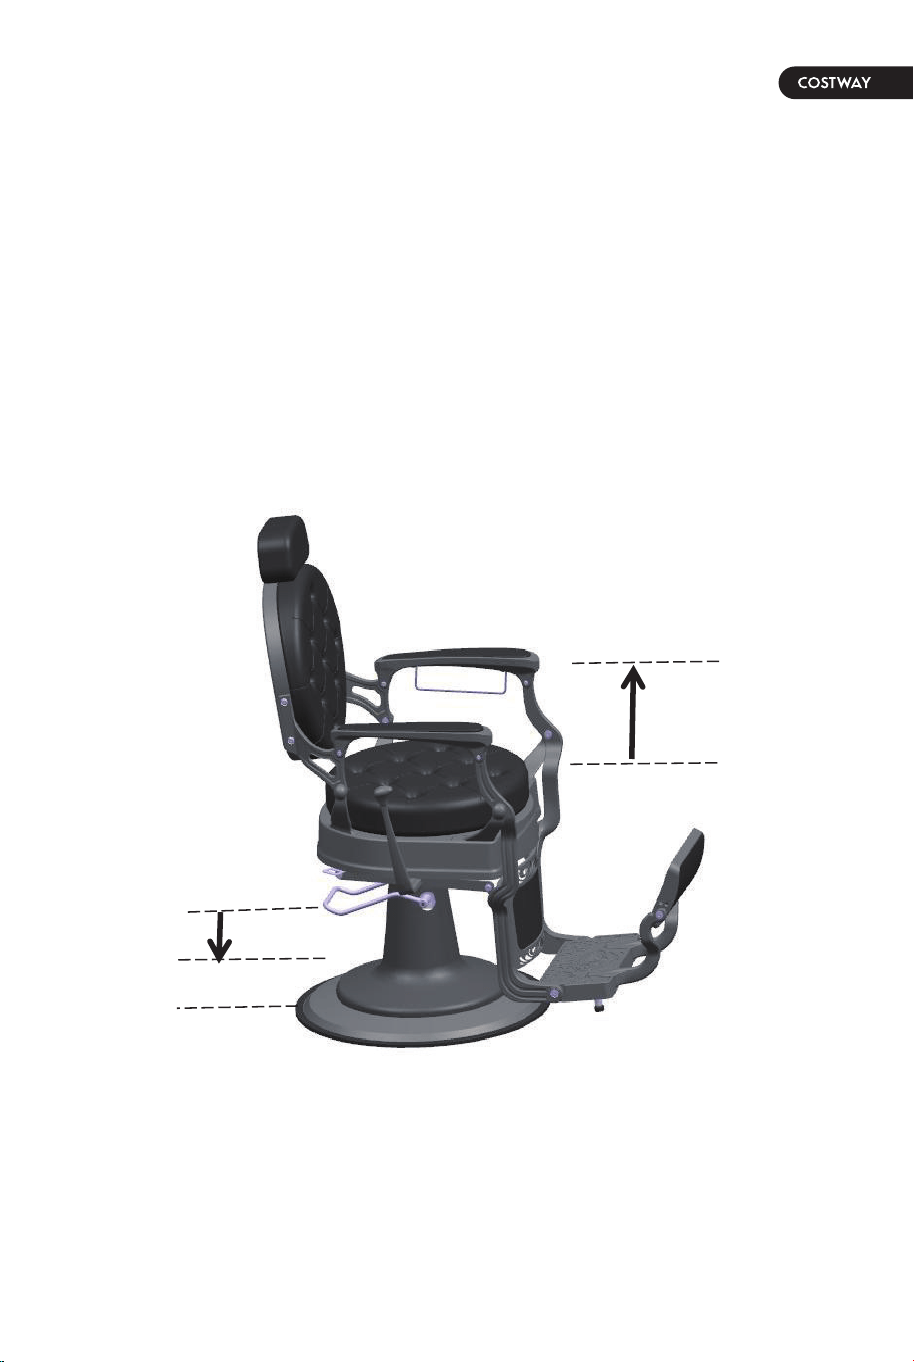
Second: Raising the Chair
• Step down on the Foot Bar repeatedly to raise the chair to the desired
height.
• Do not over-extend the chair, creating the risk of falls or tipping the
chair and its occupant over, resulting in injury.
15
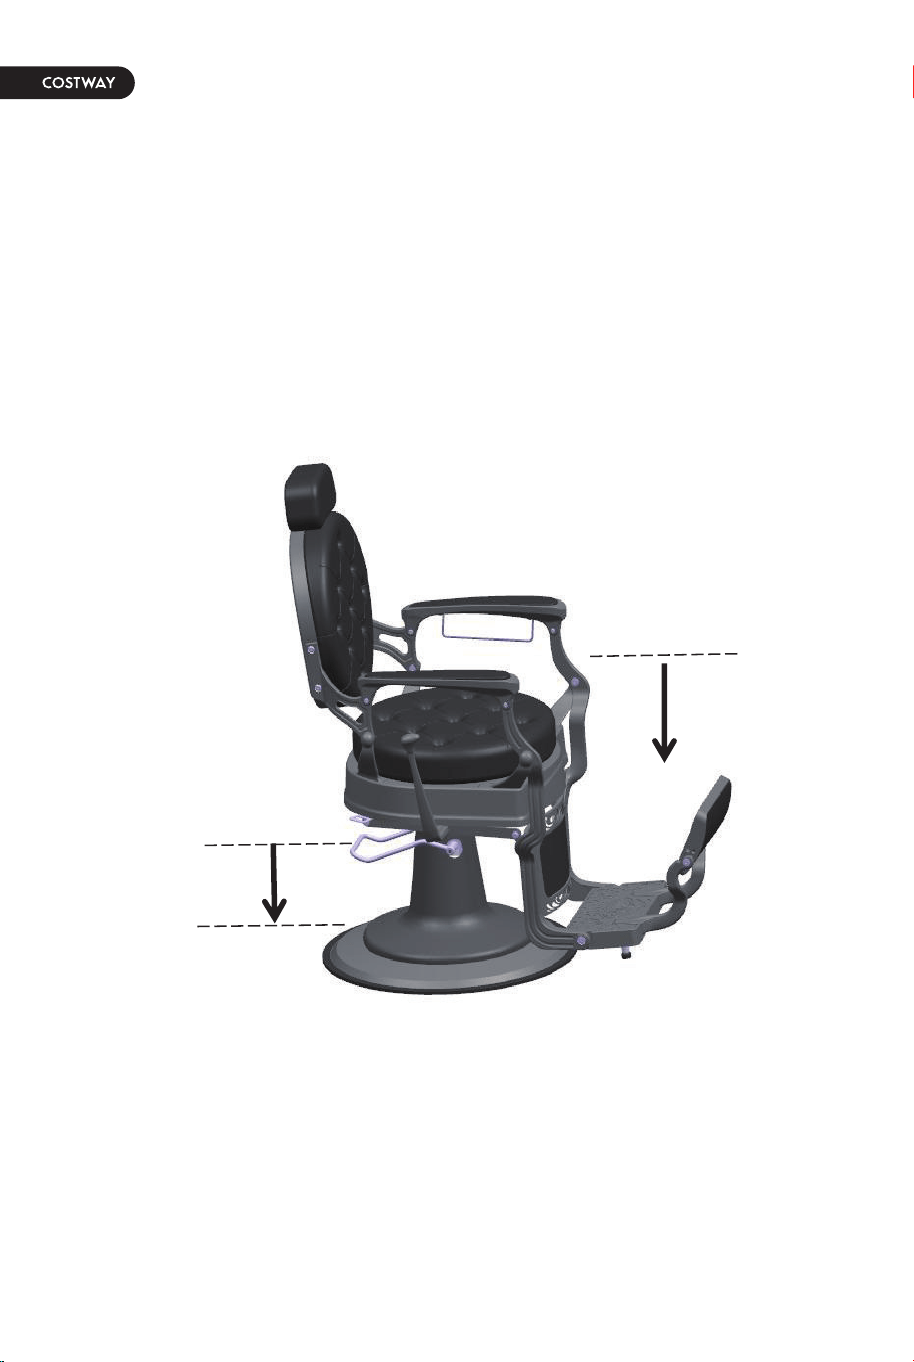
Third: Lowering the Chair
• Step down and hold the Foot Bar to allow chair to lower.
16
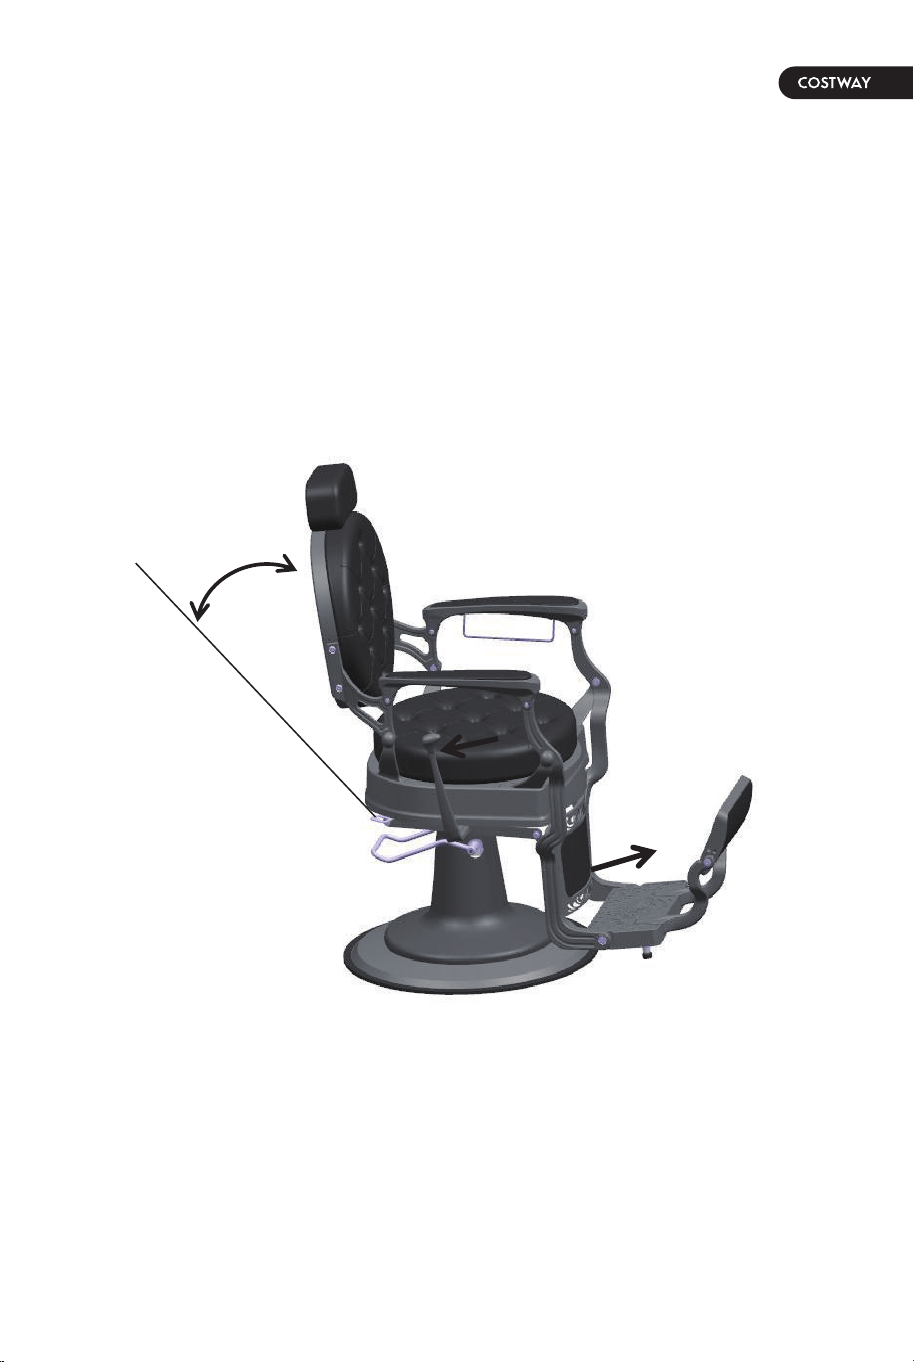
Fourth: Recline the Backrest
• Push the lever backwards (35°~40°) and push the backrest to back.
The backrest will tilt backwards; loosen the lever to get the tilt degree of
backrest; Turn the lever again backwards (35°~40°), the backrest can
Back to the original position.Don't push lever too hard. It'll break lever.
17
Fifth:
You can adjust the height of the headrest by pressing the button on the
backrest.
18

