Loading ...
Loading ...
Loading ...

4
5
ASSEMBLY
WARNING
Recharge only with the charger
specifi ed for the battery. For spe-
cifi c charging instructions, read the operator’s
manual supplied with your charger and battery.
Removing/Inserting the Battery
To remove the battery, push the battery latch to the
side and squeeze the battery latch lever. Pull the
battery pack away from the machine.
WARNING
Always remove battery pack before
changing or removing accessories.
To insert the battery, slide the pack into the body of
the machine. Make sure it latches securely into place.
WARNING
Only use accessories specifi cally
recommended for this machine.
Others may be hazardous.
Selecting the Proper Cable
Cat. No. Description
48-53-2325 5/8" x 25' Inner Core Drum Cable
48-53-2350 5/8" x 50' Inner Core Drum Cable
48-53-2310 5/8" x 100' Inner Core Drum Cable
48-53-2425 3/4" x 25' Inner Core Drum Cable
48-53-2450 3/4" x 50' Inner Core Drum Cable
48-53-2410 3/4" x 100' Inner Core Drum Cable
48-53-2905 3/4" Anchor Cable
48-53-2902 3/4" x 2' Leader Cable
48-53-2802 5/8" x 2' Leader Cable
Cable Attachments for 5/8" and 3/4" Cables
Cat. No. Description
48-53-2830 Straight Auger
48-53-2831 Funnel Auger
48-53-2832 3" Root Cutter
48-53-2833 4" Root Cutter
48-53-2834 6" Root Cutter
48-53-2835 Small Opening Tool
48-53-2836 Medium Opening Tool
48-53-2837 3" Grease Cutter
48-53-2838 4" Grease Cutter
48-53-2840 9 pc Head Attachment Kit
CAUTION
To prevent damage to the cable and
attachments, only use in recommended
pipe size.
SYMBOLOGY
No Load Revolutions per Minute (RPM)
CAUTION
Risk of Electric Shock
Read operator's manual.
Always wear leather gloves over
latex/rubber gloves.
Always wear eye protection.
Use appropriate hearing and
respiratory protection.
Two-person lift
Lift assist
Drain cleaning
Ascend
Descend
o
Forward/OFF/Reverse drum control
C
US
UL Listing for Canada and U.S.
SPECIFICATIONS
Battery Type ........................................ MX FUEL™
Charger Type....................................... MX FUEL™
Drain Drive RPM ................................................200
Module/FCC ID ..................... BLE113/QOQBLE113
Recommended Ambient
Operating Temperature .................... 0°F to 125°F
Tire Air Pressure ............................................30 psi
Cable Size ..............................................5/8" & 3/4"
Recommended Pipe Diameter ......................3" - 8"
Foot Pedal Cat. No ............................... 14-02-0000
Cat. No. .....................................................MXF500
Weight (without cable) ................................. 110 lbs
Cat. No. .....................................................MXF501
Weight (without cable) .................................120 lbs
Cable Installation
WARNING
To reduce the risk of injury, always
wear proper eye protection marked
to comply with ANSI Z87.1.
Always wear leather
gloves over l
atex/rubber gloves
to avoid entangle-
ment. Cable tip may be sharp. Never feed more than
100' of cable into the machine to avoid overloading.
Remove the cable for cleaning after each use. Diff er-
ent size and types of cables are available for diff erent
applications. The instructions below detail how to
remove/install the cable manually.
NOTE: The cable feed can also be used to advance/
retrieve the cable during installation (see "Using the
Cable Feed" in the Operation section).
To manually remove the cable:
1. Move the Forward/OFF/Reverse switch to OFF O
and remove the battery pack. Ensure the cable
feed is disengaged by pressing down on the
ratchet release button.
2. Pull the cable out through the nose of the drum
until the anchor cable shows.
3. Remove the cable from the anchor cable by insert-
ing the pin key into the coupling hole and pulling
the cable away.
4. To clean or maintain cable, follow the cleaning
instructions under "Maintenance".
To manually install the cable:
1. Move the Forward/OFF/Reverse switch to OFF O.
Ensure the cable feed is disengaged by pressing
down on the cable feed quick release button.
2. Attach the cable to the anchor cable by snapping
the attachment coupler into the cable coupler.
3. Move the Forward/OFF/Reverse switch to
Forward .
4. Use the foot pedal to start the drum.
5. Manually feed the cable into the drum. WARNING!
Always wear leather gloves over l
atex/rubber gloves
to avoid entanglement.
Cable Attachment Installation
To install the attachment:
Snap the attachment coupler into the cable coupler.
Test the cable before inserting into the drain to make
sure the attachment does not fall off during use.
To remove the attachment:
Insert the pin key into the coupling hole and pull at-
tachment off of cable.
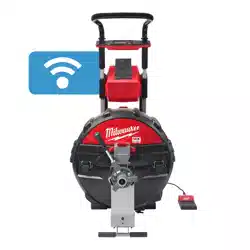
FUNCTIONAL DESCRIPTION
8
1. Transport handle
2. Control panel
3. Wheels
4. Stand
5. Drum latches
6. Drum plug
7. Stand/Lower lift
handle
8. Cable
9. Cable feed
handle
10. Cable feed
quick
release button
11. Cable feed
ratchet lever
12. Drum
13. Battery bay
14. Foot pedal cord
wrap
15. Arm button
16. Mode selector **
17. ONE-KEY™
indicator
18. Ascend/Descend
selector **
19. Forward/OFF/
Reverse switch
1
2
3
7
13
21
19
22
11
12
6
5 4
23
20. POWERTREDZ™ lift
assist **
21. POWERTREDZ™ lift
assist trigger **
22. Battery latch lock
23. Battery latch lever
24. Foot pedal
25. Foot pedal storage
** Indicates MXF501 only
24
9
10
14
16
215
17
18
20
25
Loading ...
Loading ...
Loading ...