April 9, 2024
1
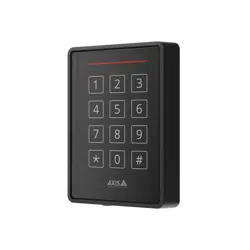
GV-SRK1356 Card Reader
The content of this installation guide refers to GV-SRK1356.
Introduction
GV-SRK1356 is a dual-band OSDP keypad reader, capable of reading PIN codes and
access cards. Its dual-band capability offers great flexibility for integrators to solve card
management issues on the locations, installed with both 125 kHz and 13.56 MHz readers.
For outdoor use, GV-SRK1356 comes with a weather-sealed and IP66-compliant housing.
Specification
Power Source
DC 12 ~ 18 V
Power Consumption
50 mA (max)
RFID Frequency
125 kHz and 13.56 MHz
Reading Range
2 – 4 cm (0.78 – 1.57 in)
Wiegand Interface
Wiegand 26 bits for 125 kHz,
26 / 34 bits for 13.56 MHz,
distance 100 m (328.1 ft) via GV-AS1620 / 2120 /
4110 / 4111 / 8110 / 8111
Operating Temperature
-40 °C ~ 60 °C (-40 °F ~ 140 °F)
Operating Humidity
0% to 98% RH
Color
Black
Ingress Protection
IP66
Dimensions
(H x W x T)
120 x 50 x 20 mm (4.72” x 1.97” x 0.79”)
Weight
150 g (0.33 lb)
April 9, 2024
2
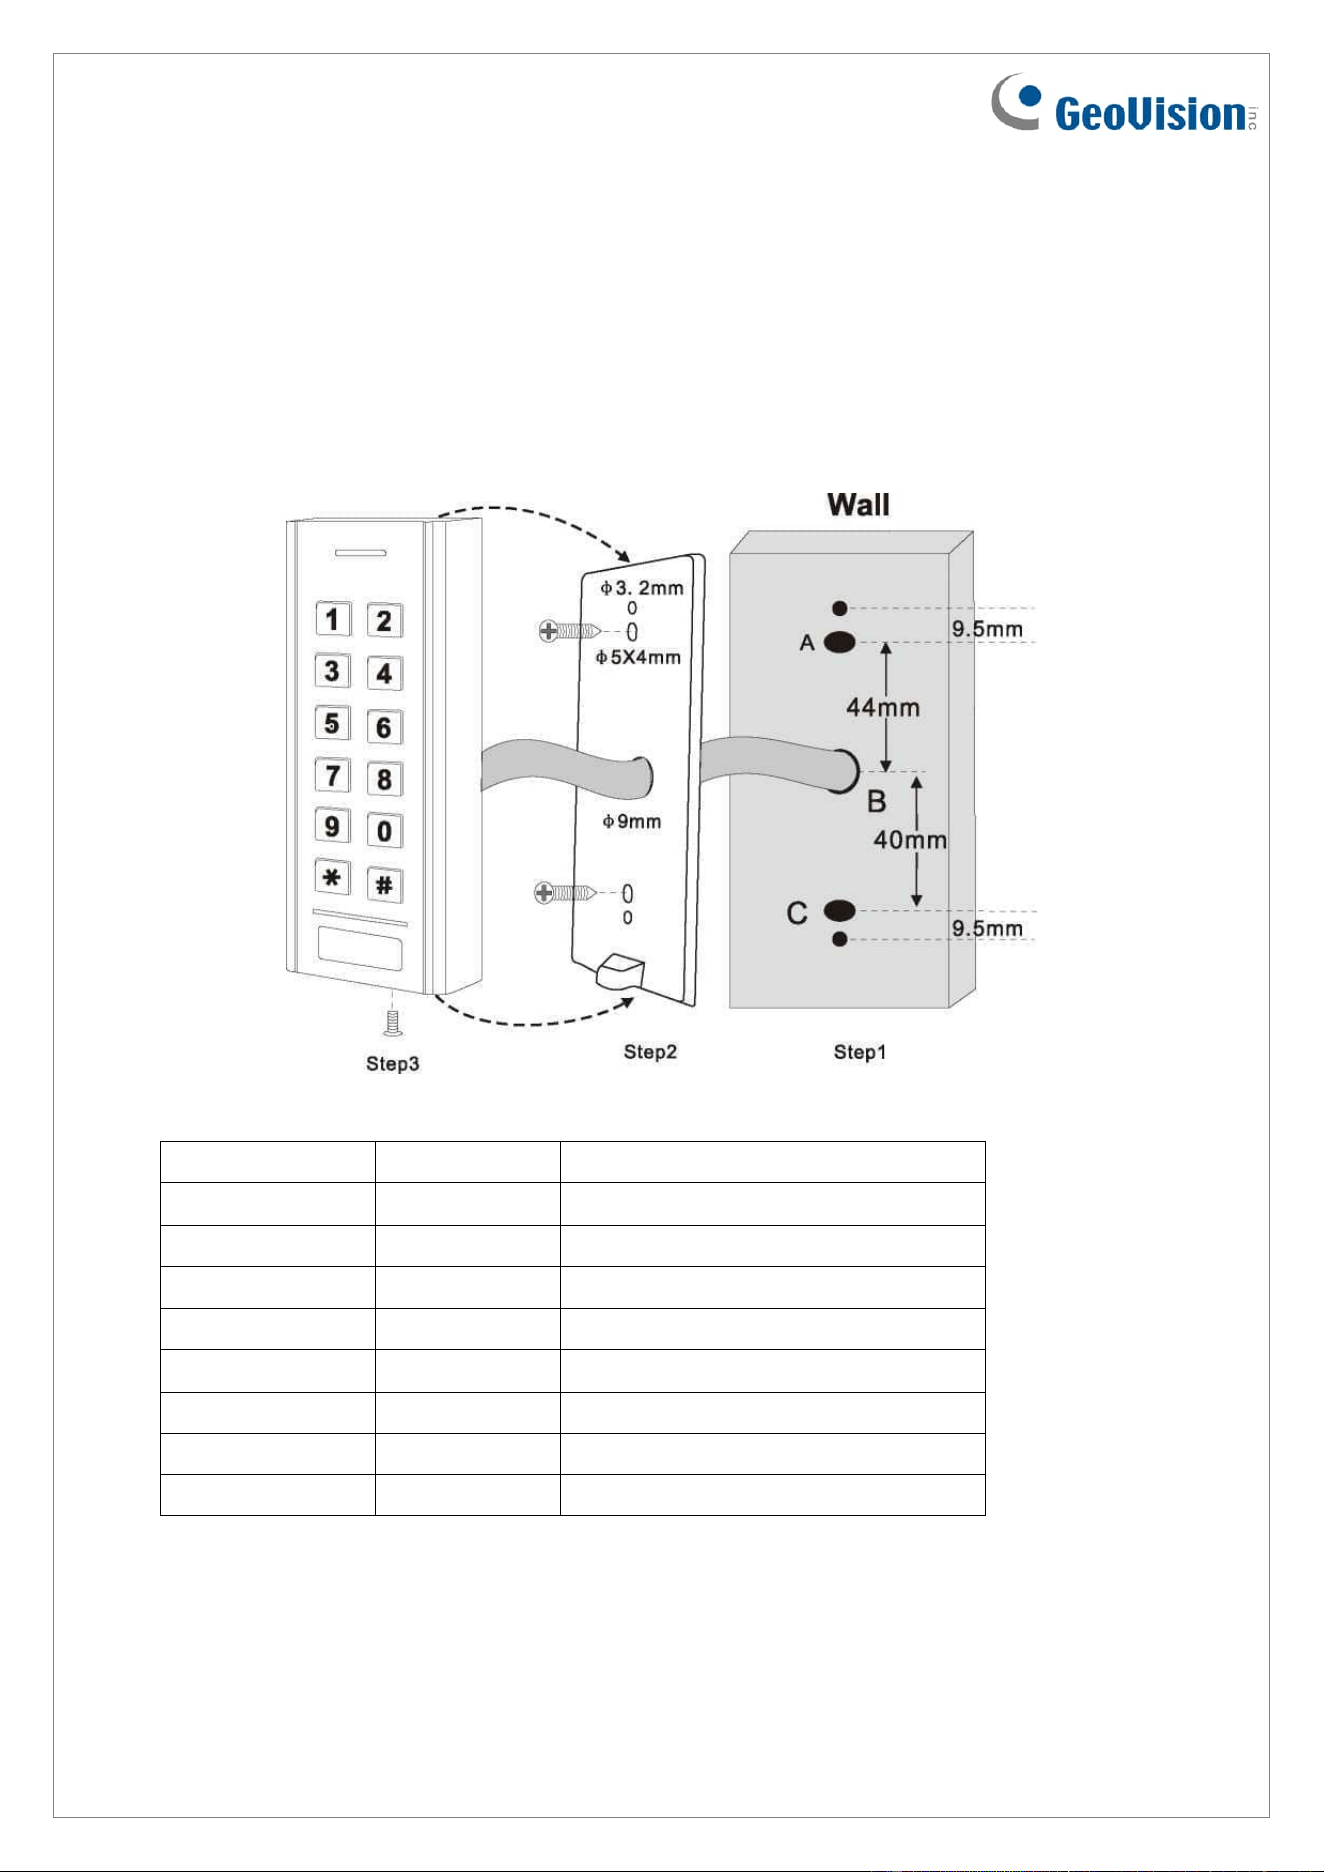
Installation
1. Drill 2 holes (A, C) on the wall for the screws and one hole (B) for the cable.
2. Knock the plastic screw anchors to the holes (A, C).
3. Fix the back cover on the wall with 2 screws.
4. Thread the cable through the cable hole (B).
5. Attach the unit to the back cover.
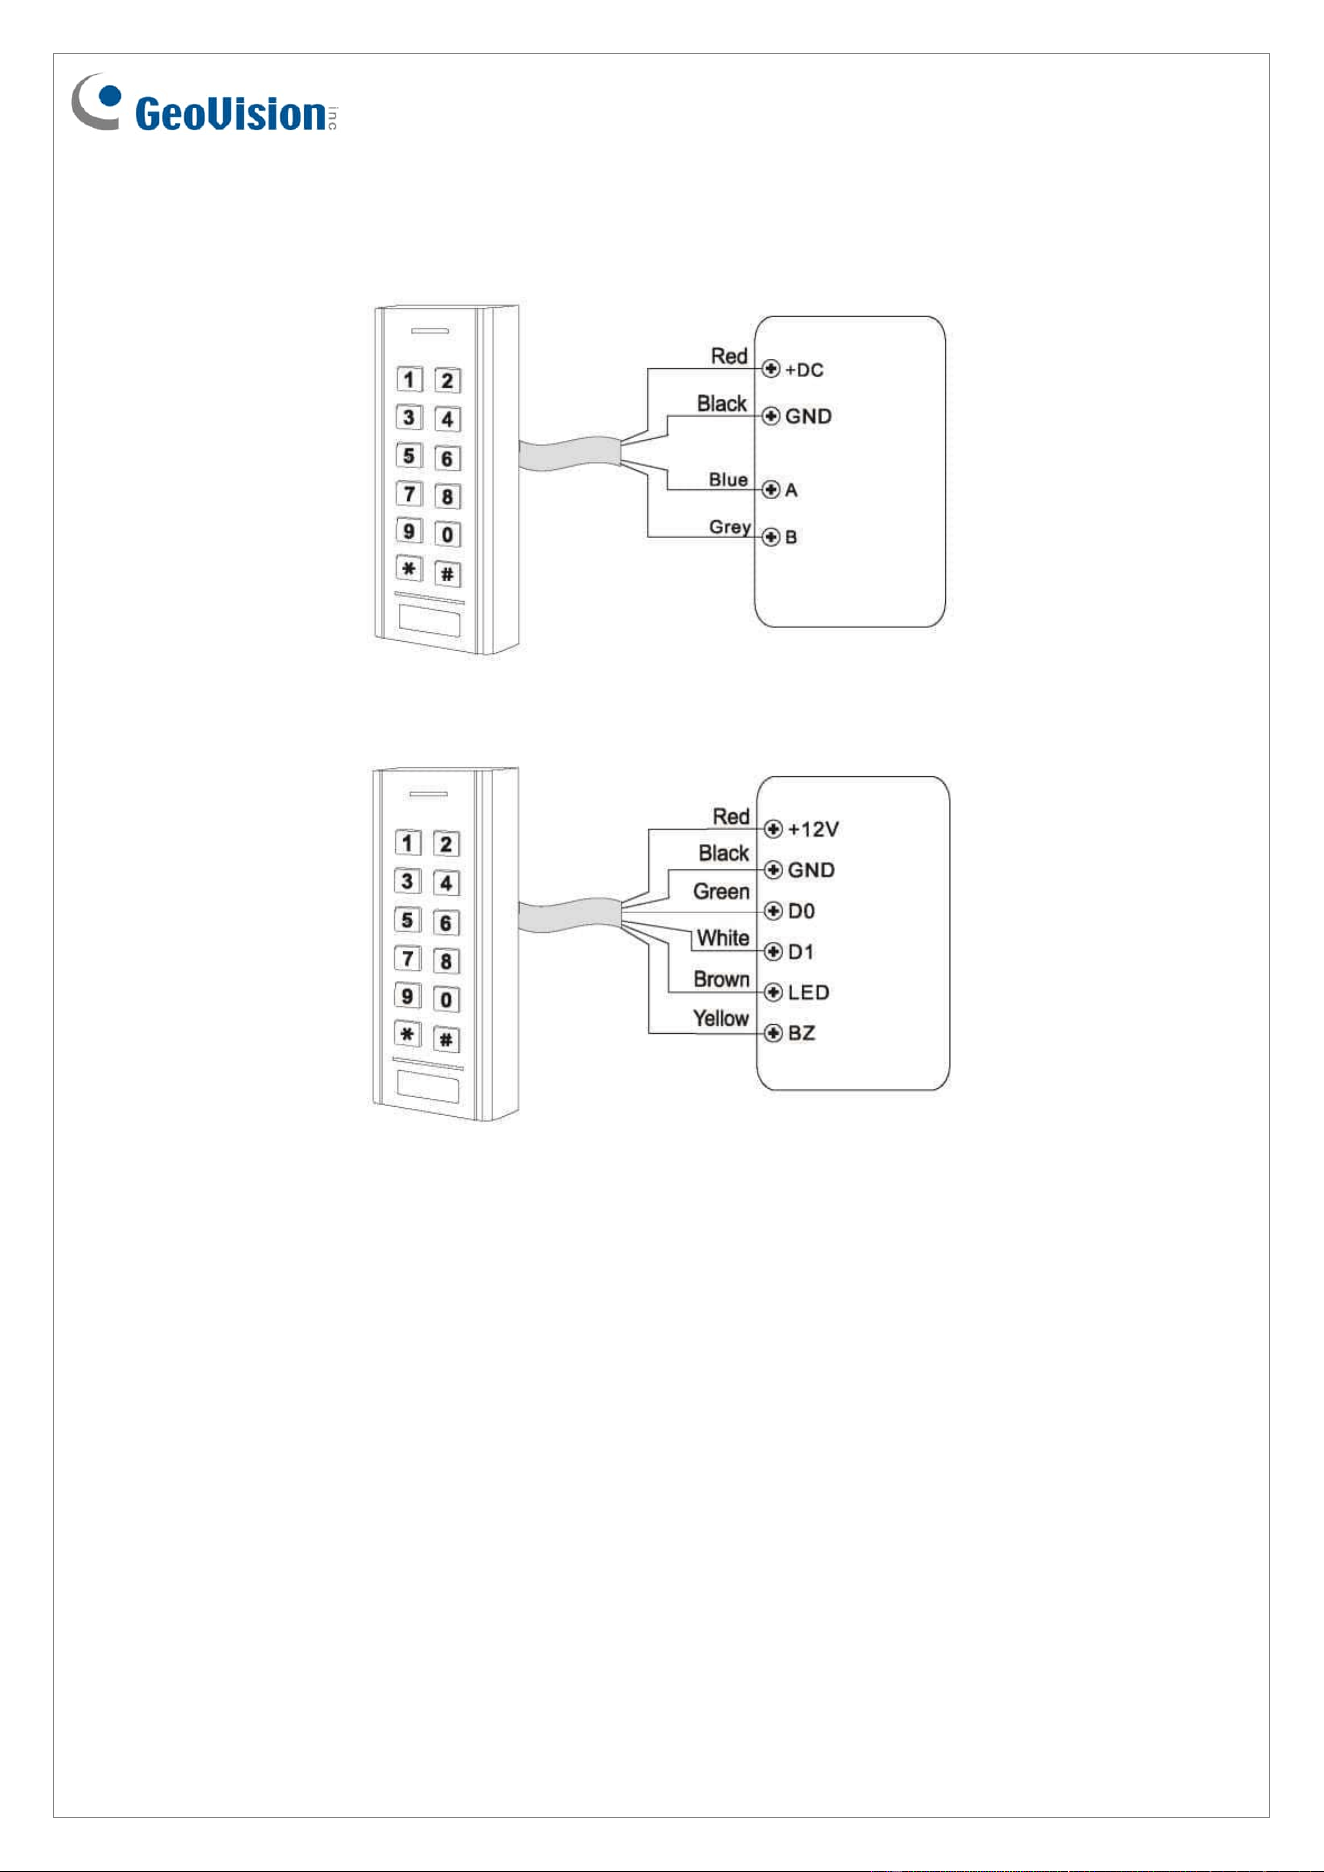
Electric Wires
Note:
1. Brown and yellow wires are optional connections.
2. When connecting via Wiegand, the Ground (GND) wire must also be connected
alongside the Wiegand Data 0 and Data 1 wires.
Wire Color
Function
Notes
Red
Power +
+ DC (12 – 18 V DC)
Black
GND
Ground
Green
D0
Data 0
White
D1
Data 1
Brown
LED
Green LED Light Control
Yellow
Buzzer
Buzzer Control
Blue
A
RS-485A
Gray
B
RS-485B
April 9, 2024
3
Connection Diagram
Connect with OSDP Controller
Connect with Wiegand Controller
Programming
Set Master Code (4~6 digits)
The master code is used to prevent unauthorized access to the system. We suggest you
immediately update it and note down the new master code. The master code is set to
123456 by default. Follow the steps below to update it.
1. Press * for 5 seconds, and press 123456 (default master code) to enter the program
mode.
2. To update the master code, press 0[the new master code]#, and press [the new
master code]#. For example, if you wish to update the new master code as 567890,
press 0567890# and 567890#.
3. Press * again to exit the program mode.

April 9, 2024
4
OSDP Address Setting
The OSDP address is set to 1 by default. Follow the steps below to change it.
1. Press * for 5 seconds, and press the master code to enter the program mode.
2. To change the OSDP address, press 7[the new OSDP address]#. For example, if you
wish to change the OSDP address to 2, press 72#.
3. Press * again to exit the program mode.
Note: The addresses of all readers under the same controller should be different, otherwise
the readers will conflict with each other.
Reset the Reader to Default
Method 1
1. Press * for 5 seconds, and press the master code to enter the program mode.
2. Press 50#.
3. Press * again to exit the program mode.
Method 2
This method is suitable for users who forget the updated master code.
1. Power off the reader.
2. Connect the yellow and GND wires and power on the reader.
3. Wait for 5 seconds until there’s a long beep.
4. Disconnect the yellow wire and GND wires. The reader is reset to default successfully.
April 9, 2024
5
Indicator Light Status
Operating Status
Indicator Light Color / Buzzer
Connected via
Wiegand
Connected via RS-485
Standby
Constant red
No
Correct Card (access granted)
Blinks green and
beeps once when a
card code approaches.
1. Blinks green and beeps
once when a card code
approaches.
2. Blinks green and beeps
once upon access granted.
Error Card (access denied)
1. Blinks green and beeps
once when a card code
approaches.
2. Blinks red and beeps twice
upon access denied.
Note: The status details are based on the test results when the reader is connected to
GV-AS1620 / GV-CS1320.
Packing List
1. GV-SRK1356
2. Self-Tapping Screw x 2 (4 x 25 mm)
3. Rubber Plug x 2
4. Installation Guide