1. SAFETY
1.1. General Safety
WARNING! Ensure Health & Safety, local authority, and general workshop practice regulations are adhered to when using this
equipment. Under Health and Safety Law, Employers and Self Employed Personnel have a legal duty to ensure Safe Working
Conditions for all employees and personnel that may come into contact with this equipment. In particular they must carry out a specific
risk and hazard assessment in the workplace to eliminate or reduce any risk found and must record, update and retain records of the
results of this inspection.
1.1.1. Familiarise yourself with the applications, limitations and any possible or potential hazards of the Bead Breaker.
1.1.2. Maintain the Bead Breaker in good condition (use an authorised service agent).
WARNING! Check regularly for damaged parts. Any part that is damaged must be repaired or replaced before the equipment is
next used.
1.1.3. Use the Bead Breaker in a suitable work area, keep area clean and tidy and free from unrelated materials. Ensure that there is
adequate lighting.
1.1.4. Keep the Bead Breaker clean for best and safest performance.
1.1.5. Wear approved safety eye protection.
1.1.6. Keep hands well clear of the bead breaker.
1.1.7. Maintain correct balance and footing. Ensure the floor is not slippery and wear non-slip safety shoes.
1.1.8. Remove ill fitting clothing. Remove ties, watches, rings other loose jewellery and contain and/or tie back long hair.
1.1.9. Keep hands away from pinch and crush points that can be created during operation.
1.1.10. Keep children and unauthorised persons away from the work area.
WARNING! DO NOT use on split, multi-piece or rims greater than 26”.
8 DO NOT use the Bead Breaker for any purpose other than that for which it is designed.
8 DO NOT operate the Bead Breaker if any parts are damaged or missing as this may cause failure and/or personal injury.
8 DO NOT allow untrained persons to operate the Bead Breaker.
8 DO NOT operate the Bead Breaker when you are tired or under the influence of alcohol, drugs or intoxicating medication.
8 DO NOT top up system with brake uid. Use hydraulic oil only.
8 DO NOT adjust the safety overload valve.
WARNING! The warnings, cautions and instructions referred to in this manual cannot cover all possible conditions and situations that
may occur. It must be understood that common sense and caution are factors which cannot be built into this product, but must be
applied by the operator.
2. INTRODUCTION
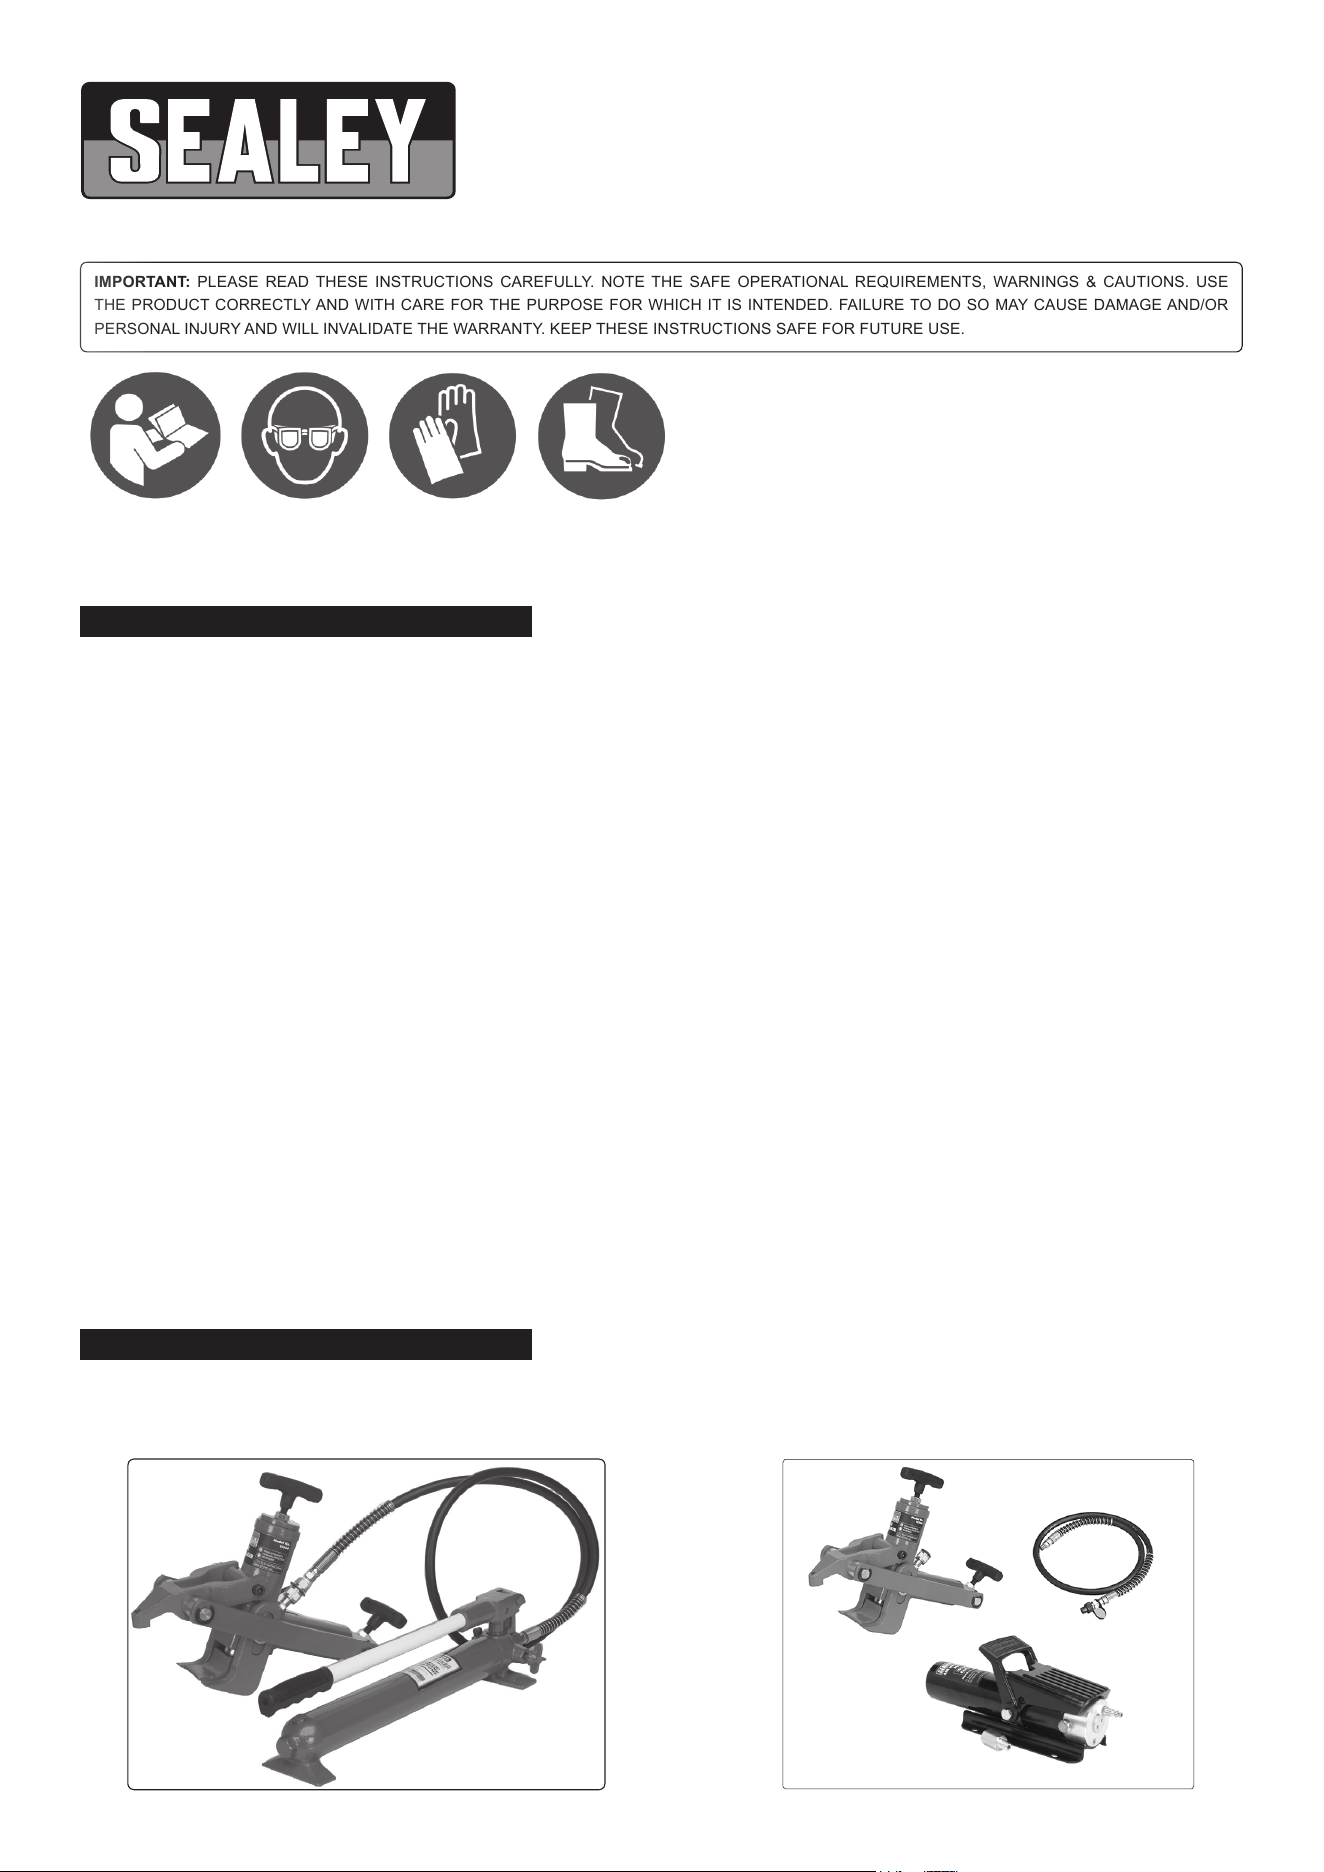
Hydraulic Bead Breaker, suitable for breaking beads on commercial and agricultural tyres. Use in conjunction with hydraulic pump and hose (not
included).
HYDRAULIC BEAD BREAKER
MODEL NO: TC966
Thank you for purchasing a Sealey product. Manufactured to a high standard, this product will, if used according to these instructions
and properly maintained, give you years of trouble free performance.
IMPORTANT: PLEASE READ THESE INSTRUCTIONS CAREFULLY. NOTE THE SAFE OPERATIONAL REQUIREMENTS, WARNINGS & CAUTIONS. USE
THE PRODUCT CORRECTLY AND WITH CARE FOR THE PURPOSE FOR WHICH IT IS INTENDED. FAILURE TO DO SO MAY CAUSE DAMAGE AND/OR
PERSONAL INJURY AND WILL INVALIDATE THE WARRANTY. KEEP THESE INSTRUCTIONS SAFE FOR FUTURE USE.
Refer to
Instruction
Manual
Wear Eye
Protection
Wear Protective
Gloves
Wear Safety
Footwear
TC966 Issue: 3(HF) - 16/05/18
Original Language Version
© Jack Sealey Limited
3. SPECIFICATIONS
4. OPERATION
WARNING! The tyre must be deflated before using the bead breaker. Failure to heed this warning, could result in injury.
WARNING! DO NOT use on split, multi-piece or rims greater than 26”.
4.1. Connect the bead breaker to your pump. You may use either a manual pump (RE97.10-01) or a air hydraulic pump (RE83/840).
4.1.1. Note:-The manual pump may need to be operated by a second person to allow the operator to keep both hands on the bead breaker.
4.1.2. Note:-The foot operated air hydraulic pump will enable you to maintain greater control over the bead breaker. If using an air pump you will
require an air supply of 100 - 120psi.
4.1.3. Note:-Whichever pump you use, refer to the manufacturer’s instructions supplied with that pump for correct connection and usage.
4.2. Remove valve core and all balance weights.
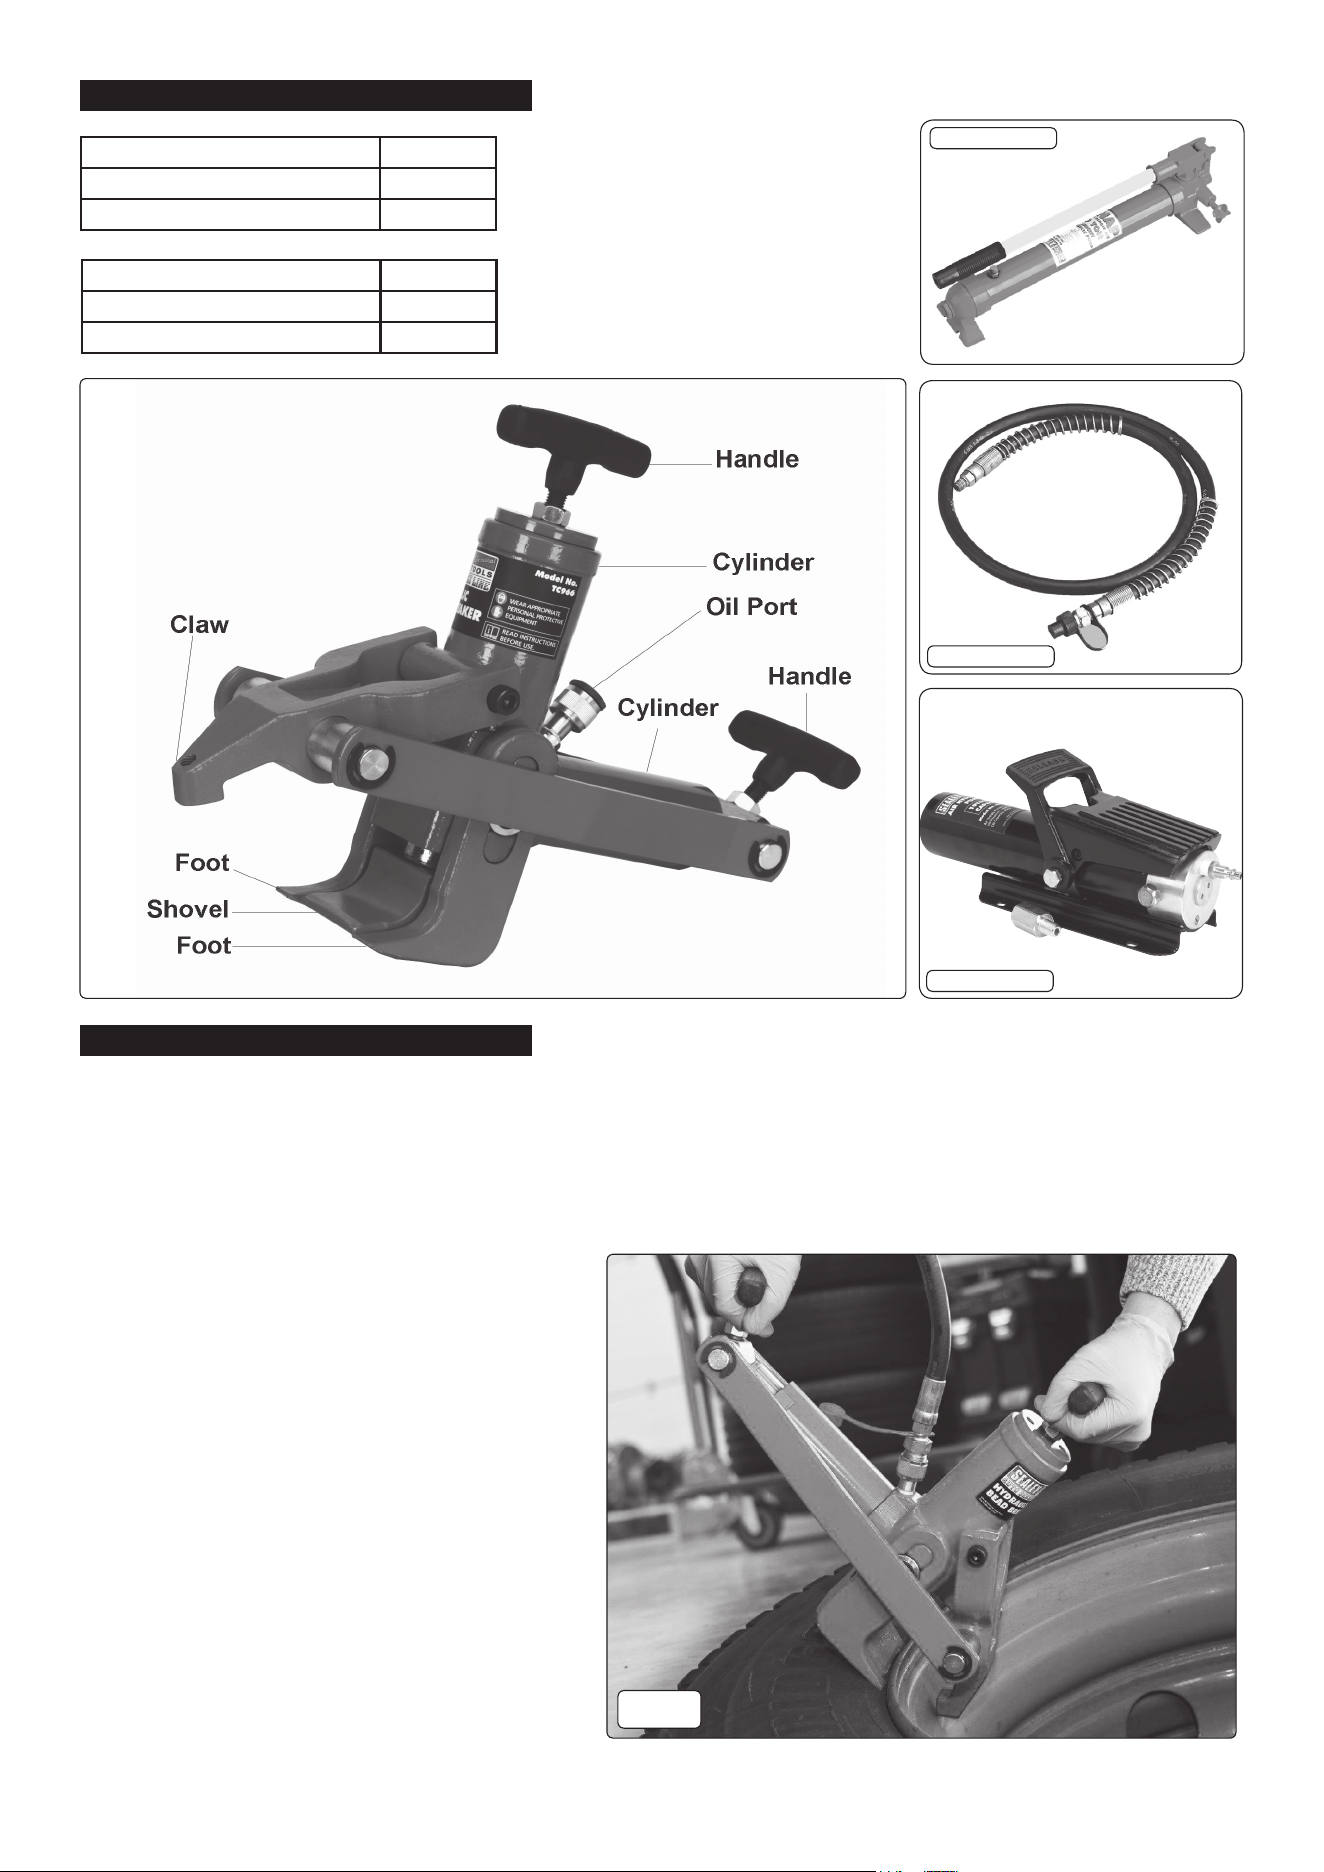
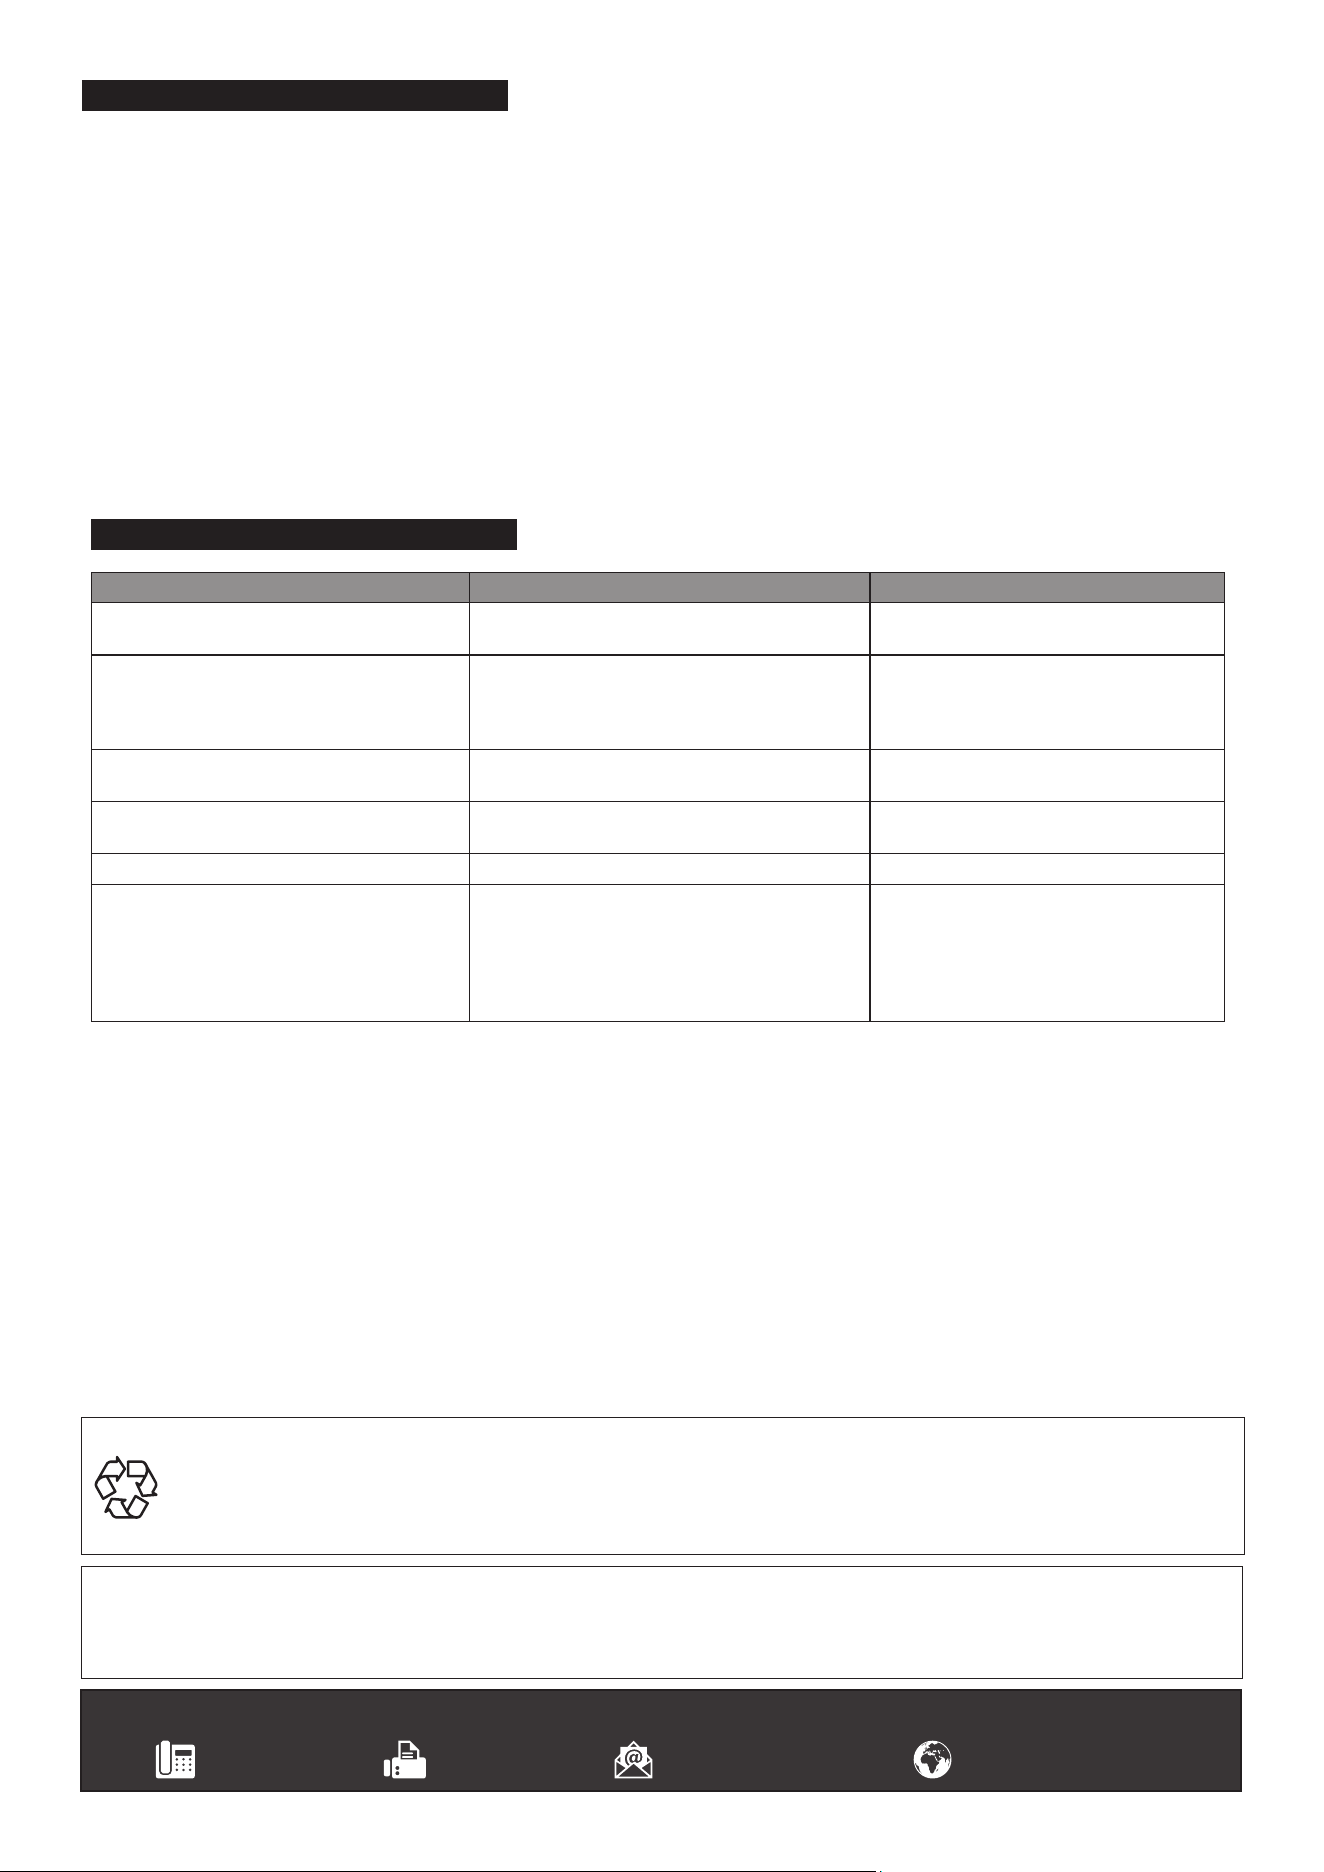
4.3. Hold the breaker to the rim as shown in g.1.
4.4. Operate the pump. With the claw pushing against the
outer part of the rim, the shovel and feet push against
the bead of the tyre and the inner rim.
4.5. Maintaining the pump pressure, the shovel pushes
against the tyre and breaks the bead from the wheel
rim. When the bead is broken release the pump
pressure and remove the bead breaker from the rim.
4.6. Repeat this operation around the wheel as many times
as necessary to break the tyre bead all the way around
the wheel.
4.7. Repeat steps 4.3 to 4.6 on the opposite side of the
wheel.
RE97.10-01
g.1
Option 1. (Optional Hydraulics) Part No.
Air Hydraulic Pump 10 tonne RE83/840
Hose Assembly RE97.10-03
Option 2. (Optional Hydraulics) Part No.
Pump Assembly RE97.10-01
Hose Assembly RE97.10-03
RE97.10-03
RE83/840
TC966 Issue: 3(HF) - 16/05/18
Original Language Version
© Jack Sealey Limited
5. MAINTENANCE
WARNING Only fully qualied personnel should attempt maintenance or repair.
5.1. When not in use, ensure jaw remains in the open position to minimise corrosion on the ram piston.
5.2. Keep the bead breaker clean and lubricate all moving parts on a regular basis.
WARNING DO NOT use brake uid as this may cause serious damage to the jack and will invalidate the warranty! Only use a good
quality jack oil, such as SEALEY HYDRAULIC JACK OIL. NOTE: Ensure waste oil is disposed of in accordance with local authority
regulations.
5.3. Before each use check for broken, cracked, bent, or loose parts, or any visible damage to welds, ram, pump, jaws, frame and all parts
including nuts, bolts, pins and other fasteners. If any suspect item is found, remove from service and take necessary action to remedy
the problem.
8 DO NOT use the bead breaker if believed to have been subjected to abnormal load or shock. Inspect and take appropriate action.
IMPORTANT: NO RESPONSIBILITY IS ACCEPTED FOR INCORRECT USE OF THE MACHINE.
Hydraulic products are only repaired by local service agents. We have service/repair agents in all parts of the UK.
8 DO NOT return to Sealey. Please telephone Sealey on 01284 757500 to obtain the address and phone number of your local agent. If
breaker is under guarantee please contact your dealer.
De-commissioning the bead breaker
Should the bead breaker become completely unserviceable and require disposal, draw off the oil into an approved container and
dispose of the jack and the oil according to local regulations.
6. TROUBLESHOOTING
Symptom Possible Causes Corrective Action
• Claw or shovel erratic. • External leakage.
• Binding sticking or components.
• Contact Sealey dealer for service.
• Clean and lubricate all moving parts.
• System is pressurised but the bead breaker
is not responding.
• Loose or faulty hydraulic connections/couplers.
• Oil level in pump is low.
• Pump not operating.
• Depressurise Tighten/replace
connections/couplers.
• Depressurise and ll the pump.
• Consult pump instruction manual.
• Claw will not close or shovel will not fully
extend or withdraw.
• Oil in pump is low.
• Sticking rams or binding components.
• Depressurise and ll the pump.
• Contact Sealey dealer for service.
• Bead breaker will not maintain pressure. • Pump malfunctioning.
• Seals leaking.
• Consult pump instruction manual.
• Contact Sealey dealer for service.
• Oil leaking. • Worn seals. • Contact Sealey dealer for service.
• Bead breaker will not open and/or shovel
stuck or slower than normal.
• Faulty coupler.
• Pump reservoir over lled.
• Internal damage.
• Linkage binding.
• Depressurise Tighten/replace
connections/couplers.
• Depressurise and drain uid to correct
level.
• Contact Sealey dealer for service.
• Clean and lubricate all moving parts.
Sealey Group, Kempson Way, Suffolk Business Park, Bury St Edmunds, Suffolk. IP32 7AR
01284 757500 01284 703534 sales@sealey.co.uk www.sealey.co.uk
ENVIRONMENT PROTECTION
Recycle unwanted materials instead of disposing of them as waste. All tools, accessories and packaging should be sorted, taken to
a recycling centre and disposed of in a manner which is compatible with the environment. When the product becomes completely
unserviceable and requires disposal, drain any fluids (if applicable) into approved containers and dispose of the product and fluids
according to local regulations.
Note: It is our policy to continually improve products and as such we reserve the right to alter data, specifications and component parts without prior
notice.
Important: No Liability is accepted for incorrect use of this product.
Warranty: Guarantee is 12 months from purchase date, proof of which is required for any claim.
TC966 Issue: 3(HF) - 16/05/18
Original Language Version
© Jack Sealey Limited
