
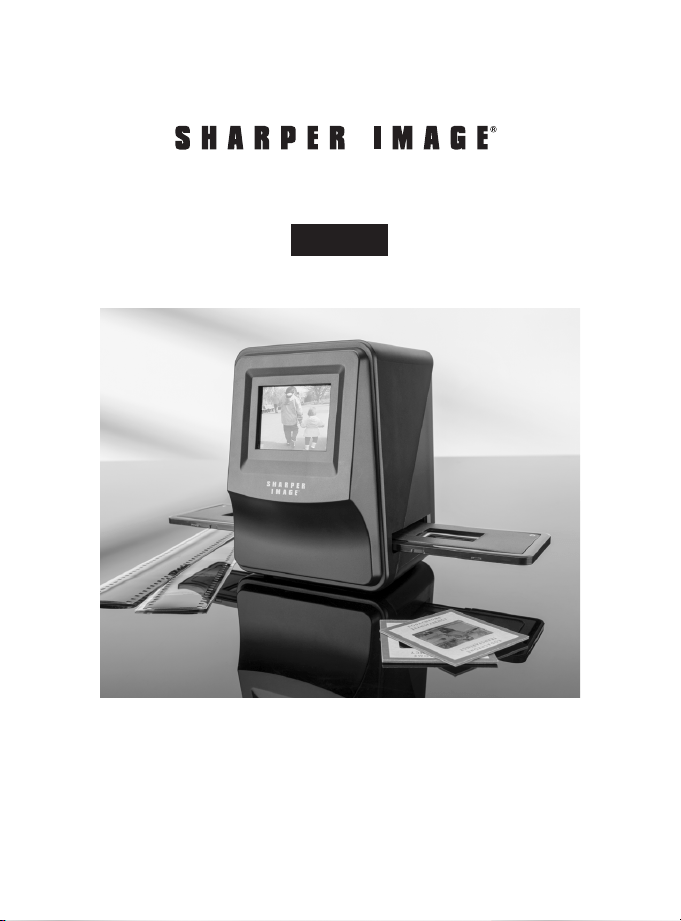
Item No. 205369
SLIDE AND NEGATIVE CONVERTER
User Guide
- 1 -

TABLE OF CONTENTS
Introduction / Precautions......................................................2
FCC Notice...............................................................................3-4
Included Accessories................................................................4
Identification of Parts...............................................................5
Installing the Battery Pack......................................................6
Charging the Battery Pack..................................................7-8
Loading the Slide and Film Holders......................................8
Operating the Slide and Negative Converter...............9-12
Power Saving Mode.................................................................12
Adjusting the Exposure...................................................12-13
Playback Mode..........................................................................13
Delete Mode...............................................................................14
Formatting an SD Card..........................................................14
Connecting to a Computer....................................................16
Specifications....................................................................16-17
Icons and Indicators...............................................................18
System Requirements............................................................19
Battery Disposal.......................................................................19
Warranty/Customer Service.................................................19
- 2 -

INTRODUCTION
PRECAUTIONS
Thank you for purchasing the Sharper Image Slide and
Negative Converter. This device will help you to digitize
and preserve your favorite slides and film negatives. Please
take a moment to read through this Owner’s Guide, and
store it for future reference. With a little practice and
experience, you will be able to convert your cherished
family slides and film negatives to digital files quickly
and efficiently.
• Do not try to open the Slide and Negative Converter or
attempt to modify it in any way.
• Keep this device away from water and other liquids.
• Keep this device out of the reach of children.
• Use only the supplied power accessories. Use of other
accessories may lead to overheating, distortion of the
equipment, fire, electrical shock or other hazards.
• This device may become slightly warm during use.
This does not indicate malfunction.
• If the exterior of the Slide and Negative Converter
needs cleaning, wipe it with a soft, dry cloth.
FCC NOTICE
This equipment has been tested and found to comply with
the limits for a Class B Digitize device, pursuant to Part
15 of the FCC Rules. These limits are designed to provide
reasonable protection against harmful interference in a
residential installation. This equipment generates, uses
and can radiate radio frequency energy. If not installed
and used in accordance with the instruction, it may cause
harmful interference to radio communication.
- 3 -

- 4 -
To comply with the limits for a Class B Digitize device,
pursuant to Part 15 of the FCC Rules, this device must only
be installed on computer equipment certified to
comply with the Class B limits. This unit may contain a
microcomputer for signal processing and control function.
In very rare situations, severe interference, noise from an
external source, or static electricity may cause it to lockup.
In the unlikely event that this should happen, turn off the
unit, wait at least five seconds, and then turn it back on
again.
CAUTION
FCC NOTICE
However, there is no guarantee that interference will not
occur in a particular installation. If this equipment does
cause harmful interference to radio or television reception,
which can be determined by turning the equipment
on or off, the user is encouraged to try to correct the
interference by one or more of the following suggestions:
• Reorient or relocate the receiving antenna.
• Increase the distance between the equipment and
the receiver.
• Connect the equipment to a different power outlet
other than the one where the receiver is connected.
• Consult an experienced television or radio technician
for help.
- 5 -
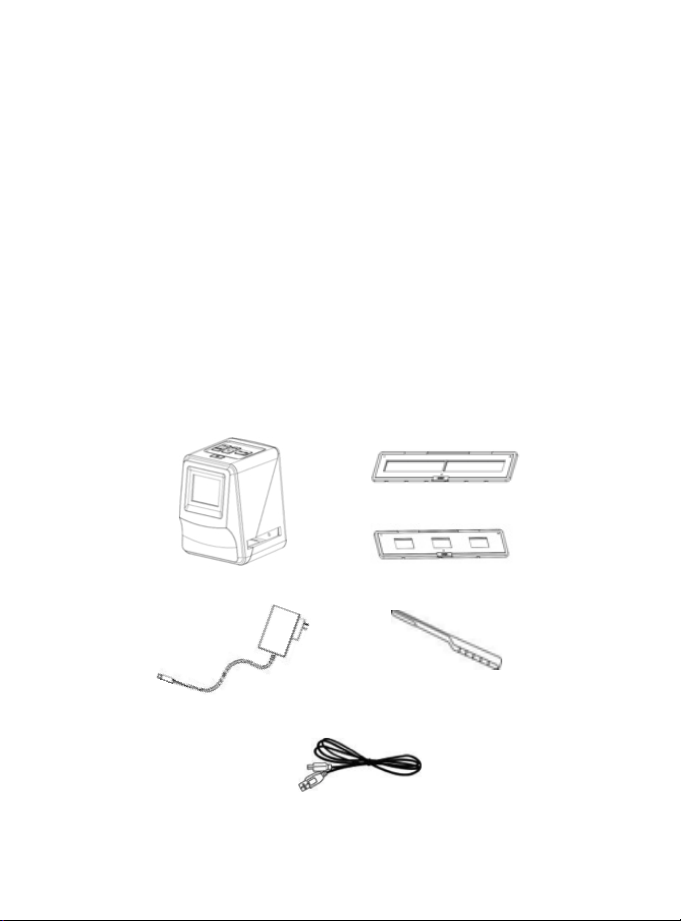
SLIDE AND NEGATIVE CONVERTER
AC POWER ADAPTOR
CLEANING BRUSH
USB CABLE
SLIDE HOLDER
35 MM NEGATIVE HOLDER
- Slide and Negative
Converter
- Owner’s Guide
- 35mm Negative Holder
- Slide Holder
- USB Cable
- AC Power Adapter
- Cleaning Brush
- 4GB SD Memory Card
- Battery
INCLUDED ACCESSORIES
This unit may contain a microcomputer for signal
processing and control functions. In very rare situations,
severe interference, noise from an external source, or
static electricity may cause it to lock up. In the unlikely
event that this should happen, turn off the unit, wait at
least five seconds, and then turn it back on again.
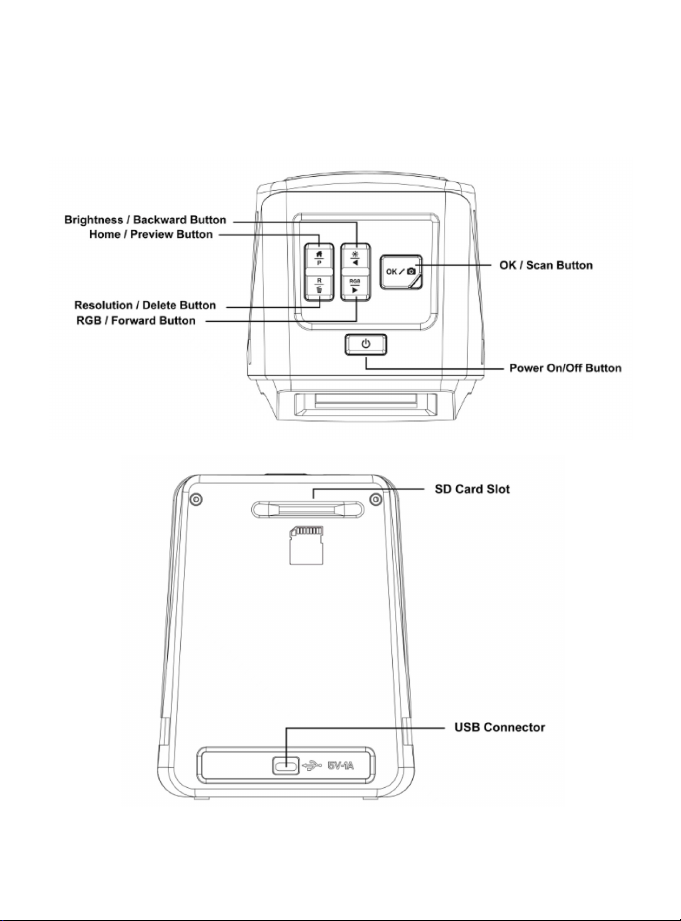
IDENTIFICATION OF PARTS
- 6 -
- 7 -
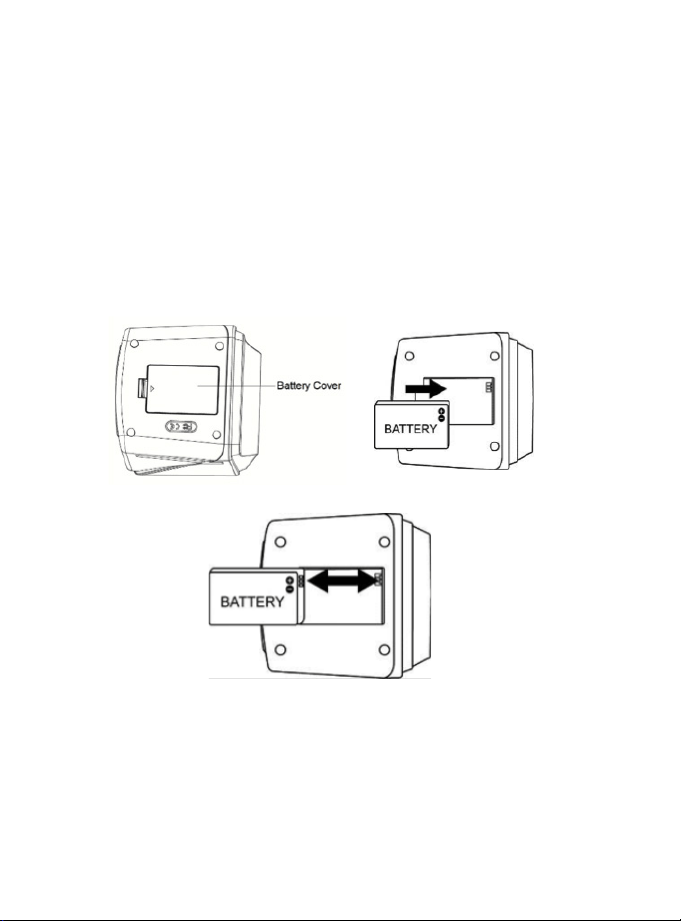
INSTALLING THE BATTERY PACK
Open the battery compartment cover by lightly pressing
and sliding it back as shown.
Insert the supplied battery. Make sure the (+ and -) ends
of the battery match to the polarities indicated in the
battery compartment. Snap the cover back into place.
- 8 -
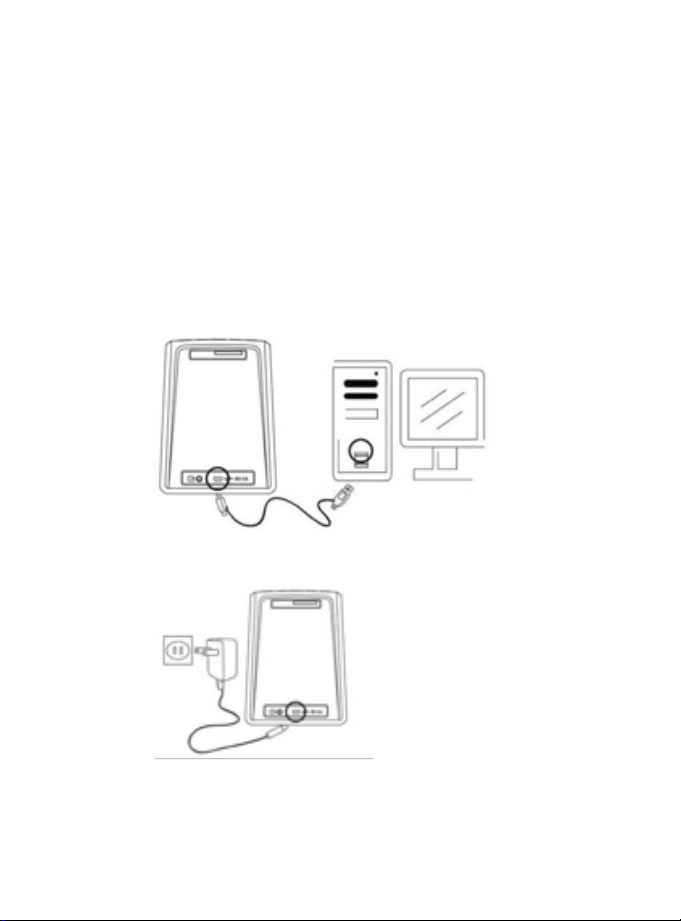
CHARGING THE BATTERY PACK
The battery is not charged at the time of purchase. Please
charge the battery at least 5.5-6 hours prior to first use.
You may charge the battery in 2 ways:
1. Plug the included USB cable into the device and then
plug the other end into a USB port on a computer (Fig.
A).
2. Use the included AC adapter to plug the device directly
into an AC outlet (Fig. B).
FIG. A
FIG. B
- 9 -
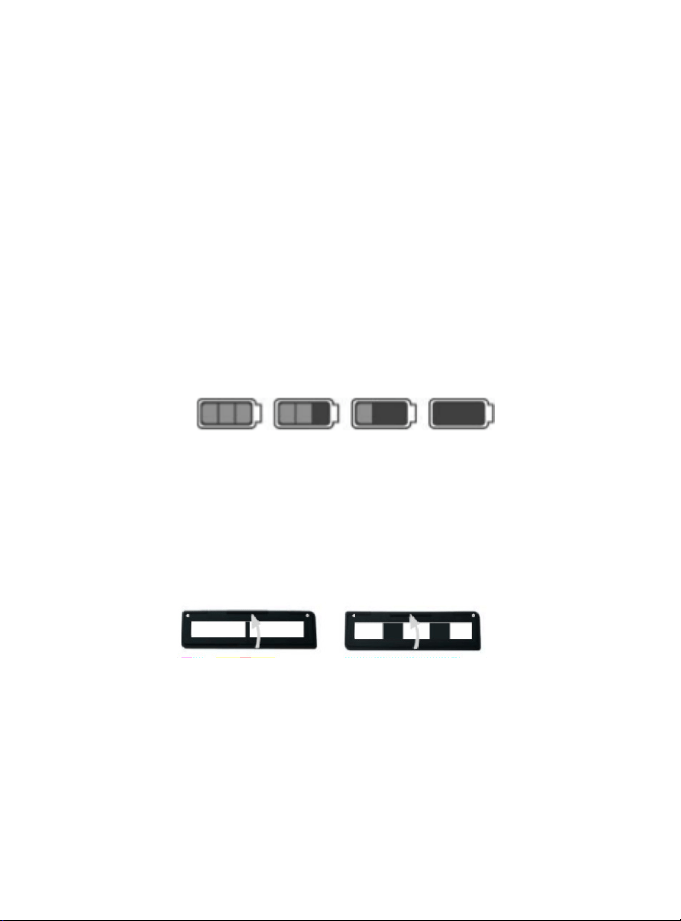
LED INDICATOR
STATUS LED INDICATOR
BATTERY STATUS
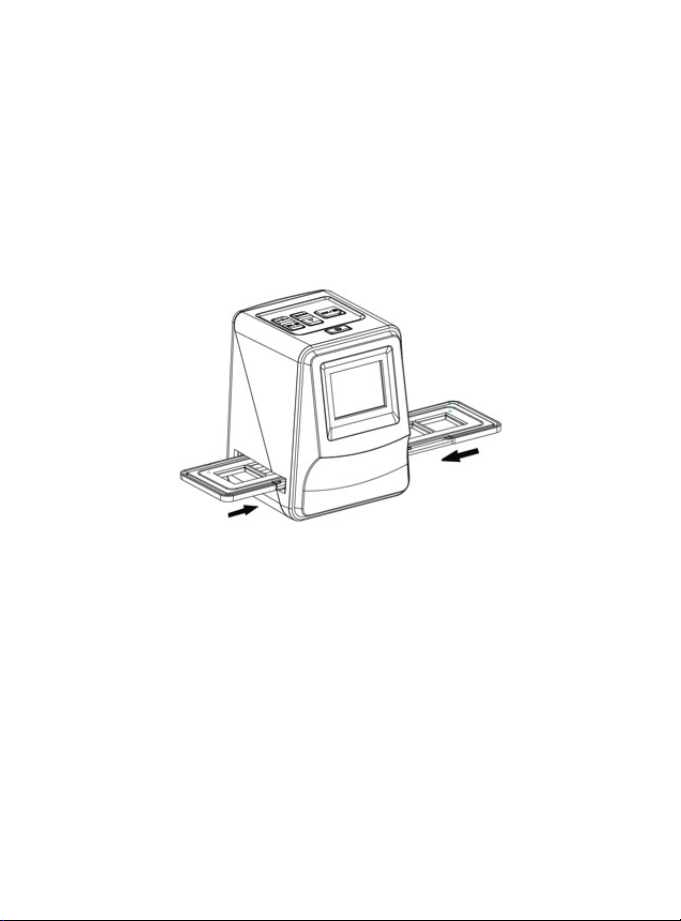
LOADING THE SLIDE AND FILM HOLDERS
The Red LED will turn on during charging. When the
battery pack is fully charged, the Red LED light will turn
off and you may disconnect the charging cable.
Red: The device is OFF and the battery is charging.
Purple: The device is ON and the battery is charging.
Blue: The device is turned ON.
Be sure that the glossy surface is facing upward (toward
the ceiling).
• Open the media holders as shown:
• Place your media into the holder and close the holder.
NOTE: This device converts:
• 35mm slides (color or black and white)
• 35mm negatives (color)
• 35mm negatives (black and white)
EMPTYFULL
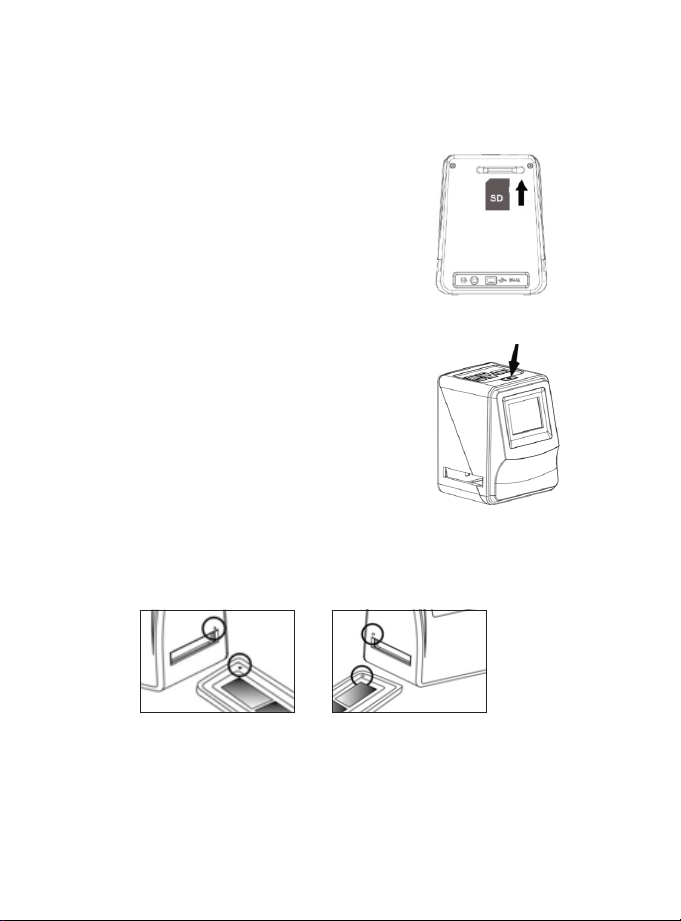
OPERATING THE SLIDE AND NEGATIVE CONVERTER
1. Insert the included SD memory
card into the SD card slot.
2. Press the Power button to power
on the device.
3. Insert the loaded slide/negative
holder into the slot according
to the ∏ or • sign shown on the
device.
Power button
- 10 -
TIP: Keep your picture in the rectangular white frame on
the screen. Improper positioning of the slide/negative
may result in copying the black edges of the film holder by
mistake.
TIP: We recommend using the included brush to clean
the glass surface periodically. Gently insert the brush
into the film slot to remove dust and help produce a clear
image. In addition, please make sure your film negatives
and mounted slides are clean before inserting them into
the device. Any dust or dirt will affect the quality of your
digitized images.
- 11 -
NOTE: The holder can be inserted into either the left or
right side opening.
- 12 -
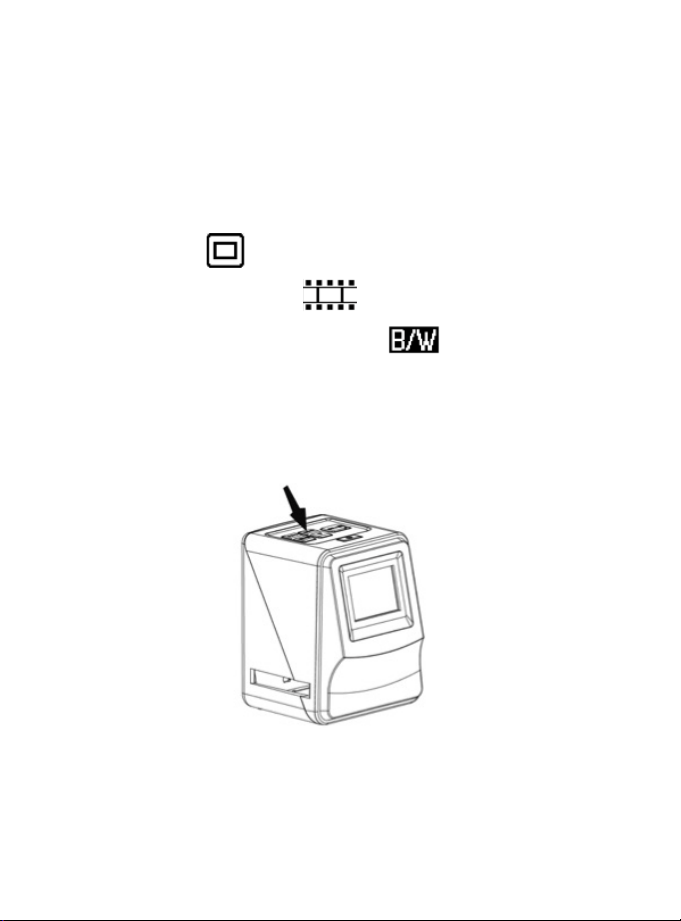
SELECTING THE MEDIA TYPE
In order to get the correct image size, you must specify
what type of media (slides or film negatives) you will be
converting. To select film type on the screen, press the
Film Type button.
35mm slide
35mm negative (color)
35mm negative (black and white)
Note: 110 & 126 film sizes are not supported. The 110 & 126
negative holders are not included in this package.
Film Type button
- 13 -
POWER SAVING MODE
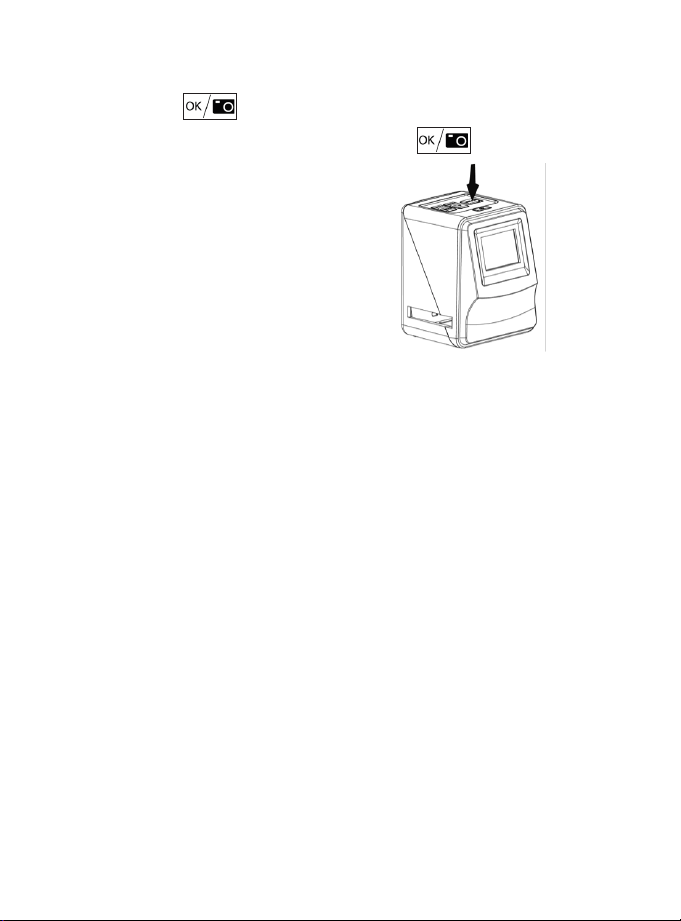
ADJUSTING THE EXPOSURE
Press the button to
convert your image to a digital
file.
TIP: To get the best digitized
image, wait for the image display
on the LCD screen to adjust
the brightness until it becomes
stable. This normally takes 3-4
seconds, depending on the
brightness of your film.
Note: To conserve power, the Slide and Negative Converter
will automatically enter sleep mode if you do not use it
for more than 3 minutes. You may wake up the device by
pressing any one of the buttons.
If the device is not used for more than 6 minutes, it will
turn off automatically. Press the Power button to resume
operation.
The exposure value (EV) on this device is set automatically.
However, in some situations you may want to adjust the EV
to make your image brighter or darker:
button
- 14 -
ADJUSTING THE EXPOSURE
(
CONT.
)
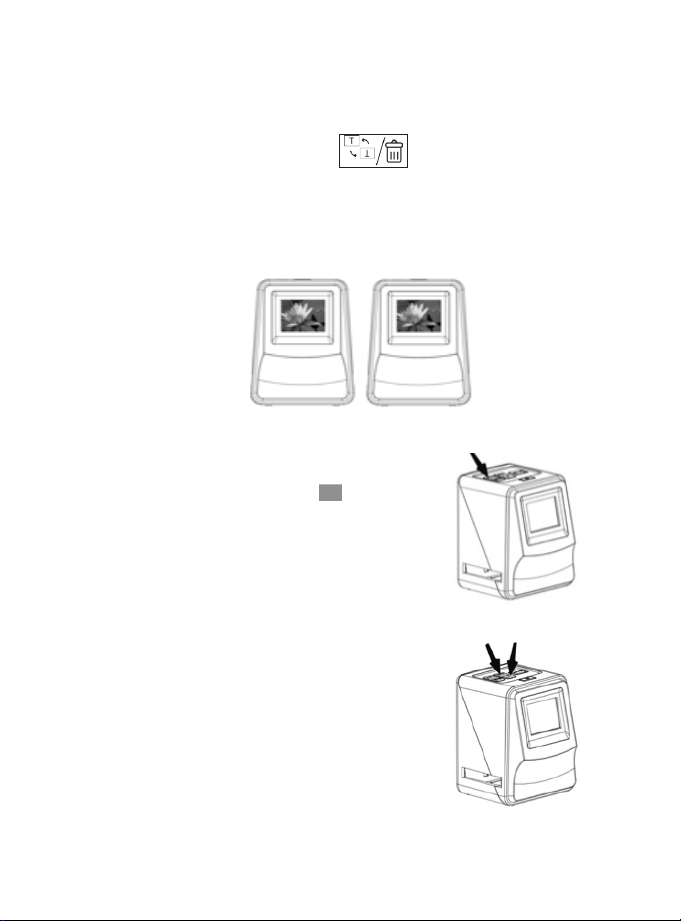
PLAYBACK MODE
1. Press EV/Delete button to adjust exposure
value (EV).
2. Press the Up or Down buttons to adjust the exposure
compensation from +2EV to -2EV in 0.5 increments.
Press the Playback button to play
back all of your converted images on
the LCD screen.
Press the Playback button again to go
back to the original screen.
• Press the UP button for forward
scrolling.
• Press the DOWN button for
backward scrolling.
Playback button
Up/Down buttons
∂
- 15 -
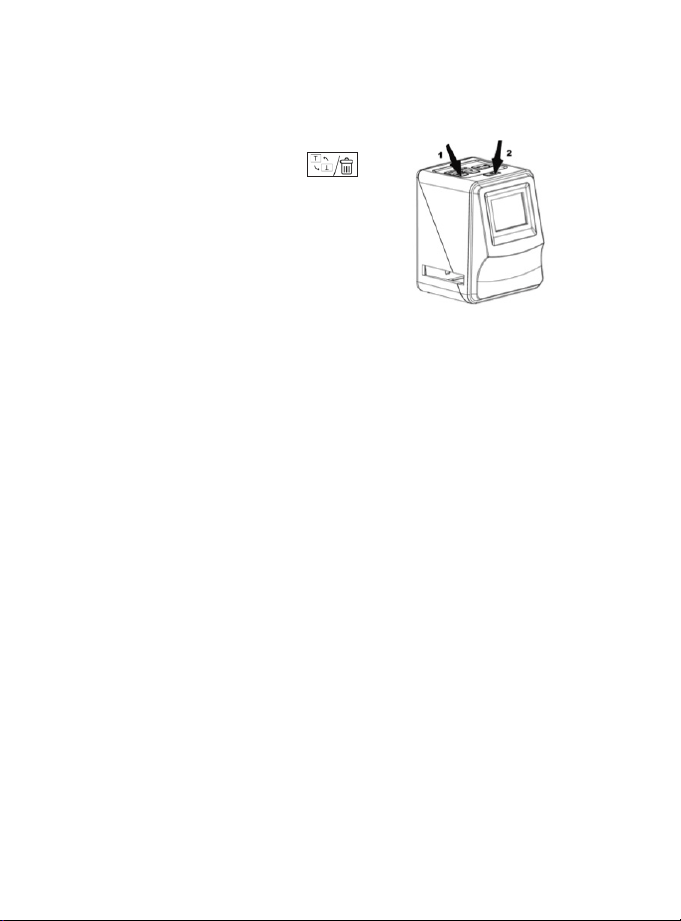
DELETE MODE
FORMATTING AN SD CARD
While in Playback Mode, press
the EV/Delete button (1)
once, then press the OK button
(2) to delete the current image.
If you decide you don’t want to delete the image(s), use
the down button to select “NO,” then press the OK button.
Formatting the SD card is not required. You may use a card
that has already been formatted.
To format a card, first enter Playback Mode. Then press the
EV/Delete button three times, then press the OK button to
format the SD card.
NOTE: Formatting an SD card will erase all of the files
stored in the card. Download any files from the SD card to
your computer hard drive BEFORE formatting an SD card.
If you don’t want to format the card, select “NO,” then
press OK.
NOTE: This device supports memory cards up to 32GB.
Press the EV/Delete button twice,
then press the OK button to
delete ALL images.
Delete button OK button

- 16 -
CONNECTING TO A COMPUTER
1. Plug the Slide and Negative Converter into your com-
puter with the included USB cable.
2. Turn the power on. Press the UP button to select “SD
to PC,” to YES, then press the OK button for confir-
mation. The device will appear as an external drive on
your computer desktop. You can now open the files on
your computer or copy them to your computer
hard drive.
SPECIFICATIONS
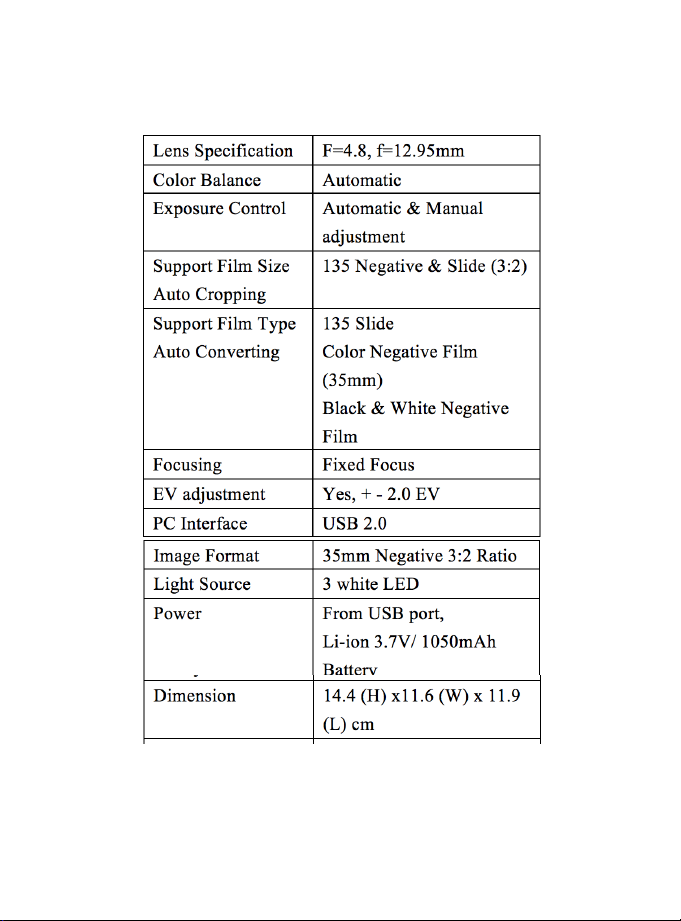
- 17 -
SPECIFICATIONS
(
CONT.
)
NOTE: Specifications are subject to change without prior notice.
- 18 -
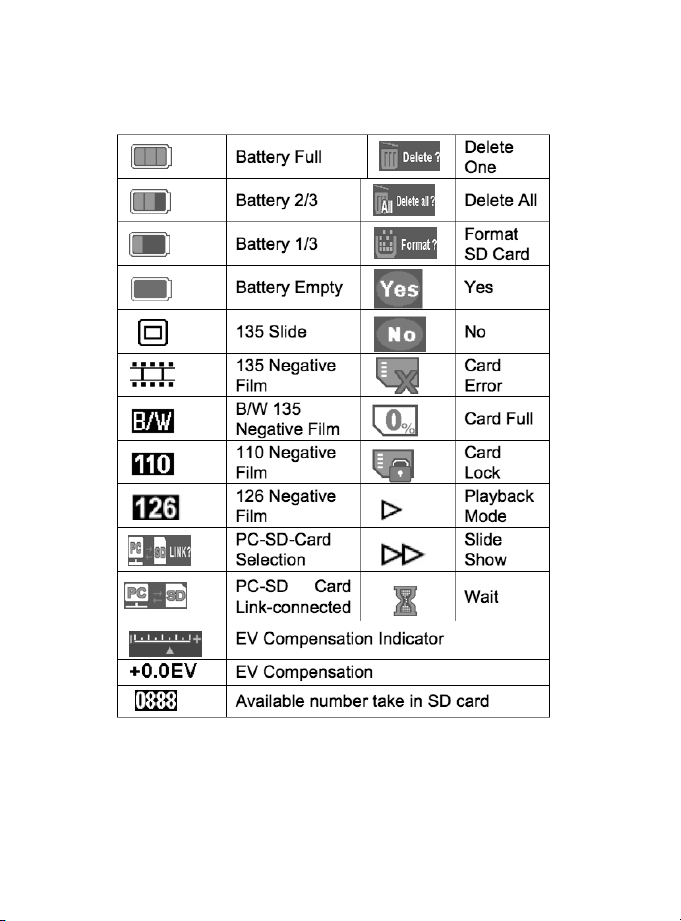
ICONS & INDICATORS
The SHARPER IMAGE® name and logo are registered trademarks.
©Sharper Image. All Rights Reserved.

SYSTEM REQUIREMENTS
WARRANTY / CUSTOMER SERVICE
BATTERY DISPOSAL
PC: Pentium® P4 1.6GHz or equivalent AMD Athlon
Free USB2.0 port
512MB RAM
500MB free hard disk space
1024 x 768 pixel color monitor
CD-ROM drive
Windows® XP Service Pack II / Vista™, 32/64 bits
Windows 7/Windows 8/Windows 10
Sharper Image branded items purchased from
SharperImage.com include a 1-year limited replacement
warranty. If you have any questions not covered in this
guide, please call our Customer Service department at 1
(877) 210-3449. Customer Service agents are available
Monday through Friday, 9:00 a.m. to 6:00 p.m. ET.
Mac: PowerPC G5 or Intel Core Duo processor recommended
Free USB2.0 port
768MB RAM
500MB free hard disk space
1024 x 768 color monitor
CD-ROM drive
Mac 10.5 ~ Up
Electronic equipment should be disposed at the end of its
life separately from your household waste.
- 19 -
The SHARPER IMAGE® name and logo are registered trademarks.
©Sharper Image. All Rights Reserved.
