Loading ...
Loading ...
Loading ...
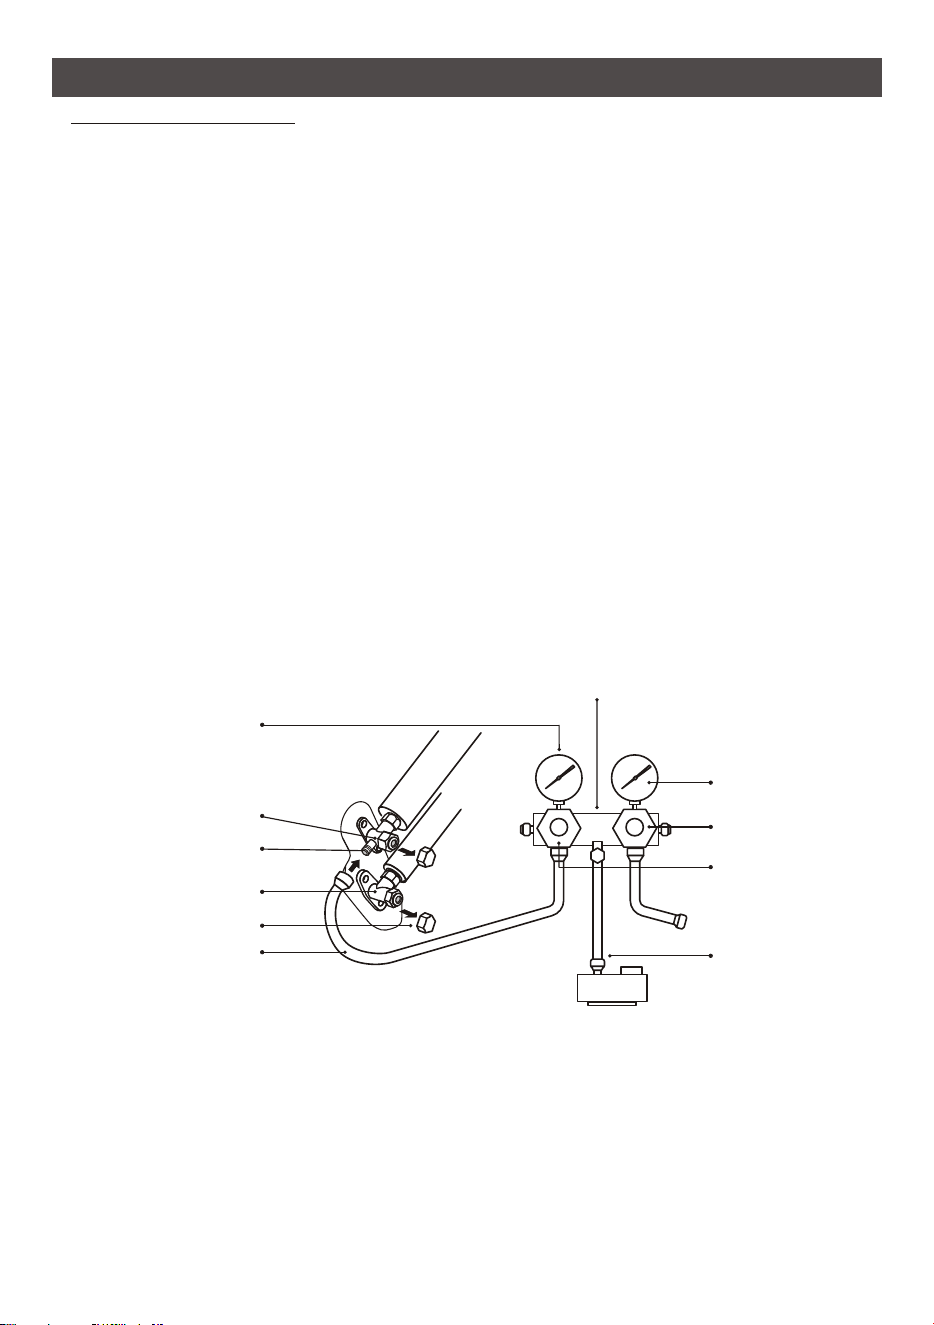
Step6: Vacuum Pumping
compound gauge
Low pressure valve
Valve protective caps
Pressure hose
Pressure gauge
High pressure valve
Charge hose
High pressure valve
Low pressure valve
Vacuum pump
Service port
Manifold gauge
OUTDOOR UNIT INSTALLATION
6.1 Use a spanner to take down the protective caps from the service port, low pressure valve and
high pressure valve of the outdoor unit.
6.2 Connect the pressure hose of manifold gauge to the service port on the outdoor unit low
pressure valve.
6.3 Connect the charge hose from the manifold gauge to the vacuum pump.
6.4 Open the low pressure valve of the manifold gauge and close the high pressure valve.
6.5
he vacuum time should not be less than 15 minutes, or make sure the compound gauge
indicates -0.1 MPa (-76 cmHg)
6.7 Close the low pressure valve of the manifold gauge and turn off the vacuum.
6.8 Hold the pressure for 5 minutes, make sure that the rebound of compound gauge pointer does
not exceed 0.005 MPa.
6.9 Open the low pressure valve counterclockwise for 1/4 turn with hexagonal wrench to let a little
refrigerant fill in the system, and close the low pressure valve after 5 seconds and quickly remove
the pressure hose.
6.10 Check all indoor and outdoor joints for leakage with soapy water or leak detector.
6.11 Fully open the low pressure valve and high pressure valve of the outdoor unit with hexagonal
wrench.
6.12 Reinstall the protective caps of the service port, low pressure valve and high pressure valve of
the outdoor unit.
6.13 Reinstall the valve cover.
Turn on the vacuum pump to vacuum the system.
6.6 T
29
Loading ...
Loading ...
Loading ...