instructions for
digital feed display for sm3002
model no: sm3002dfd.V2
thank you for purchasing a sealey product. manufactured to a high standard, this product will, if used according to these instructions,
and properly maintained, give you years of trouble free performance.
IMPORTANT: PLEASE READ THESE INSTRUCTIONS CAREFULLY. NOTE THE SAFE OPERATIONAL REQUIREMENTS, WARNINGS & CAUTIONS. USE
THE PRODUCT CORRECTLY AND WITH CARE FOR THE PURPOSE FOR WHICH IT IS INTENDED. FAILURE TO DO SO MAY CAUSE DAMAGE AND/OR
PERSONAL INJURY AND WILL INVALIDATE THE WARRANTY. KEEP THESE INSTRUCTIONS SAFE FOR FUTURE USE.
1. introduction
digital display for the cross slide and the compound tool rest to replace
the standard graduated scales. these lcd units improve accuracy,
save reading time and minimise errors. imperial or metric readings may
be selected and the reading can be zeroed at any point. three decimal
place (metric) and four decimal place (imperial) displays with an
accuracy of ±0.025mm/0.001”. Batteries not supplied.
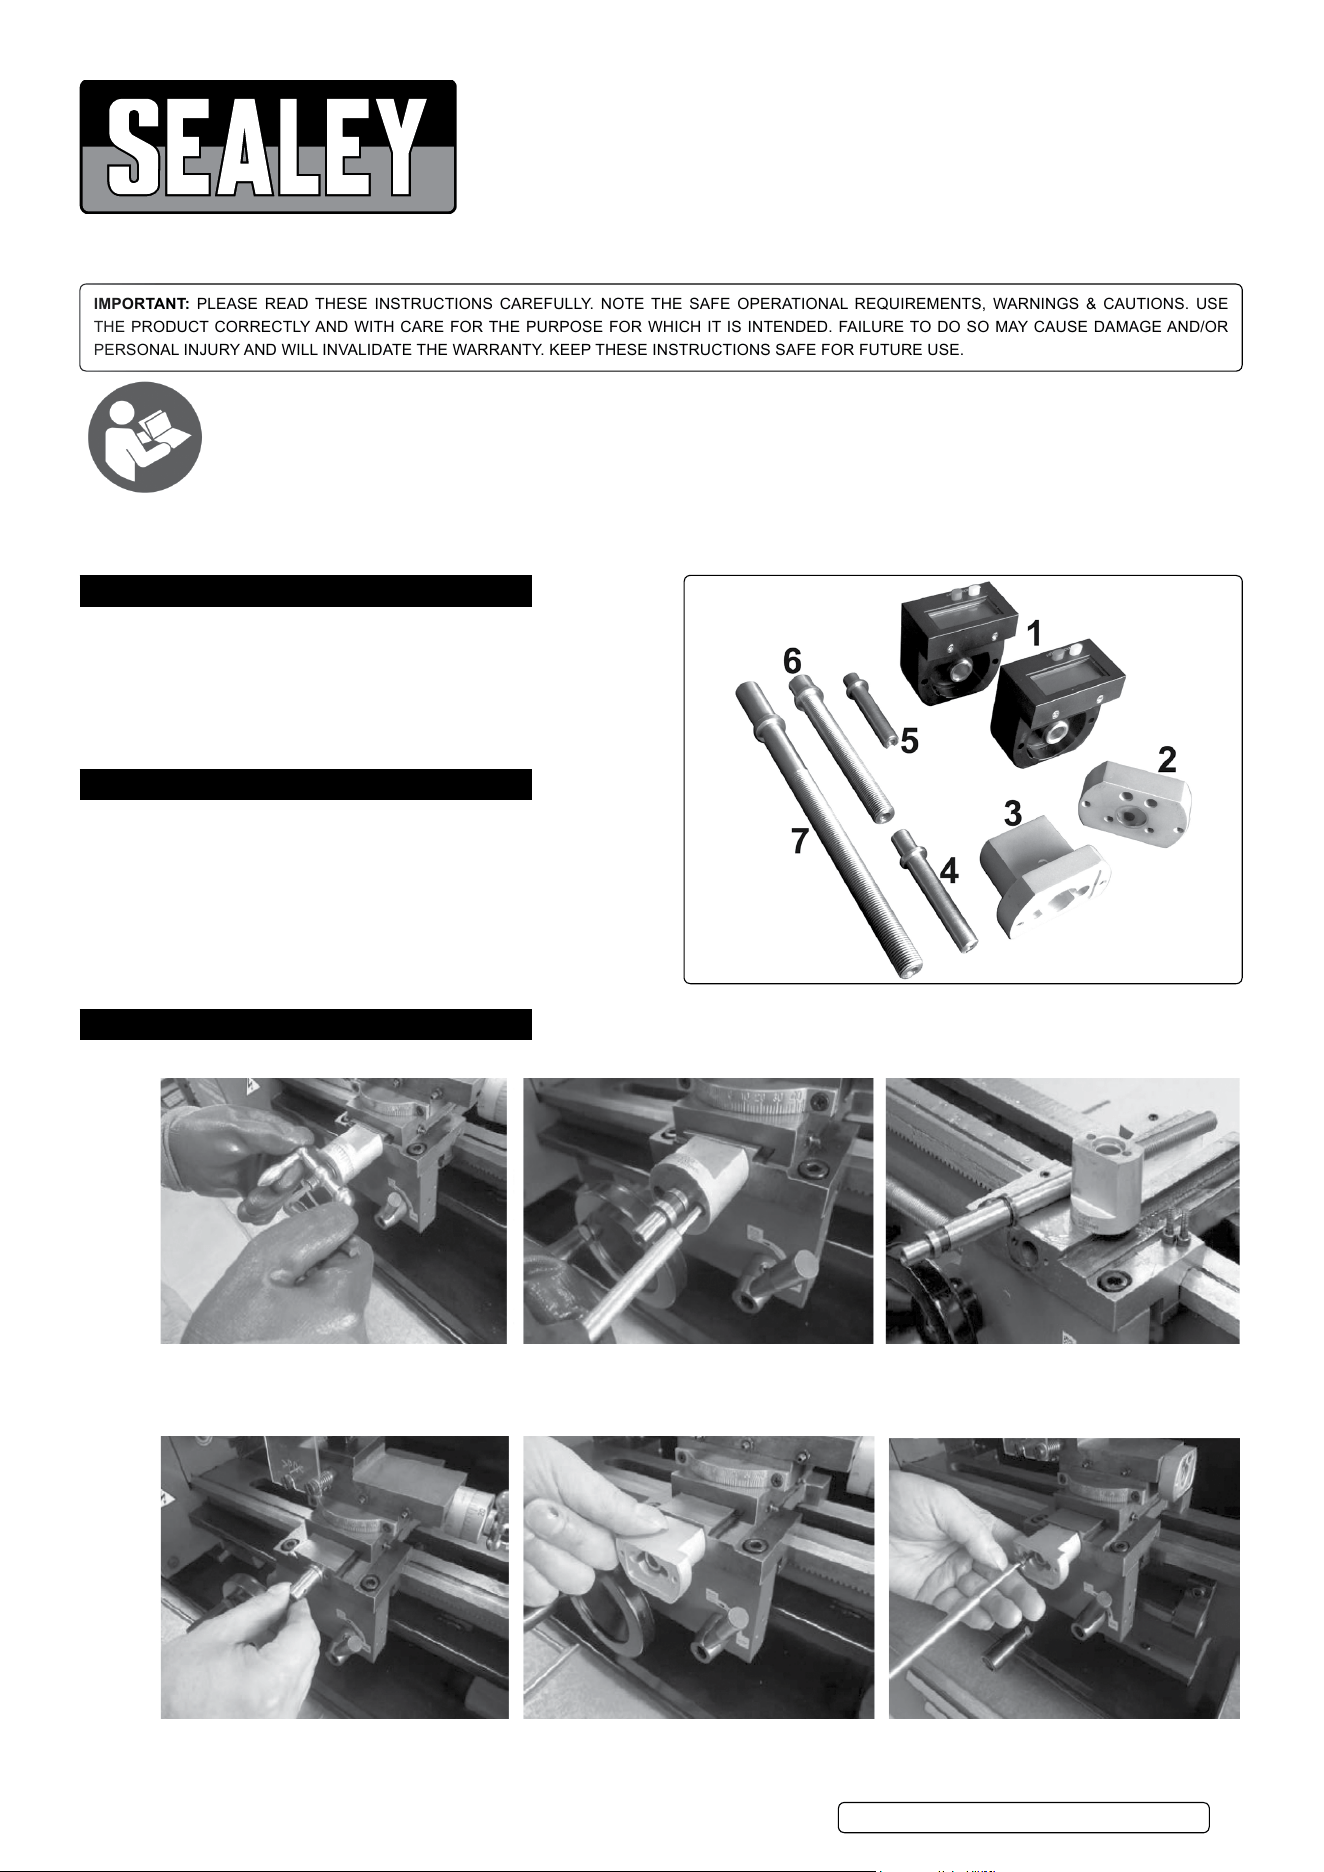
2. contents
1. digital readout box
2. compound slide bracket
3. cross slide bracket
4. cross slide transition shaft
5. compound slide transition shaft
6. compound feed screw
7. cross slide feed screw
8. screws (not shown)
3. assembly
3.1. assembly on tHe cross slide
sm3002dfd.V2 | issue:1 15/01/18
Original Language Version
© Jack sealey limited
refer to
instruction
manual
1. remove the screw securing the cross
slide handle. remove the ball handle,
spacer and dial.
2. remove the dial bracket and take out the cross slide feed screw.
3. Assemble the new cross slide feed screw (part no.7) and bracket (part no.3). tighten the two m4 x 16 screws (part no.8)
4. Assemble the transmission shaft (part no.4) onto the dismantled ball handle.
5. Assemble the digital readout box (part no.1) onto the bracket, then t the assembled
transition shaft and ball handle into the leadscrew. slightly adjust the transition shaft to
make it work properly with the leadscrew. finally, tighten with two m3 x 25mm screws
(part no.8).
6. Make the nal adjustment for free
movement of the handle with little drag.
lock the small screws.
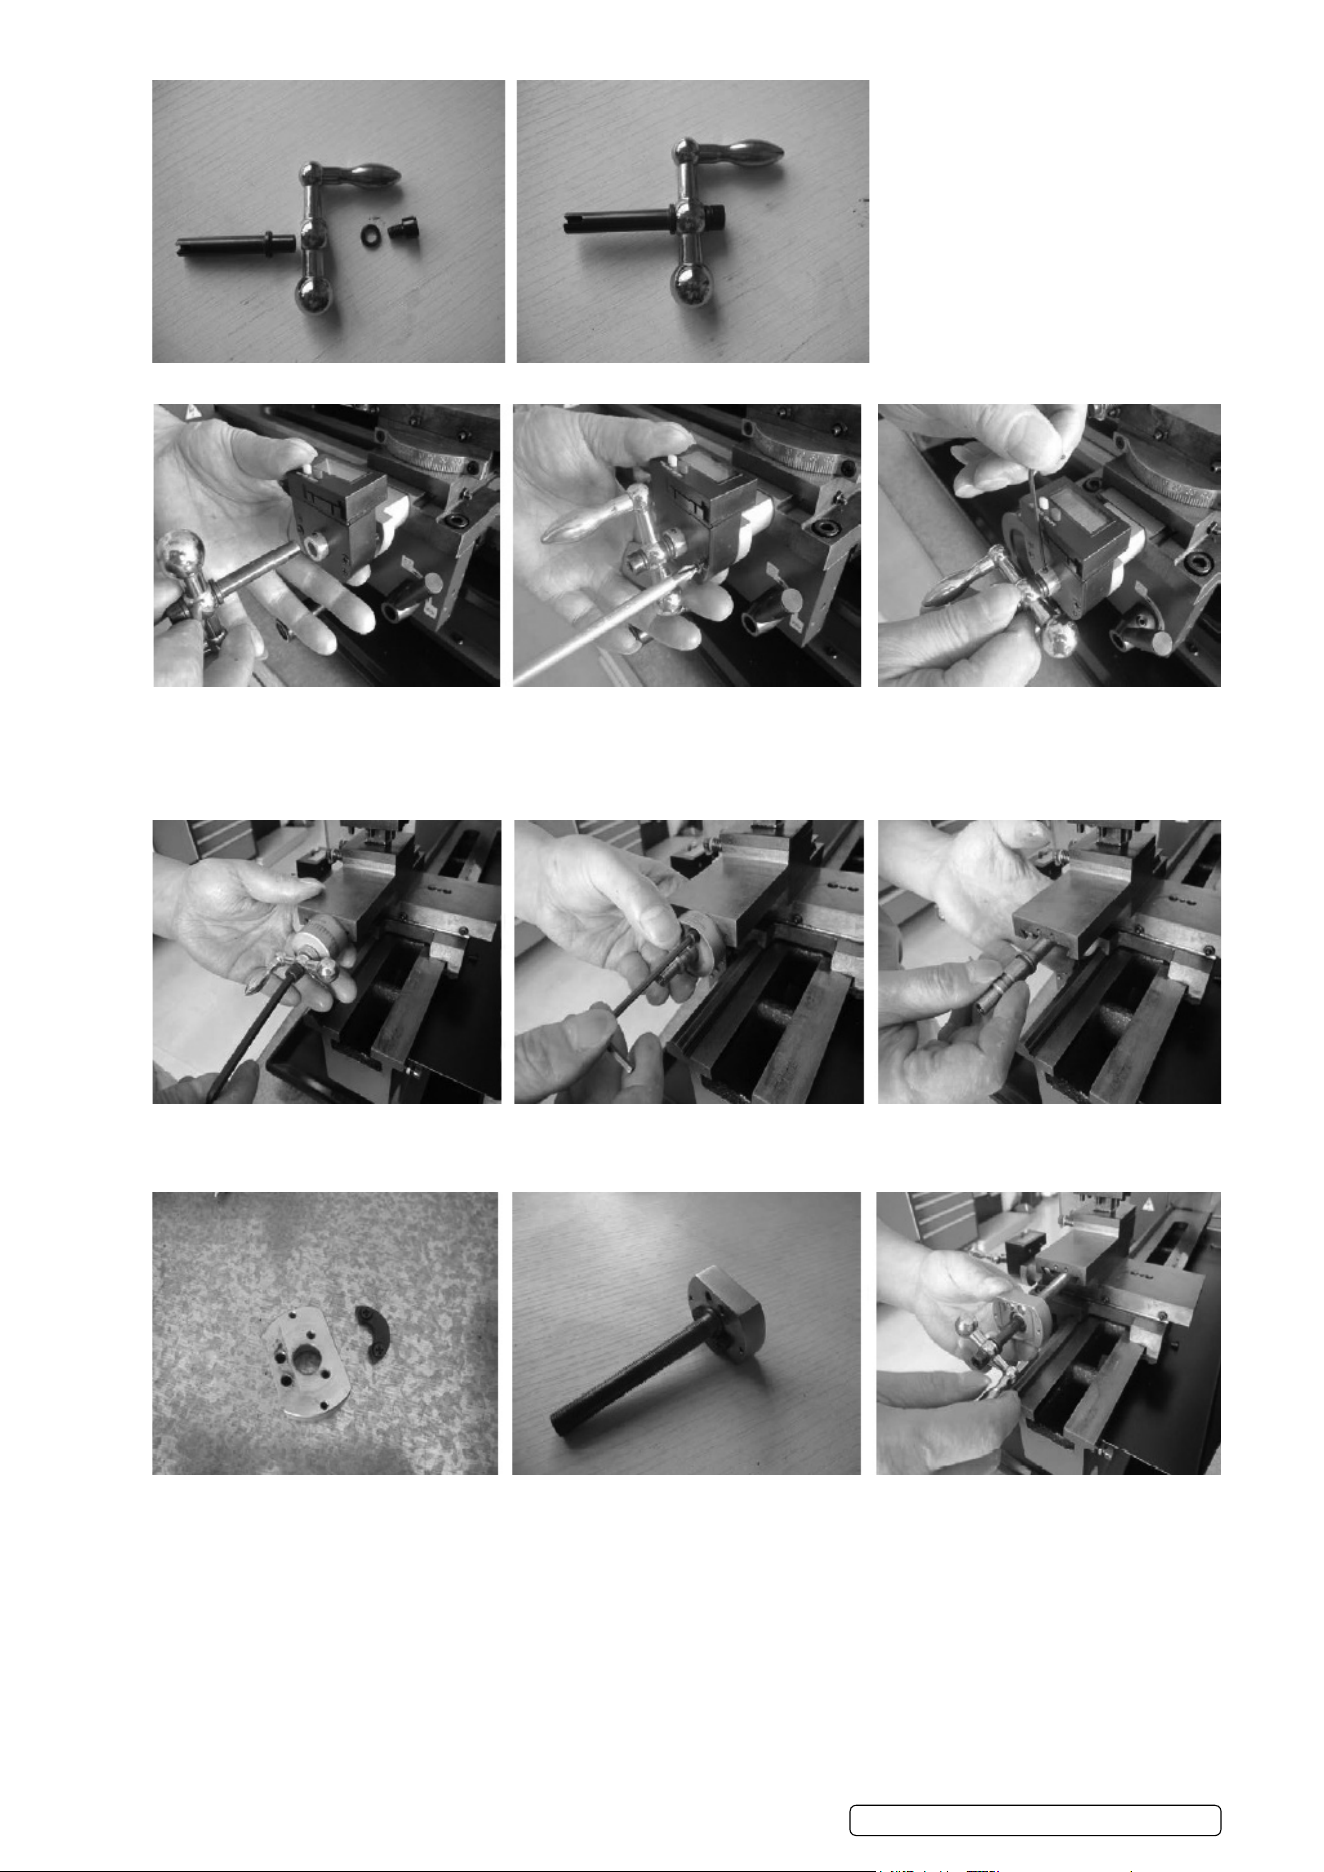
1. remove the screw securing the
compound handle. remove the ball handle,
spacer and dial.
2. loosen the screws. remove the dial bracket and take out the compound feed screw.
3. Assemble the block (part no.8) and compound feed screw (part no.6) on the bracket
(part no.2).
4. use the transition shaft to push the
assembled compound feedscrew and bracket
into the compound slide.
3.2. assembly on tHe compound slide
sm3002dfd.V2 | issue:1 15/01/18
Original Language Version
© Jack sealey limited
5. Assemble the transition shaft (part no.5) onto the dismantled ball handle.
7. Assemble the digital readout box (part no.1) onto the bracket, then t the assembled
transition shaft and ball handle into the lead screw. slightly adjust the transition shaft to
make it work well with the leadscrew. finally tighten with two m3 x 25 screws (part no.8).
8. Make the nal adjustment for free
movement of the handle with little drag. lock
the small screws.
6. Ret the dismantled, original M4 x 12
screws. take out the transition shaft again.
sealey group, Kempson Way, suffolk business park, bury st edmunds, suffolk. ip32 7ar
01284 757500 01284 703534 sales@sealey.co.uk www.sealey.co.uk
note: it is our policy to continually improve products and as such we reserve the right to alter data, specifications and component parts without prior
notice.
important: no liability is accepted for incorrect use of this product.
Warranty: Guarantee is 12 months from purchase date, proof of which is required for any claim.
enVironment protection
recycle unwanted materials instead of disposing of them as waste. All tools, accessories and packaging should be sorted, taken to
a recycling centre and disposed of in a manner which is compatible with the environment. When the product becomes completely
unserviceable and requires disposal, drain any fluids (if applicable) into approved containers and dispose of the product and fluids
according to local regulations.
sm3002dfd.V2 | issue:1 15/01/18
Original Language Version
© Jack sealey limited
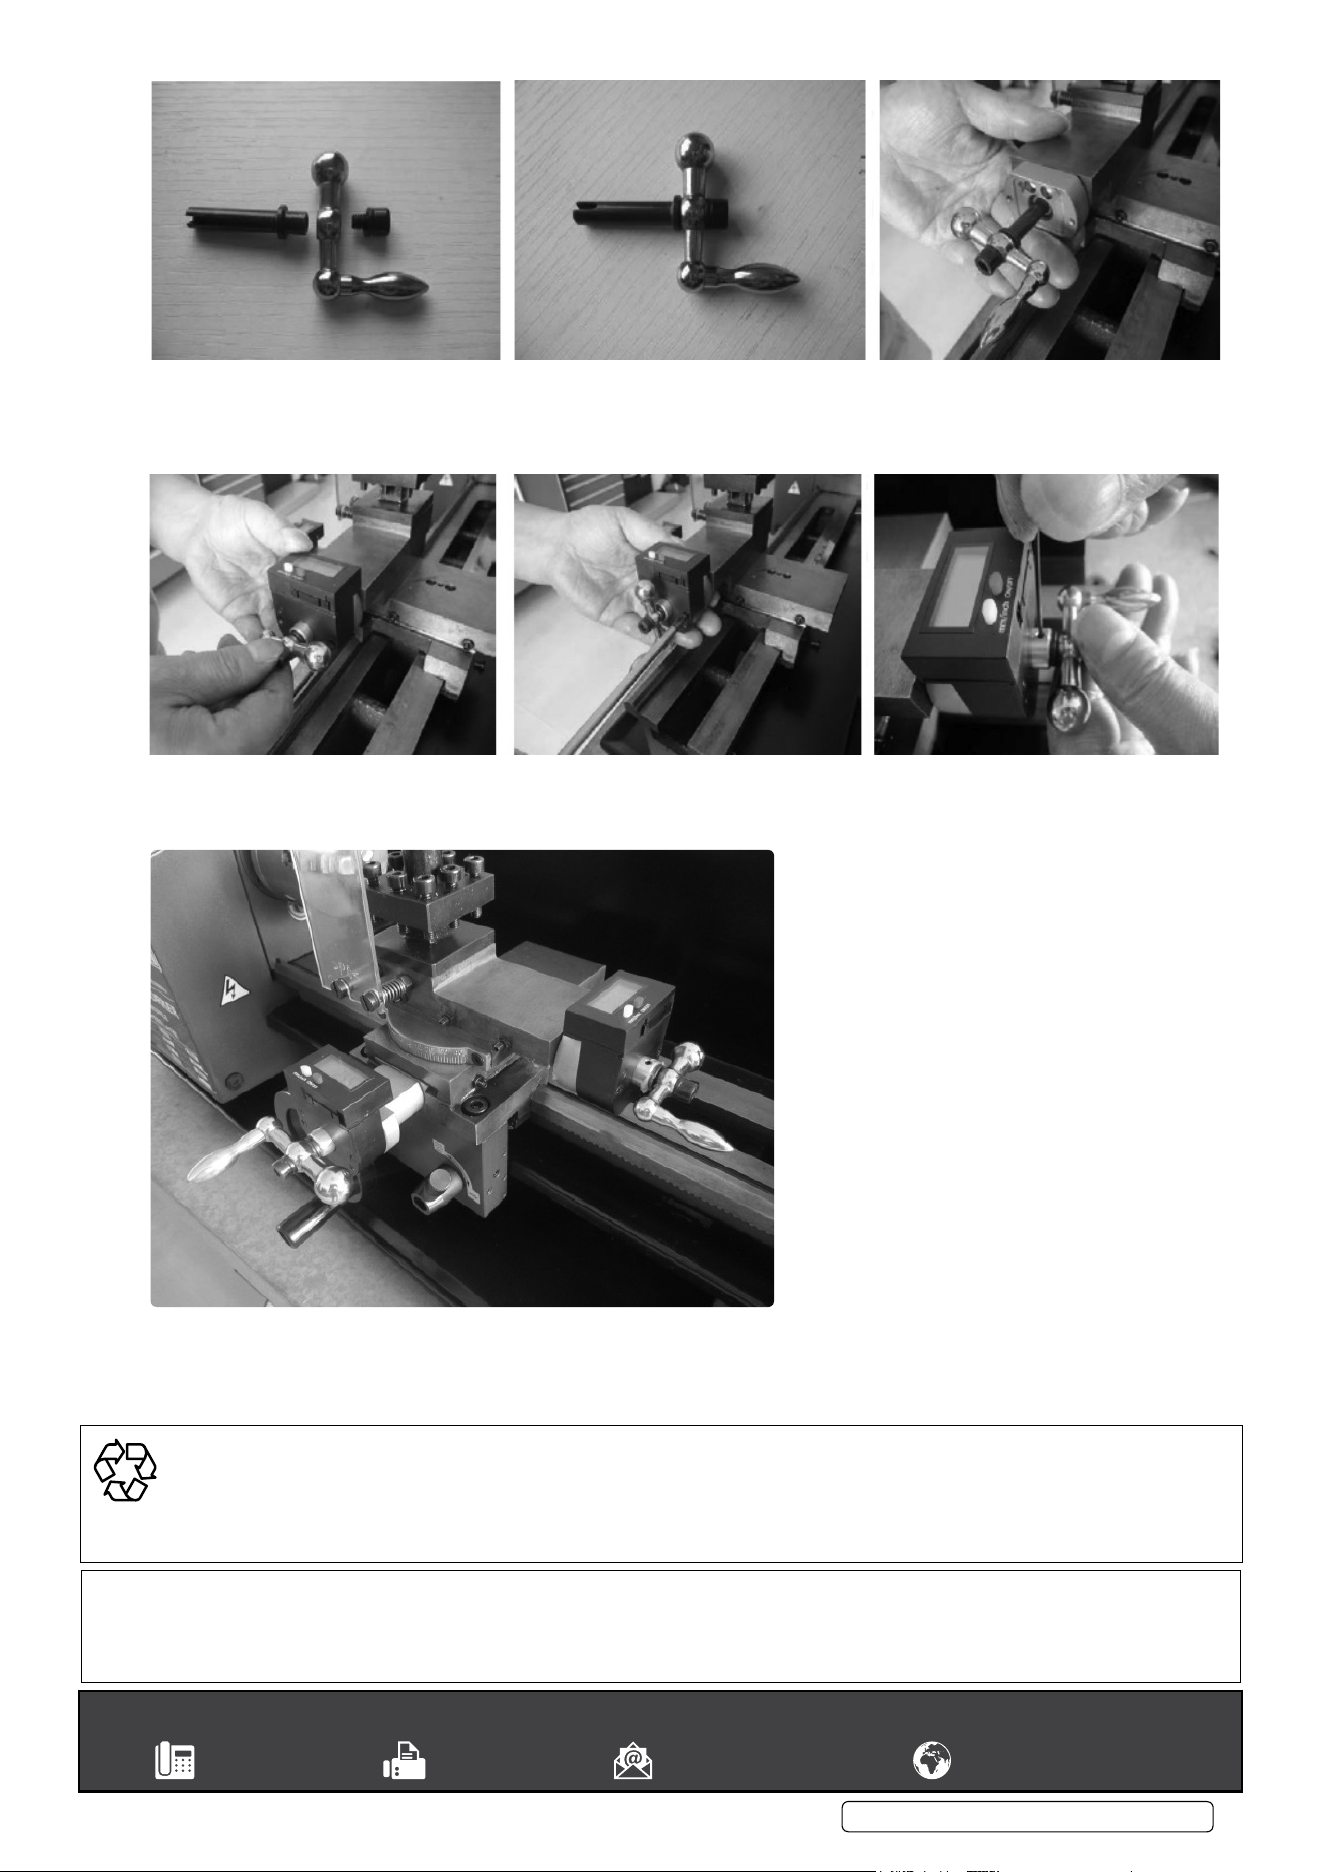
9. completed assembly.
