Loading ...
Loading ...
Loading ...
DS-AT1000S Series Storage System Quick Start Guide
26
2) Enter network camera information. The information must be the same with the
information of network camera to add.
3) Click OK.
Quick Add: Add network cameras of the same password and in the same network segment the
storage system.
1) Click Quick Add. Network cameras in the same network segment with the storage
system will be listed.
2) Check network cameras to add and click OK. Network cameras of the same password
with the storage system will be successfully added.
6.2 Configure Recording Schedule
Purpose
By default, network cameras start continuous recording after successfully added. Follow the steps
to configure recording schedules.
Step 1 Log in to Hybrid SAN sub-system. For details, refer to 5.2.1 Activate Hybrid SAN Sub-System.
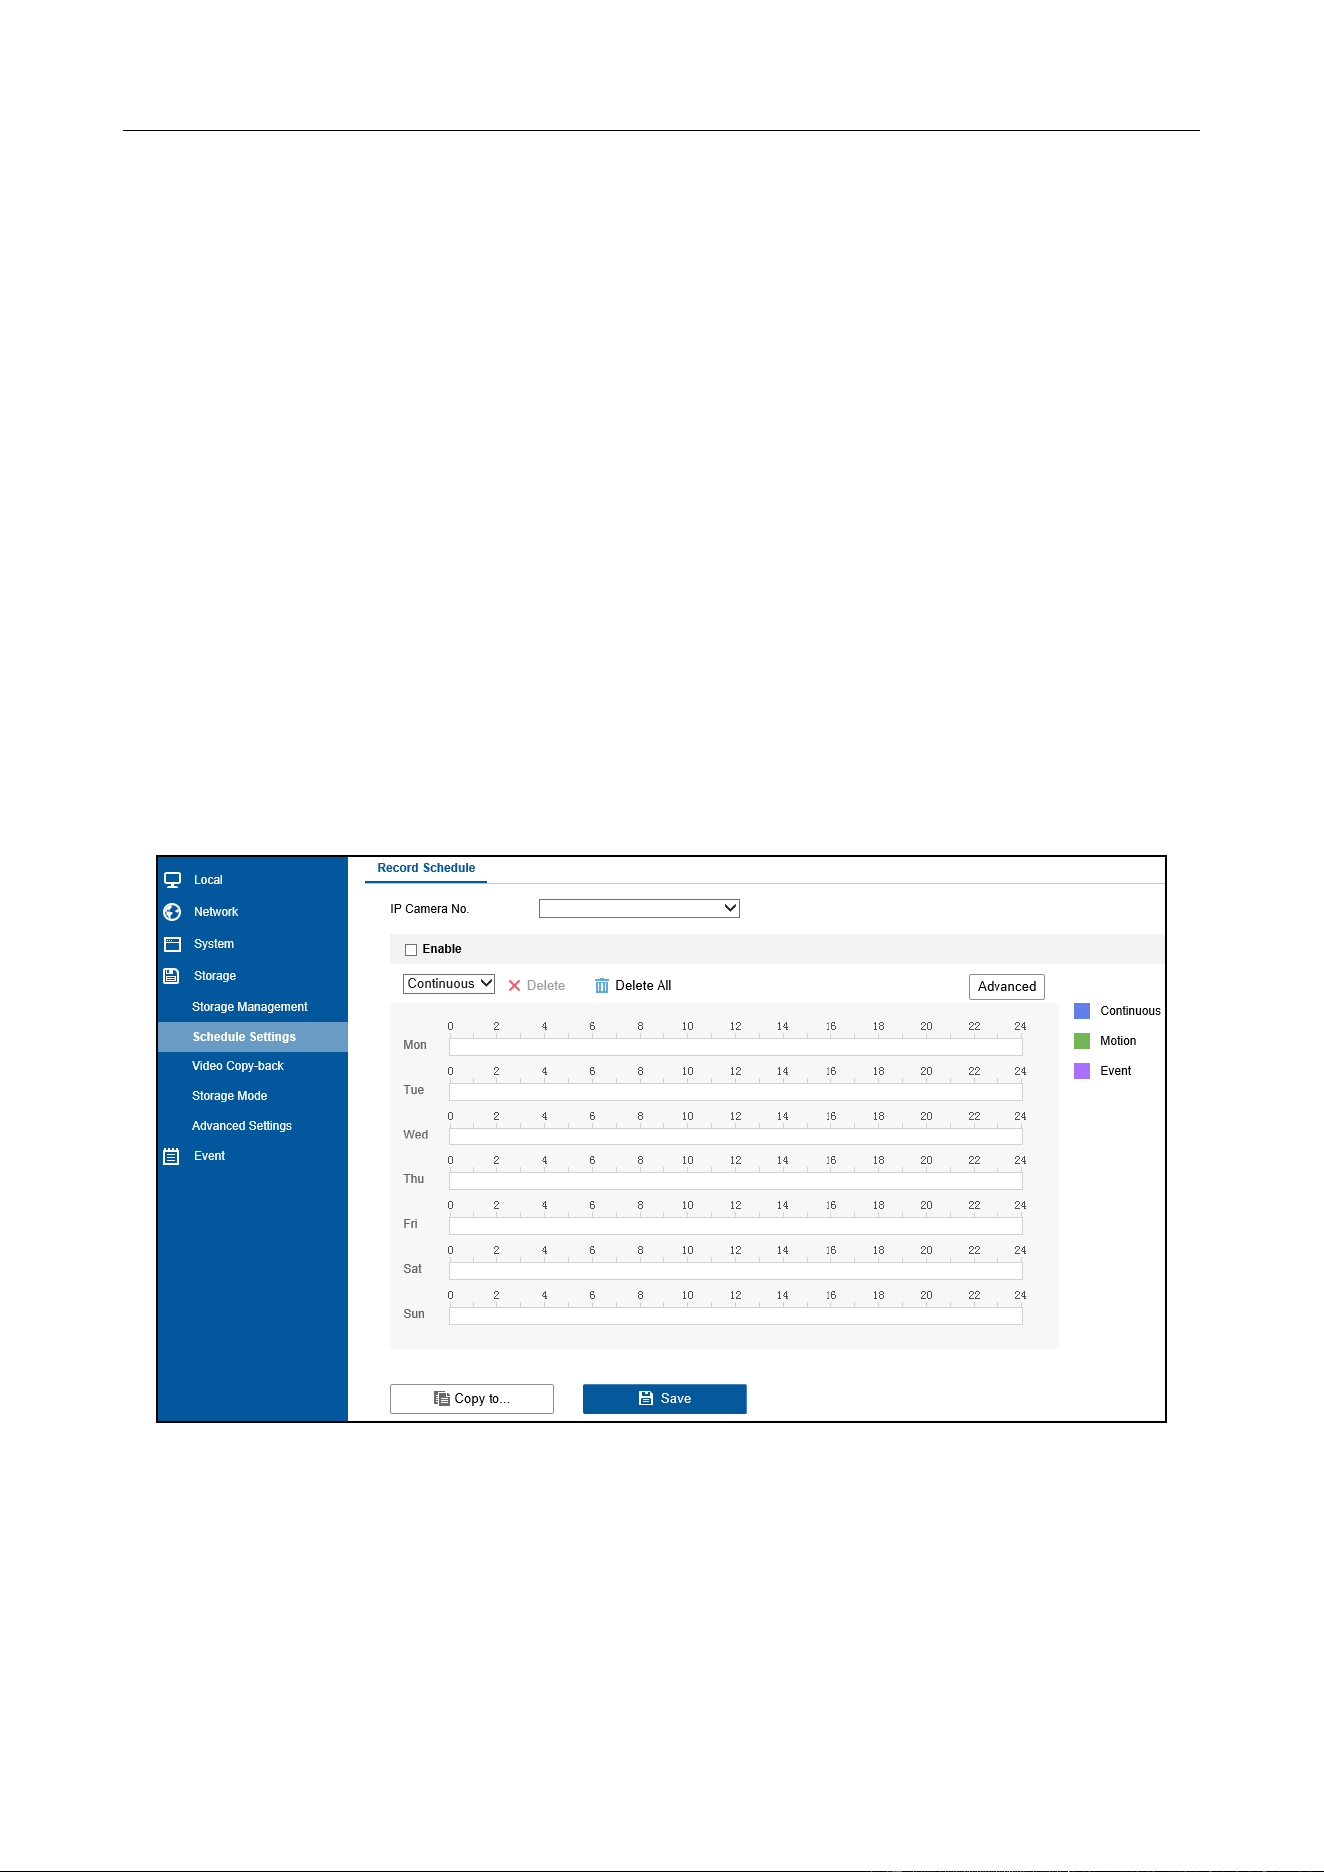
Step 2 Go to Configuration > Storage > Schedule Settings.
Figure 6-3 Record Schedule
Step 3 Select IP Camera No. and check Enable.
Step 4 Select schedule type.
Step 5 Drag on the table to draw the recording schedule.
Step 6 Click Save.
Loading ...
Loading ...