Loading ...
Loading ...
Loading ...
E
L
B
J
M
N
P
H
K
A
En-3
1-4. INSTALLATION DIAGRAM
Units should be installed by licensed contractor according to local code
requirements.
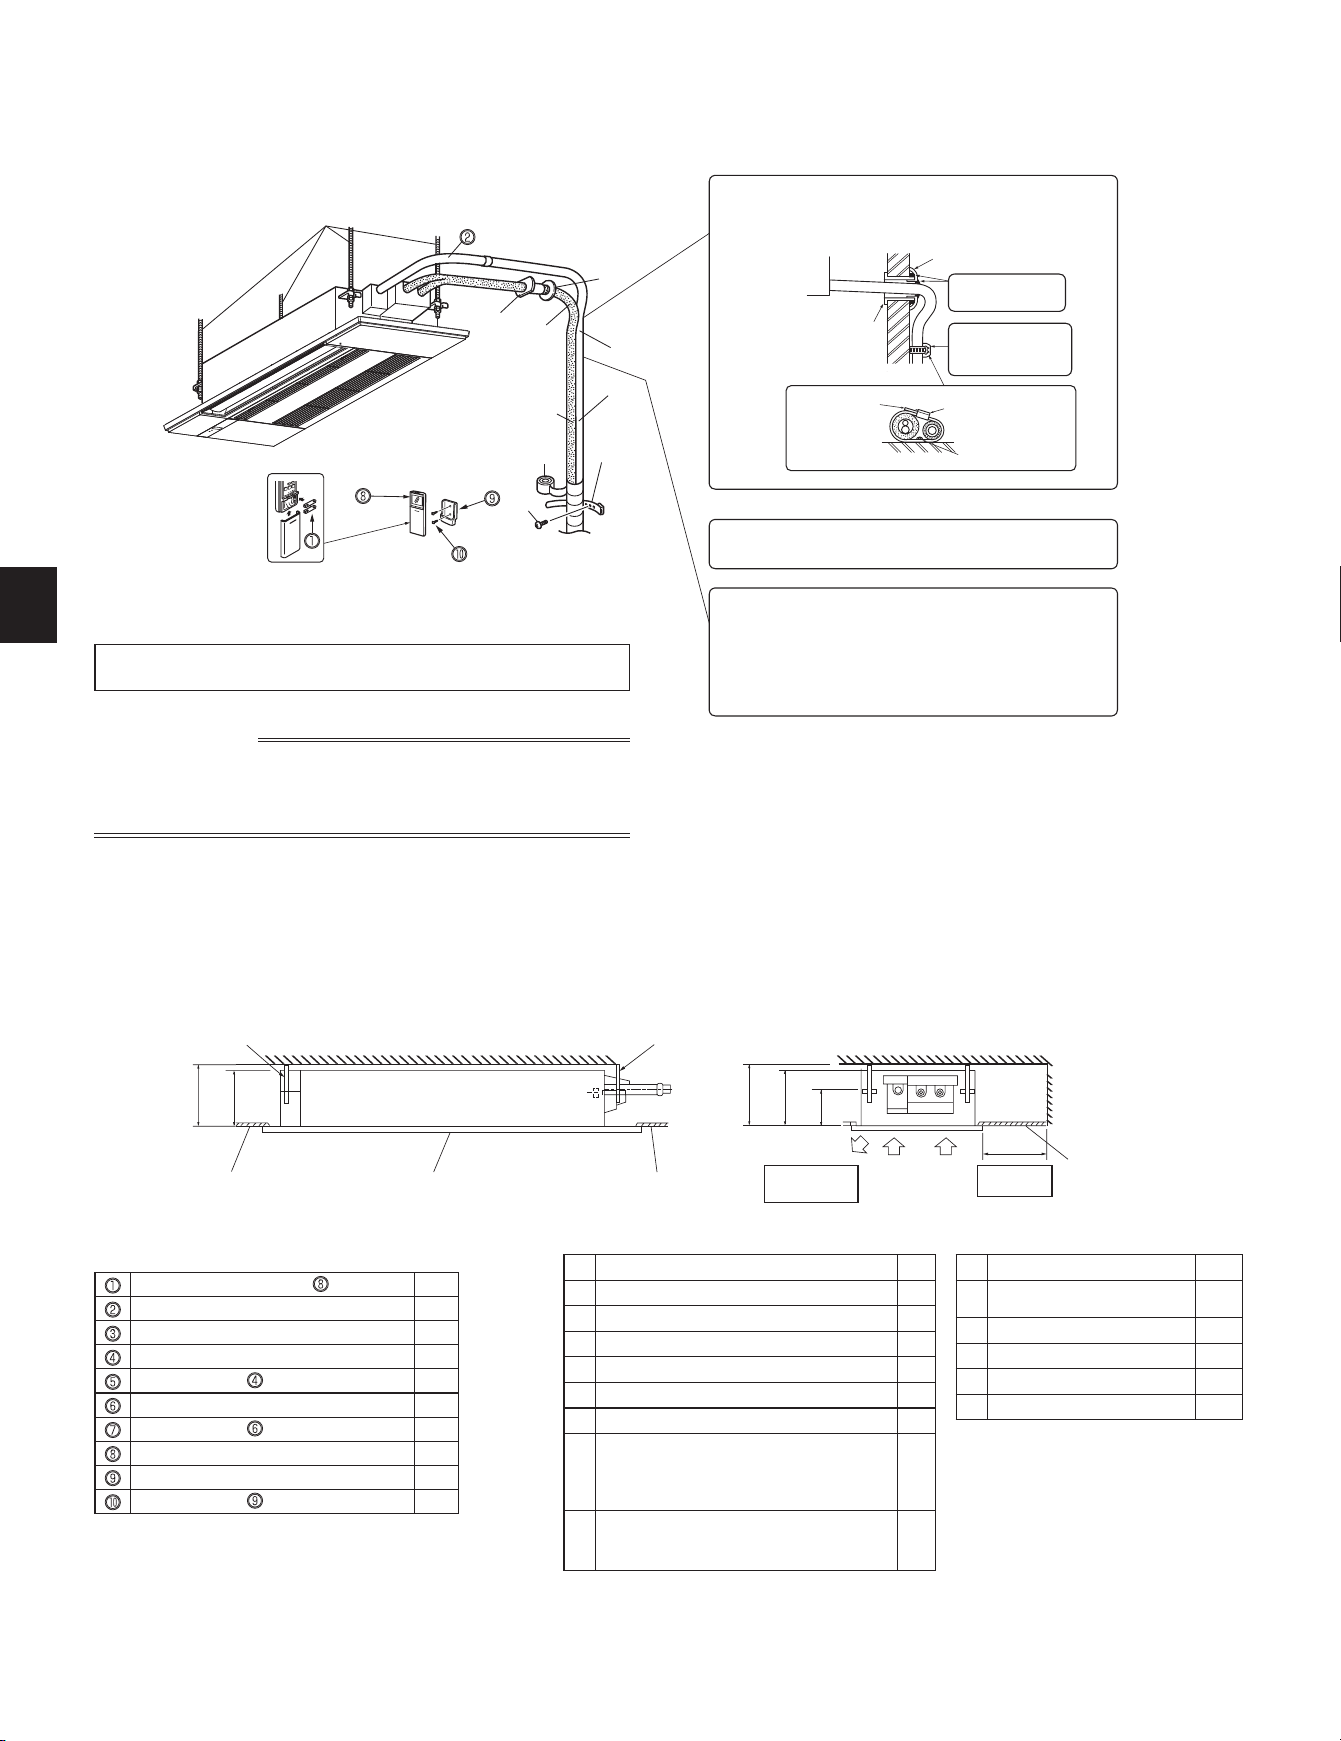
Be sure to use wall hole sleeve
K
to prevent indoor/outdoor
connecting wire
D
from contacting metal parts in the wall and to
prevent damage by rodents in case the wall is hollow.
ACCESSORIES
Check the following parts before installation.
Alkaline battery (AAA) for
2
Drain hose (with insulation)
1
Special washer (with cushion, 4 pcs)
8
Installation template
1
Fixing screw for M5 × 30 mm
4
Band
1
Fixing screw for 4 × 16 mm
2
Remote controller
1
Remote controller holder
1
Fixing screw for 3.5 × 16 mm (Black)
2
PARTS TO BE PROVIDED AT YOUR SITE
A
Refrigerant pipe
1
B
Drain pipe (O.D. 1 in. (26 mm))
1
C
Installation tools (See 1-3)
1
D
Indoor/outdoor unit connecting wire*
1
E
Suspension bolt (W3/8)
4
F
Nutwithange(W3/8)
8
G
Nut (W3/8)
4
H
Insulating material for A
(Heat resistant foamed polyethylene,
specicgravity0.045,thicknessmorethan
9/16 in. (14 mm))
1
J
Insulating material for B
(Foamedpolyethylene,specicgravity
0.03, thickness more than 3/8 in. (10 mm))
1
K
Wall hole sleeve
1
L
Parts for mending wall hole
(putty, cover)
1
M
Pipexingband
2 to 7
N
Fixing screw for M
2 to 7
P
Piping tape
1 to 5
Q
Protective tape
1
* Note:
Place indoor/outdoor unit connecting wire
D
at least 3 ft. (1 m) away from the TV
antenna wire.
Service space
• The dimensions of ceiling opening can be regulated within the range shown
in following diagram; so center the main unit against the opening of ceiling,
ensuring that the respective opposite sides on all sides of the clearance
between them becomes identical.
After the leak test, apply insulating material tightly so that there
is no gap.
When the piping is to be attached to a wall containing metals (tin
plated) or metal netting, use a chemically treated wooden piece
13/16 in. (20 mm) or thicker between the wall and the piping or wrap
7 to 8 turns of insulation vinyl tape around the piping.
To use existing piping, perform COOL operation for 30 minutes and
pumpdownbeforeremovingtheoldairconditioner.Remakeare
according to the dimension for new refrigerant.
Indoor unit
Wall hole
sleeve
K
Seal the wall hole
gap with putty
L
.
Fix the pipe to wall
withpipexing
band
M
.
Cut off the
extra length.
Pipexingband
M
Fixing screw
N
Wall hole cover
L
IMPORTANT NOTES
Check that cabling will not be subject to wear, corrosion, excessive pressure,
vibration, sharp edges or any other adverse environmental effects. The check
shall also take into account the effects of aging or continual vibration from
sources such as compressors or fans.
E
E
Air outlet
Whereairow
is not blocked.
7-1/2 (190)
or more
7-1/2 (190)
or more
Air inlet
7-7/8 (200)
or more
Ceiling surfaceCeiling surface Grille
Ceiling surface
7-5/16
(185)
4-13/16
(122)
7-5/16
(185)
inch (mm)
BH79A643H01_01En.indd 3 2021/05/06 17:37:20
Loading ...
Loading ...
Loading ...