Loading ...
Loading ...
Loading ...
9
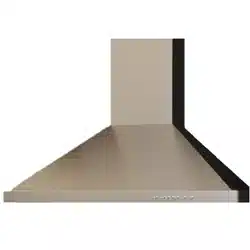
11. REINSTALL BLOWER (HORIZONTAL DISCHARGE ONLY)
Position the blower on the higher (A) or lower (B) back wall
discharge as determined previously.
Using a 5/16” socket, or a Robertson or a Phillips no. 2
screwdriver and the 4 previously removed screws, secure the
blower to the hood.
NOTE: In order to ease installation, before mounting the blower,
prepare the screw holes by screwing all 4 screws without
the blower, then remove and mount the blower.
HD0387
AB
R
IGHT SIDE
MOUNTING
SCREW
LOCATIONS
RIGHT SIDE
MOUNTING
SCREW
LOCATIONS
HE0085
Plug the blower back in and plug hood power cord into the outlet.
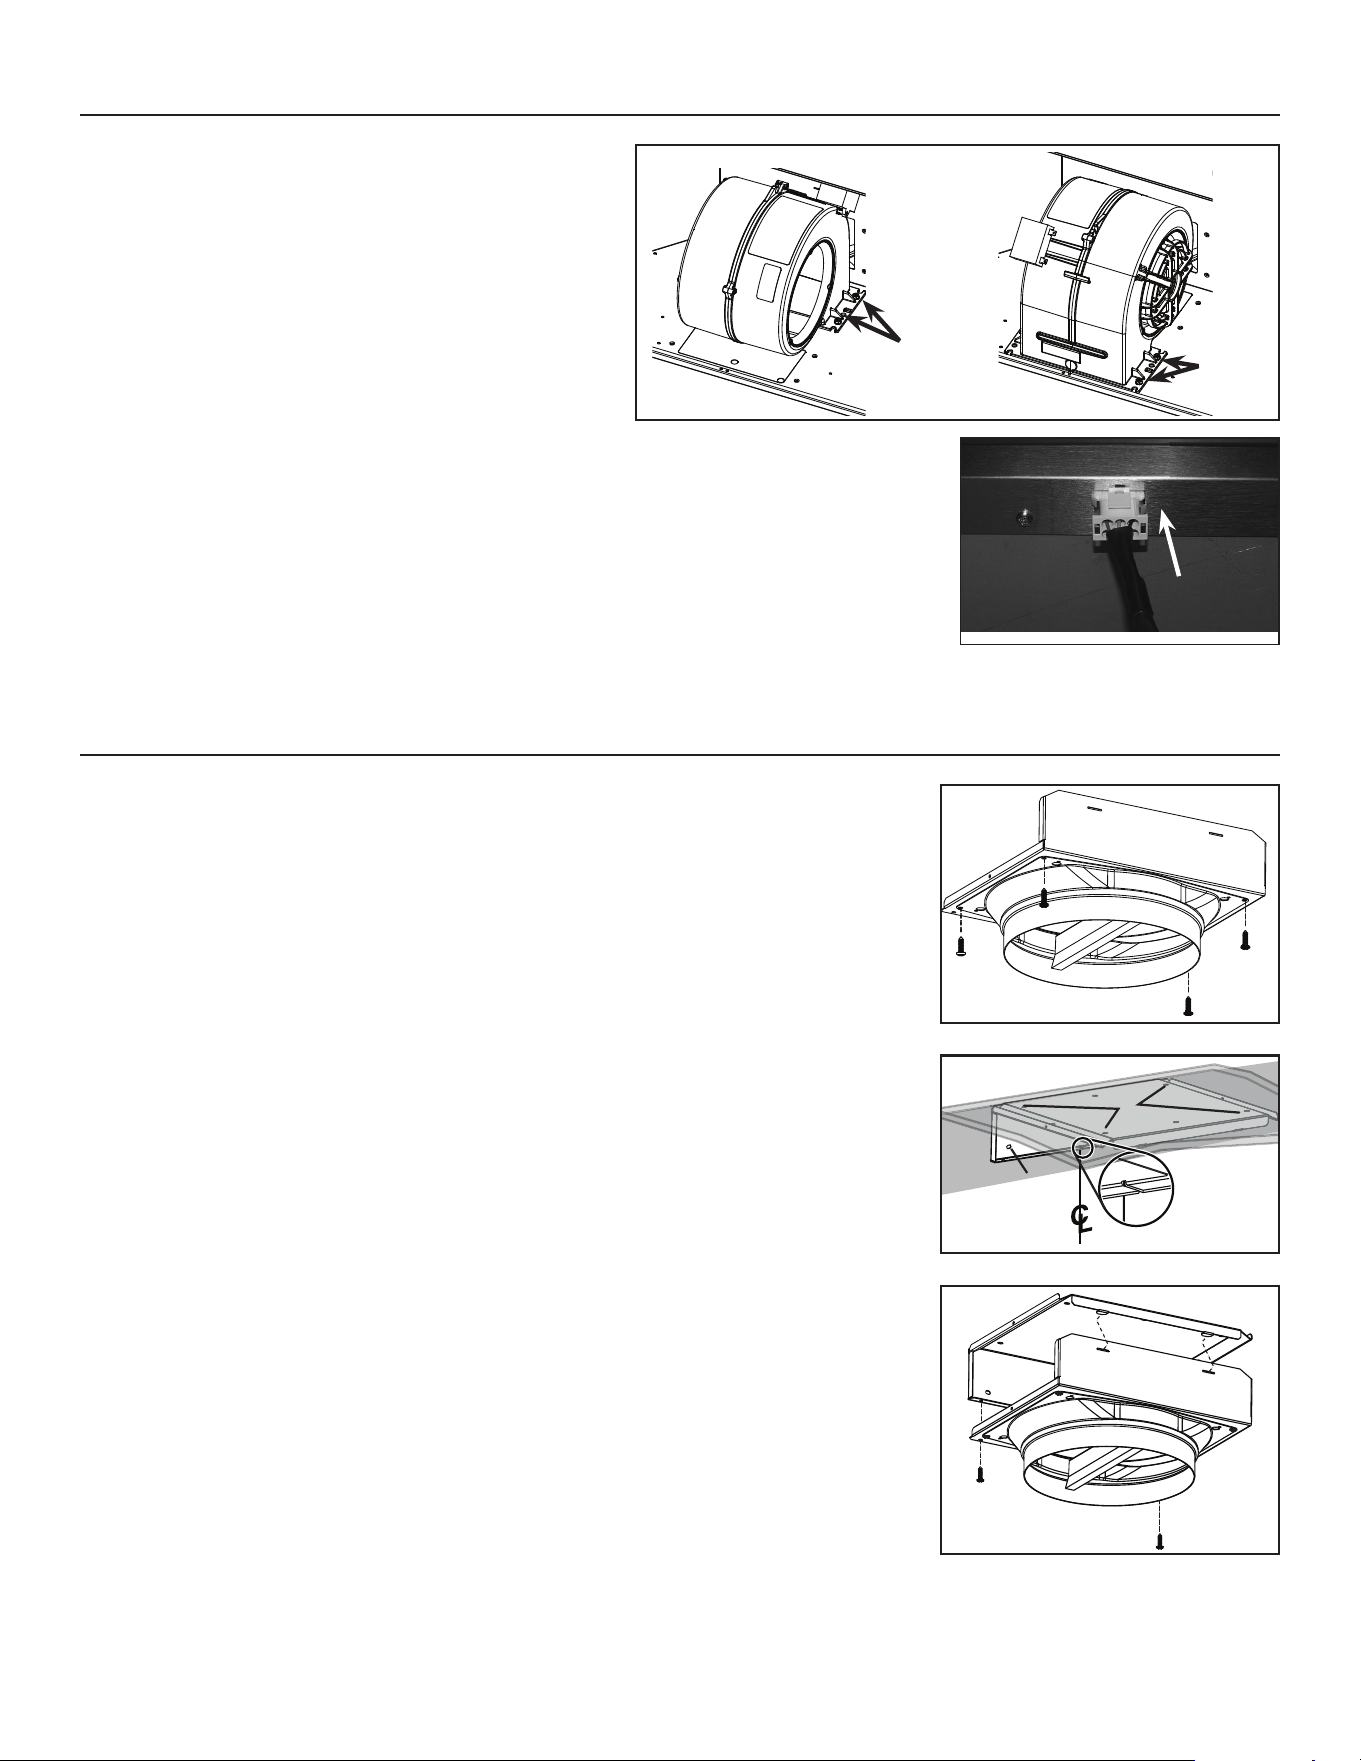
12. PLENUM INSTALLATION (NON-DUCTED INSTALLATION ONLY)
HA0077
Using 4 no. 8 x 3/8” provided screws, assemble the 8” round adapter to the lower plenum plate.
HD0382
A
A
Carefully align the upper plenum plate central notch with the line traced in step 9 (see inset at
right) and place it flush to the ceiling. Use the plate as a template to mark the position (A) of its
screws.
NOTE: To ease installation, there are many screw configurations: 6 in ceiling and 2 in wall, on each
side. Only 4 screws are needed to hold the top plenum plate.
Insert the included drywall anchors in the marked holes, then secure the upper plate using
4 no. 8 x 3/4” screws and washers (included with 09025 non-duct kit). Make sure the plate is tight
against the wall and ceiling.
HD0388
Assemble the lower plenum plate and transition assembly to the upper plate by inserting both
tabs of the top plenum plate to their corresponding slots in lower plenum plate. Secure the plenum
assemby using 2 no. 8-18 x 3/8” screws (included).
Loading ...
Loading ...
Loading ...