Loading ...
Loading ...
Loading ...
9
the steam lever back to position .
• Wait until the steam completely stops before removing the
milk jug.
Place the steam wand in the “OFF” position after each use to
start automatic rinsing.
Barista tips: Fresh milk is recommended. Always use fresh milk
straight from the fridge.
For best results, always put the milk jug back in the fridge when
not in use.
Whole milk is recommended. The appearance and texture of
froth depends on the nature of the dairy milk or vegetable bev-
erages used.
After frothing the milk, eliminate unwanted bubbles by swirling
the jug gently.
Please note: During normal operation of the machine, some
water will be discharged in the drip tray to ensure optimal per-
formance.
After every use, remove any milk residue from the steam wand
with a soft damp cloth and place it in the “OFF” (auto clean) posi-
tion. The appliance delivers water from the steam wand.
A rinse is automatically performed when the appliance switches
o if the steam wand is left in position “A” (autosteaming).
If the wand is left in position “M” after steaming, the and
indicator lights will blink to inform you of the need to place
the wand in the OFF position for automatic rinsing to be carried
out.
5. SETTINGS MENU
Press and hold the (B1) and (B4) buttons for 3 seconds
to enter the settings menu. After a few seconds of inactivity, the
machine automatically exits the menu.
The (B2) and (B3) indicator lights blink.
The following settings will be saved after a few seconds, when
the appliance automatically exits the settings menu.
5.1 Delay time between preinfusion and infusion
Increasing the delay changes the contact time between the wa-
ter and the coee, thus changing the avor prole.
To set the delay time, press the (B1) button:
No preinfusion delay
1 second (default)
2 seconds
5.2 Descale
To set the descale function, press the (B6) button; the
(B3) indicator light blinks and the indicator light turns
on. Press and hold the (B6) button for 3 seconds to start
descaling (see instructions in the Descaling section) .
If descaling is accidentally activated, it can be stopped by press-
ing and holding the (B6) button for at least 10 seconds.
5.3 Auto-o
To set the Auto-o time, press the (B7) button:
5 minutes (default)
1.5 hours
3 hours
If the machine is in Auto-o mode, press any button on the con-
trol panel to turn the appliance on.
5.4 Default values
To reset the default values press the (B5) button; the in-
dicator light blinks. Press and hold the (B5) button for 3
seconds to reset all the settings.
All settings will be restored to the factory default.
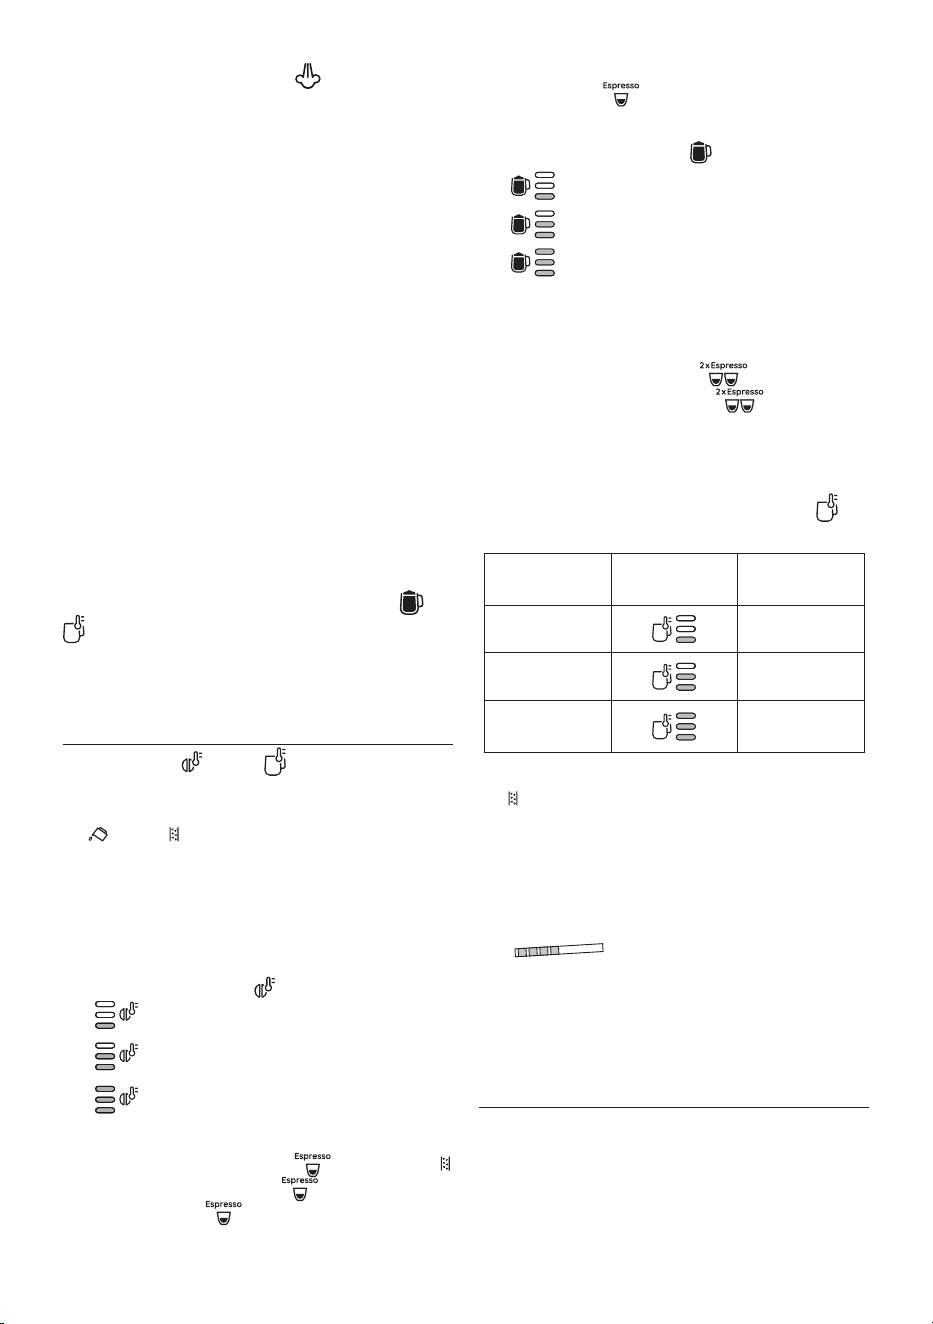
5.5 Water hardness
To set one of the 3 water hardness levels, press the (B4)
button:
Water Hardness
Test Result
Corresponding
indicator light
Level
n
1
soft water
nn
2
medium water
nnn
nnnn
(default)
3
hard or very hard water
5.6 Measuring water hardness
The (B3) indicator light comes on following a preset period
of operation that depends on the water hardness setting. The
machine can also be programmed according to the actual hard-
ness of the local water supply, in which case descaling may be
required less frequently.
• Remove the water hardness test indicator paper (A19)
from its pack.
• Fully immerse the paper in a glass of water for one second.
• Remove the paper from the water and shake lightly. After
about a minute, 1, 2, 3, or 4 red squares form, depending
on the hardness of the water.
6. CLEANING
Important: Before servicing or cleaning the appliance, turn it
o, unplug it from the mains socket and allow it to cool.
Do not use solvents, abrasive detergents, or alcohol to clean
the coee machine. Do not use metal objects to remove en-
crustations or coee deposits as they could scratch the metal or
plastic surfaces. The drip tray, milk jug and small cup tray, are
Loading ...
Loading ...
Loading ...