Loading ...
Loading ...
Loading ...
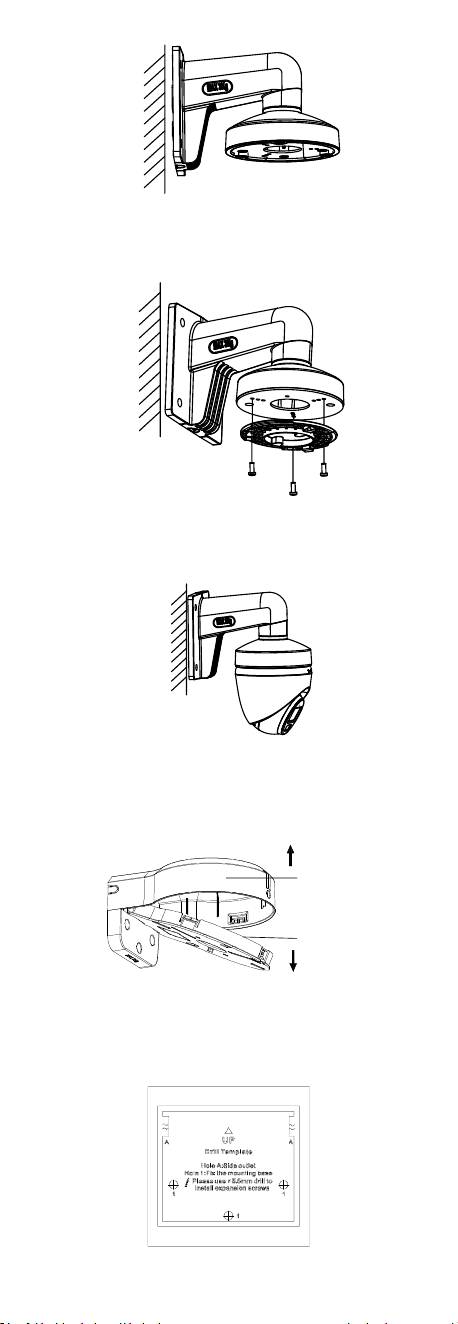
Figure 2-61 Fix Wall Mount
3. Use three PM4 × 10 screws to fix the gang box onto
the wall mount.
Figure 2-62 Fix Gang Box
4. Repeat the step 4 to 7 of 2.5.1 Ceiling/Wall Mounting
to adjust the angle and finish the installation.
Figure 2-63 Finish Installation
Type I Wall Mount
1. Take apart the wall mount.
Main Body
Cover
Figure 2-64 Take Apart Wall Mount
2. Paste the drill template (supplied) to the place where
you want to install the camera.
3. Drill the screw holes with a 5.5 mm drill and insert the
supplied wall plugs.
Figure 2-65 Drill Template for Wall Mount
Loading ...
Loading ...
Loading ...