Loading ...
Loading ...
Loading ...

Sarix Professional 4 Dome Camera Installation Manual
C6725M | 11/22
14
Surface Mount Installation
Required Tools and Materials
Thefollowingtoolsarerequiredtocompletetheinstallationbutarenotincludedinthepackage:
l
No.2Phillipsscrewdriver—forattachingcameratoanelectricalboxormountingsurface.
Camera Package Contents
Ensurethepackagecontainsthefollowing:
l
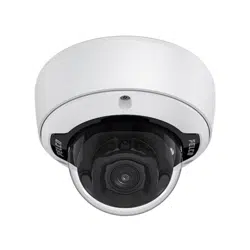
PelcoSarixProfessional4DomeCamera(Indoormodels)
o
Mountingtemplatesticker
o
4screwsandanchorsforsolidwalls
o
Surfacemountadapter
o
Cableentrygrommet
o
Sideconduitcover
o
T20Pin-Instar-shapeddriver
l
PelcoSarixProfessional4DomeCamera(Environmentalmodels)
o
Mountingtemplatesticker
o
4screwsandanchorsforsolidwalls
o
Surfacemountadapter
o
Sideconduitcover
o
1/2"Sideconduitplate
o
Conduitgrommet
o
Cableentrygrommet
o
T20Pin-Instar-shapeddriver
Installation Steps
Using the Surface Mount Adapter
Thedomecameraisprovidedwithasurfacemountadapterthatcanbemountedtoawall,ceilingor
electricalbox.
Ifthedomecameraneedstobeinstalledinadifferentway,useoneoftheothermountingadapter
optionsandrefertotheirsectionsinthismanualformoreinformation.
l
In-ceilingmountingadapter(SLSPCIL-1001).Formoreinformation,seeIn-Ceiling Mount
Installation.
l
PendantNPTmountingadapter(SRXP4-PM-1E).Formoreinformation,seePendant Mount
Installation.
o
Pendantwallmountingadapter(WMVE-AW)—mustbeusedwithNPTmountingadapter.
Mounting the Dome Camera Using the Bottom Cable Entry
Performthefollowingstepsiftherequiredcableswillbecomingfrominsidethemountingsurfaceandthe
camerawillbemountedimmediatelyoverthecablehole.Usethisprocedureonsurfacesthatcanbe
easilydrilledinto,andwhenthecablesshouldbekeptoutofsight.
Loading ...
Loading ...
Loading ...