
Loading ...
Loading ...
Loading ...
7
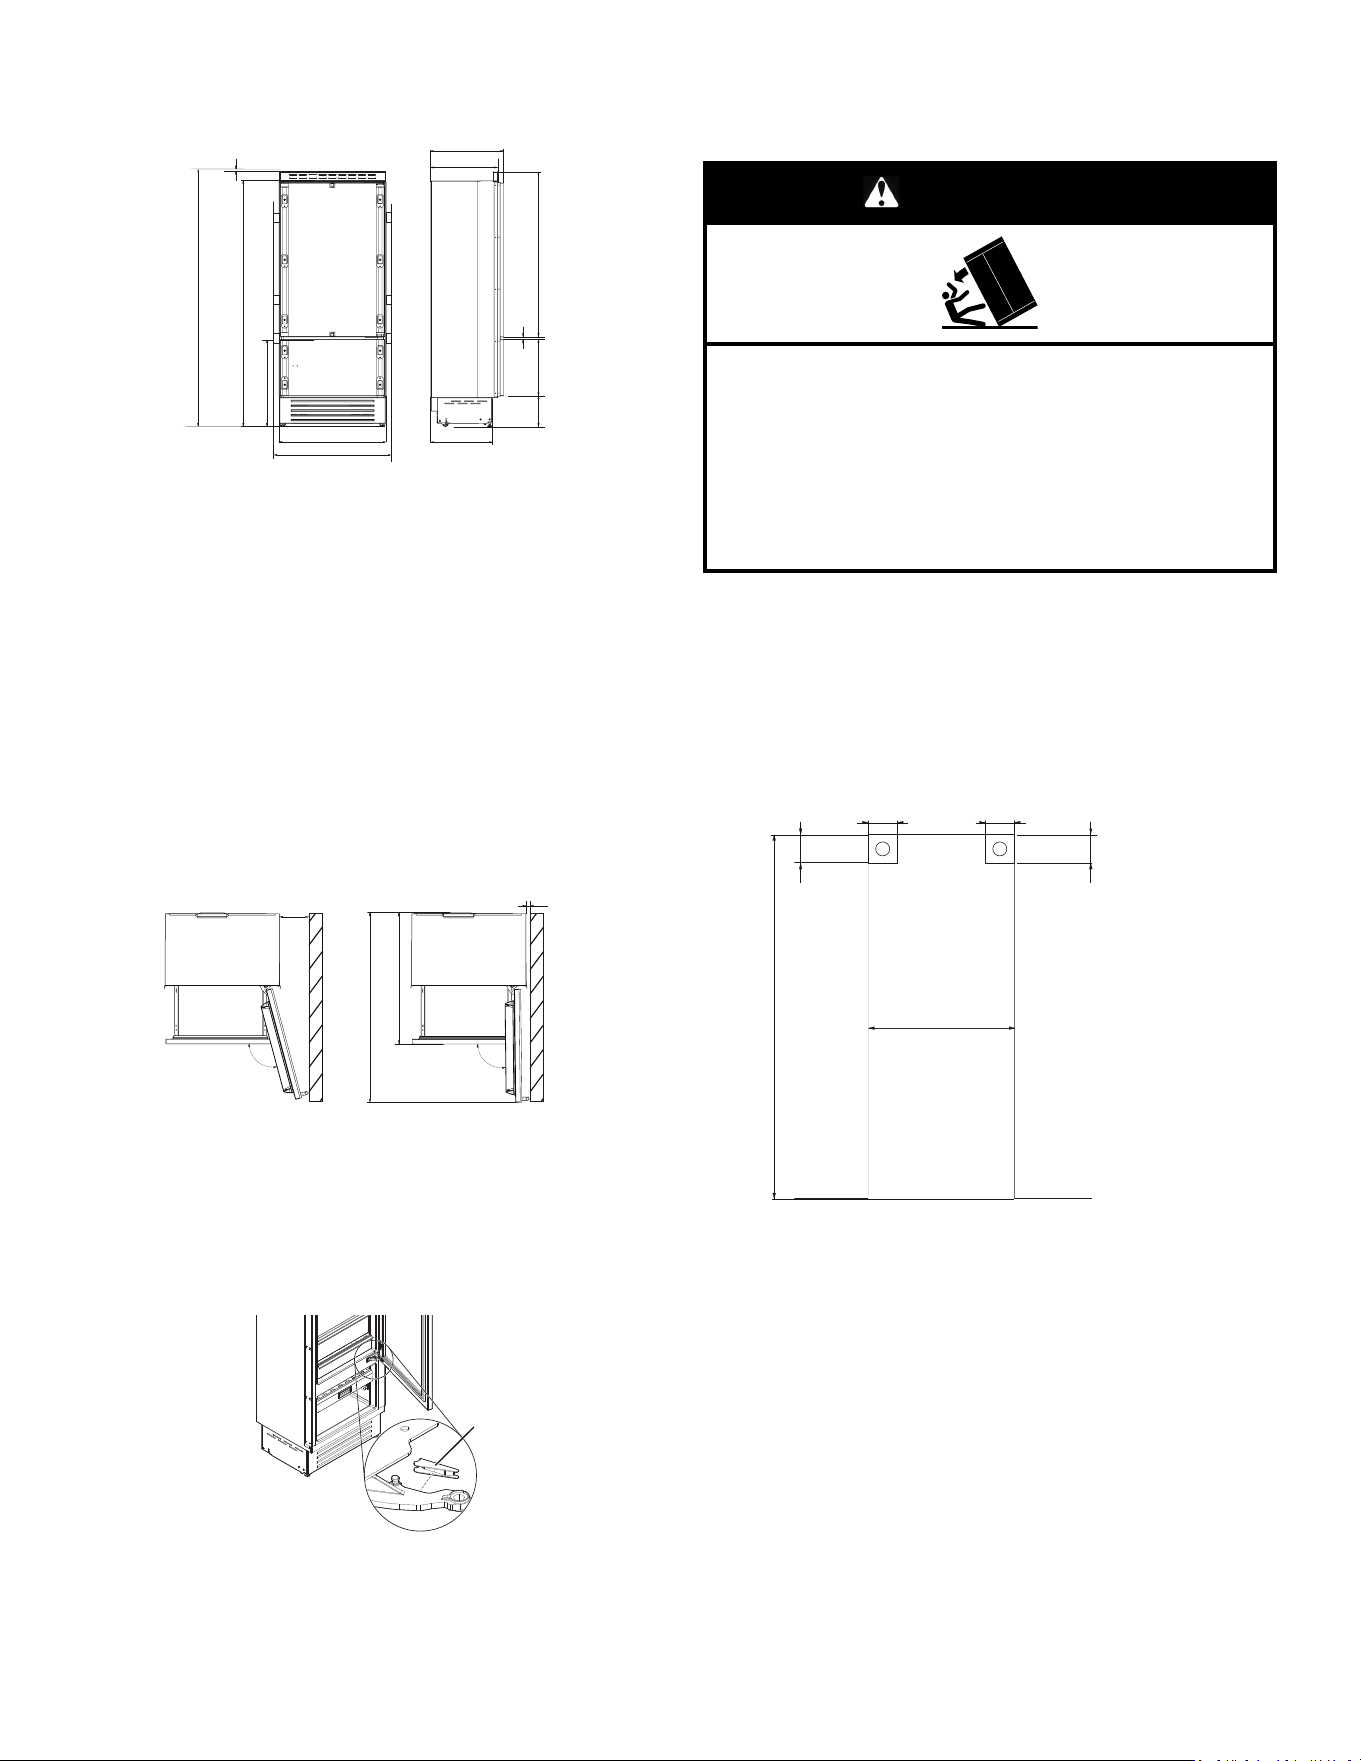
Product Dimensions
A
M
B
C
D
L
E
F
G
H
I
J
K
A. 84" (2134 mm)
B. 81
1
/
4
" (2064 mm)
C. 29
7
/
16
" (748 mm)
D. 29
1
/
2
" (749 mm)
E. 29
15
/
16
" (761 mm)
F. 19
11
/
16
" (500 mm)
G. 4
1
/
16
" (103 mm)
H. 25
3
/
8
" (645 mm)
I. 1/4" (6 mm)
J. 54
3
/
16
" (1377 mm)
K. 24" (610 mm)
L. 24
3
/
4
" (628 mm)
M. 1/8" (3 mm)
Door Swing Dimensions
The location must permit door to open to a minimum of 90°. Allow
1/4" (15 mm) minimum space between the side of the refrigerator
and a corner wall.
NOTE: More clearance may be required if you are using wood
overlay panels, custom handles, or extended handles.
F
A
B E
C
D
A. 7
1
/
4
" (185 mm)
B. 105°
C. 52
9
/
16
" (1335 mm)
D. 39" (992 mm)
E. 90°
F. 1/4" (15 mm)
There is the possibility to limit the opening of the door to 90° by
fitting a stopper on the lower hinge.
NOTE: Door Stopper is provided in the accessory bag.
A
A. Door Stopper
Site Preparation
Anti-Tip Brackets
WARNING
Tip Over Hazard
Refrigerator is top heavy and tips easily when not
completely installed.
Keep doors taped closed until refrigerator is completely
installed.
Use two or more people to move and install refrigerator.
Failure to do so can result in death or serious injury.
IMPORTANT:
� For all applications the refrigerator must be braced with the
anti-tip brackets supplied.
� It is recommended that anti-tip brackets should be attached to
the refrigerator before the refrigerator is installed but can be
installed after the refrigerator is in the installation location.
To install anti-tip brackets:
1. Area above refrigerator must be clear to attach the anti-tip
brackets and identify the stud location within this area A.
A. Area to be left clear to install Anti-tip brackets
B. 3" (76 mm)
C. 4" (100 mm)
D. 84" (2134 mm) minimum
E. 30" (762 mm)
The minimum gap between the panels and cavity should be
1/16" (1 mm).
2. Anti-tip brackets should be secured by using screws in the
wooden frame or concrete when possible. Securing anti-tip
brackets to the wall using just expansion plugs should be
supplemented with anti-tip boards.
A
A
E
B
B
D
C
C
Loading ...
Loading ...
Loading ...