
Loading ...
Loading ...
Loading ...
17
NOTE: Do not overtighten. Do not use impact driver.
B
A
C
E
D
L
F
G
H
J
K
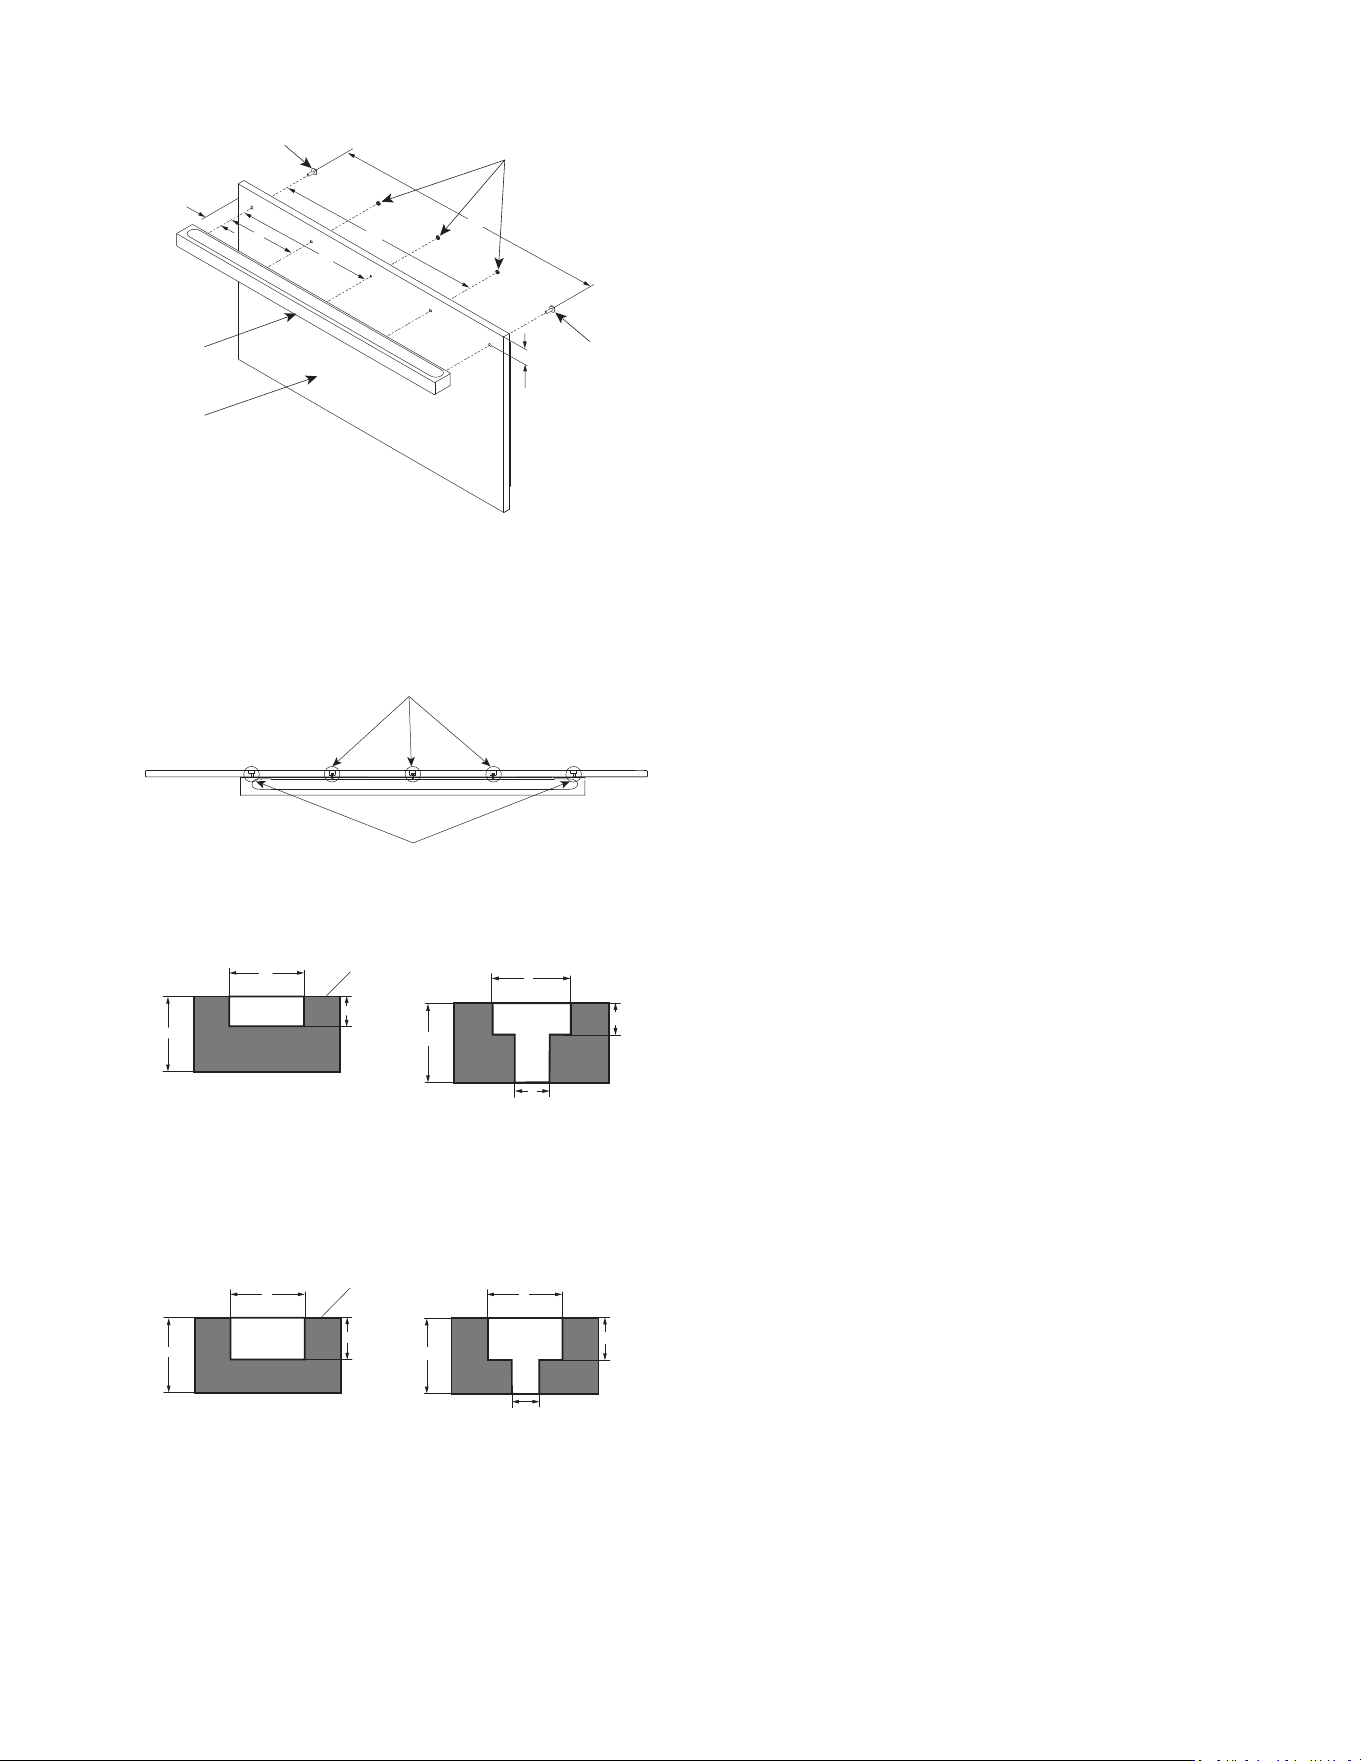
Figure 3 - Freezer drawer
A. NOIR handle
B. Door panel
C. 1/4-20 X 0.791" Screw (1)
D. #8-32 X 0.124" Hex nut (3)
E. 1/4-20 X 0.791" Screw (1)
F. 1
5
/
8
" (41 mm)
G. 7
11
/
16
" (170 mm)
H. 13
3
/
8
" (340 mm)
I. 20
1
/
8
" (511 mm)
J. 26
16
/
16
" (681 mm)
K. 2" (51 mm)
B
A
Figure 4 - Cross sectional view
A. 3X refer detail 'Y' B. 2X refer detail 'X'
Detail ‘X’
A
B
C
D
A
B
D
C
Step ‘2’ Step ‘3’
A. Backside of panel
B. 3/4" (19.05 mm)
C. 3/4" (19.05 mm)
D. 1/4" (7 mm)
A. 3/4" (19.05 mm)
B. 3/4" (19.05 mm)
C. 5/16" (8.3 mm)
D. 1/4" (7 mm)
Detail ‘Y’
C
A
B
D
A
B
C
D
Step ‘4’ Step ‘5’
A. Backside of panel
B. 3/4" (19.05 mm)
C. 3/4" (19.05 mm)
D. 7/16" (11.2 mm)
A. 3/4" (19.05 mm)
B. 3/4" (19.05 mm)
C. 1/4" (6.2 mm)
D. 7/16" (11.2 mm)
RISE™ Style Door Handle
BEFORE YOU BEGIN: The handle and handle mounting
hardware must be installed before installing the custom wood
panel. A qualified cabinet maker must perform the installation.
IMPORTANT:
� This kit is designed to be used only with custom wood
panels with thickness of 3/4" (18 mm) to 1
1
/
8
" (28 mm).
� To avoid handle damage, lift the door and drawer panel(s)
by the edges.
TOOLS NEEDED: Gather the required tools and parts before
starting installation. Read and follow the instructions provided
with any tools listed here.
� Tape measure
� Pencil
� Cordless drill
� 1/4" Drill bit
� 11/32" Drill bit
� 3/4" forstner bit
� Torx T30
✝
bit
� 11/32" socket driver
� Torque Wrench
PARTS SUPPLIED WITH HANDLE:
� Handle - freezer drawer
� Screws - 1/4-20 x 1.5"
� Handle - refrigerator
door
*
Install the Refrigerator Handle(s)
IMPORTANT:
� Verify panel dimensions before drilling any holes.
� For hole locations and the spacing requirements of RISE™
handle mounting, refer Figure 1.
NOTE: Figure 5 represents a Side by Side (left) freezer panel,
a French door (left) refrigerator panel, a bottom mount left
swing refrigerator panel, and column refrigerator/freezer panel.
Mirror the hole pattern on the opposite door panel as required.
1. Clearance is required for the handle fasteners on the
backside of the panel. Flip the panel over to reveal the
backside of the panel. Using a 3/4" forstner bit, drill a 1/4"
(7 mm) deep counterbore at the top and bottom hole
locations as shown in Figure 6 - Detail X.
2. Drill a 5/16" (8.3 mm) hole at the top and bottom locations
shown in Figure 6 - Detail X.
NOTE: Confirm hole depth by temporarily placing fastener
into the hole.
3. Place the handle on the front of the panel. Using Torx T30
screwdriver, secure the handle to panel by tightening the
two 1/4" screws on handle ends. Recommended screw
torque is 28 lb/in.
NOTE: Do not overtighten. Do not use impact driver.
4. If you have two refrigerator doors or a side-by-side doors,
repeat steps 1 through 3 to install the other handle.
✝TORX and T30 are trademarks of Acument Intellectual Properties, LLC.
*Numbers may vary depending on refrigerator model and handle type.
Loading ...
Loading ...
Loading ...