
Loading ...
Loading ...
Loading ...
6
To replace ice tray:
1. Pull out the upper drawer.
2. Align the ice tray with locking panels and place it.
Refrigerator Shelves
Important information to know about glass shelves and
covers:
Do not clean glass shelves or covers with warm water when they
are cold. Shelves and covers may break if exposed to sudden
temperature changes or impact, such as bumping. Tempered
glass is designed to shatter into many small, pebble-size pieces.
This is normal. Glass shelves and covers are heavy. Use both
hands when removing them to avoid dropping.
The glass shelves in your refrigerator are adjustable to match your
individual storage needs.
Storing similar food items together in your refrigerator and
adjusting the shelves to fit different heights of items will make
finding the exact item you want easier. It will also reduce the
amount of time the refrigerator door is open, and save energy.
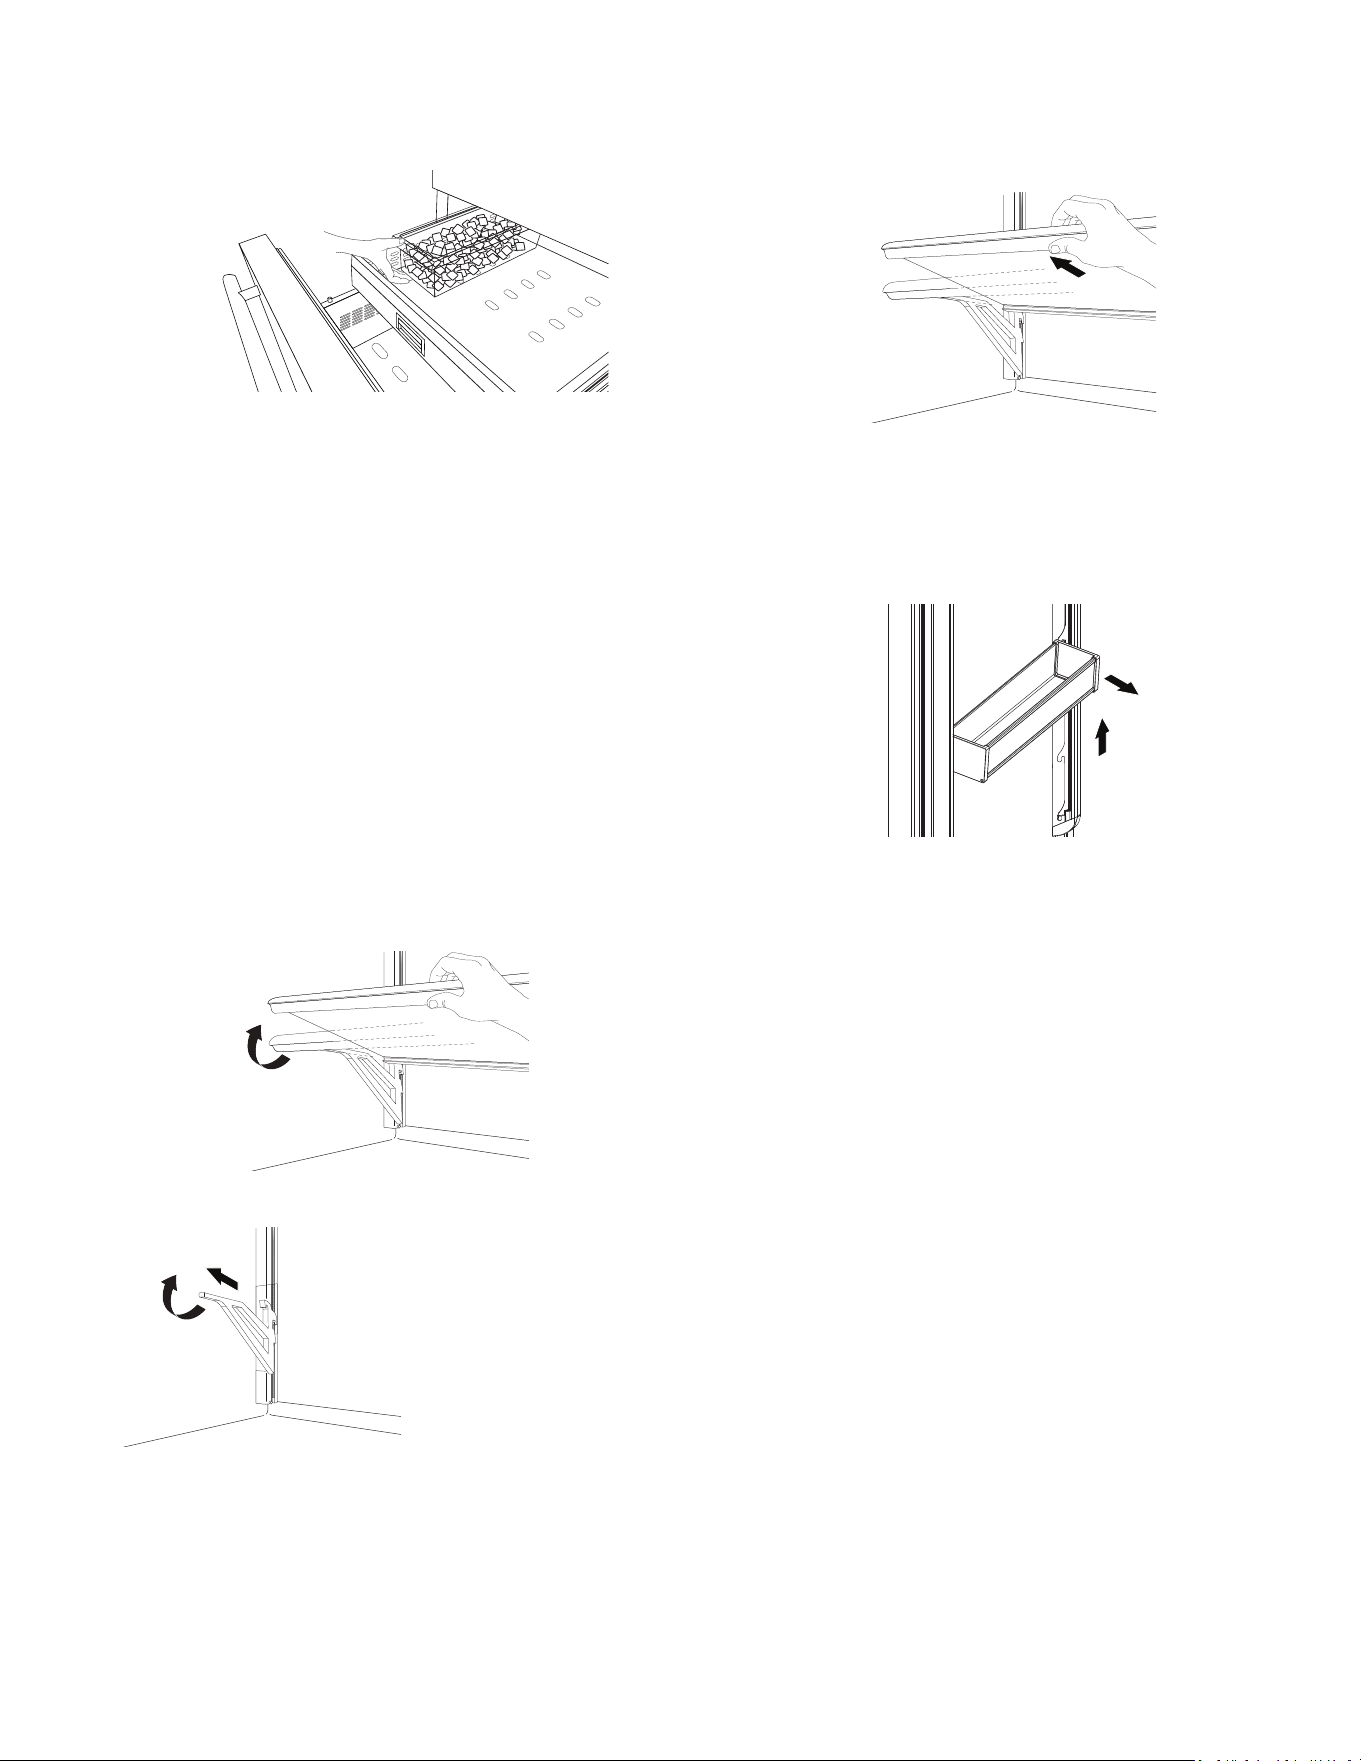
Shelves
To remove a shelf:
1. Remove items from the shelf.
2. Hold the glass shelf with both hands, lift and tilt glass shelf to
release it from the joint in rear part.
3. Remove the glass shelf.
4. To adjust the glass shelves height, tilt the support bracket
upward and pull out the bracket on both sides.
5. Place the support bracket at required height, slide in the
support brackets on both sides. Make sure support brackets
are placed at same height.
To replace a shelf:
1. Place the glass shelf in the joint of the rear part.
2. Lower the front of the glass shelf and make sure that the shelf
is in position.
Door Bins
To remove door bins:
1. Remove the screws and end caps from the top of the door bin
support rails.
2. Hold the door bin from the sides and tilt it a bit for sliding.
3. Push the door bin up to come out of position then pull out.
To replace door bins:
1. Hold the door bin at the sides.
2. Push the door bin in and then down to fit at required position.
3. Reinstall the screws and caps on door bin support rails.
INSTALLATION REQUIREMENTS
Tools and Parts
IMPORTANT:
� Installer: Leave Installation Instructions with the homeowner.
� Homeowner: Keep Installation Instructions for future
reference. Save these Installation Instructions for the local
electrical inspector’s use.
Tools Needed:
Gather the required tools and parts before starting installation.
Read and follow the instructions provided with any tools listed
here.
� Level
� 3/16" (4 mm) Allen Wrench
� Phillips Head Screwdriver
� Wood Drill
� 1/8" (2.5 mm) bit for Wood
� 5/16" (8 mm) bit for Walls
� 11/16" (17 mm) Wrench
� 3/4" (19 mm) Wrench
� 2.5 mm Allen Wrench for
Handle Set Screws (if
applicable)
� Appliance Dolly
� Step Ladder
Accessories:
� Cleaning Kit
� Anti-tip Kit
� Water Filter Kit
� Spacer Plastic Brackets
� Lateral Connection Kit
� 90° Stopper
Loading ...
Loading ...
Loading ...