Loading ...
Loading ...
Loading ...

2
⚫ Connecting to the Network
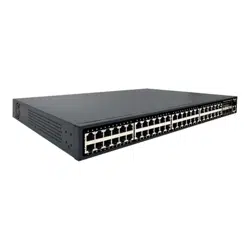
To connect the switch to the network:
1. Connect an Ethernet cable to the Ethernet port of a computer.
2. Connect the other end of the Ethernet cable to one of the numbered
Ethernet ports of the switch. The LED of the port lights if the device
connected is active.
3. Repeat Step 1 and Step 2 for each device to connect to the switch.
We strongly recommend using CAT-5E or better cable to connect
network devices. When connecting network devices, do not exceed
the maximum cabling distance of 100 meters (330 feet). It can take up
to one minute for attached devices or the LAN to be operational after it
is connected. This is normal behavior.
Connect the switch to end nodes using a standard Cat 5/5e Ethernet cable
(UTP/STP) to connect the switch to end nodes as shown in the illustration
below.
Switch ports will automatically adjust to the characteristics (MDI/MDI-X, speed,
duplex) of the device to which the switch is connected.
⚫ Starting the Web-based Configuration Utility
This section describes how to navigate the web-based switch configuration
utility. Be sure to disable any pop-up blocker.
Browser Restrictions
• If you are using older versions of Internet Explorer, you cannot directly use
an IPv6 address to access the device. You can, however, use the DNS
(Domain Name System) server to create a domain name that contains the
IPv6 address, and then use that domain name in the address bar in place
of the IPv6 address.
• If you have multiple IPv6 interfaces on your management station, use the
IPv6 global address instead of the IPv6 link local address to access the
device from your browser.
Launching the Configuration Utility
To open the web-based configuration utility:
1. Open a Web browser.
Loading ...
Loading ...
Loading ...