Loading ...
Loading ...
Loading ...

9
5.4 INSTRUCTIONS FOR THE INSTALLATION (CONT'D)
Cut out all the rectangular holes in the locations where you intend to install
rectangular registers. All 6” x 10” registers require 6” x 9¾” holes and all 4” x 10”
registers require 4” x 9¾” holes.
Install the rectangular registers in the correct locations and attach the
corresponding flexible duct to these registers. (Attention, if you have “extra
registers”, they are not connected to any ducts! See illustration at right.)
Cut out the two exterior openings. These holes should measure 4¼” diameter.
Basement openings are cut in the end-joists, whereas attic openings are cut in
the soffit.
Install the exterior ports and attach the corresponding flexible duct: If in the
basement, connect the insulated duct to the intake port and, if in the
attic, connect the insulated duct to the exhaust port. Use silicone sealer to
waterproof the openings if installed in the basement.
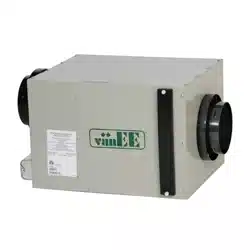
Installation of the unit. Attach the 4 hooks to the 4 corners of the unit. Using
4 screws attach the 4 chains to the ceiling joists. Put the springs on the chains.
The springs stop the vibrations from the unit being transmitted to the structure of
your house. Suspend the unit using the chains and hooks.
On PRO 200 unit only, install the white ring. Install it in the unit’s fresh air from
outside port. This ring controls the flow of fresh air. Remove the ring only if you
make frequent use of a wood-burning stove.
CAUTION
Make sure the unit is level.
5. INSTALLATION OF THE SYSTEM (CONT'D)
3
4
5
6.1
VO0016
6.1
5
3
On PRO 100, 41000 and 1601510 units only, check the stale air to outside (A) and fresh air from outside (B) ports. Those
both ports are equipped with special dampers; according to the unit installation position (normal or reversed), set these dampers as
follows:
Stale air to outside port damper: The small hole (1) must always be on the upper side of the damper.
Fresh air from outside port damper: The weight (2) must always be on the lower side of the damper.
NOTE: To set the port damper position, simply rotate the port until the right position as been reached.
6.2
VJ0044
A
1
2
A
B
B
1
2
Unit on normal position Unit on reversed position
Loading ...
Loading ...
Loading ...