Loading ...
Loading ...
Loading ...
8
5. INSTALLATION OF THE SYSTEM (CONT'D)
5.3 SUGGESTED TOOLS
1
2
VQ0014
VQ0015
Robertson or a Phillips screwdriver no. 1
Robertson or a Phillips screwdriver no. 2
Flat tip screwdriver
Cutting pliers
Electric drill
Jig saw or hand or electric compass saw
Caulking gun and tube of silicone sealant
Adhesive duct tape roll
Metal shears (if the exterior covering of your house is
aluminum or plastic)
Chisel and hammer (if th exterior covering of your house
is brick)
5.4 INSTRUCTIONS FOR THE INSTALLATION
Once you have decided on the best location for all the components and for all the various openings that will have to be cut out, and the
necessary tools have been procured, then you are ready to commence the actual installation of your system. To facilitate the installation
we strongly recommend that you follow the detailed steps below:
You will find, on pages 11 and 12, two large drawings which illustrate the different types of installation. Determine which one
corresponds to your particular situation and encircle the drawing for easy future reference.
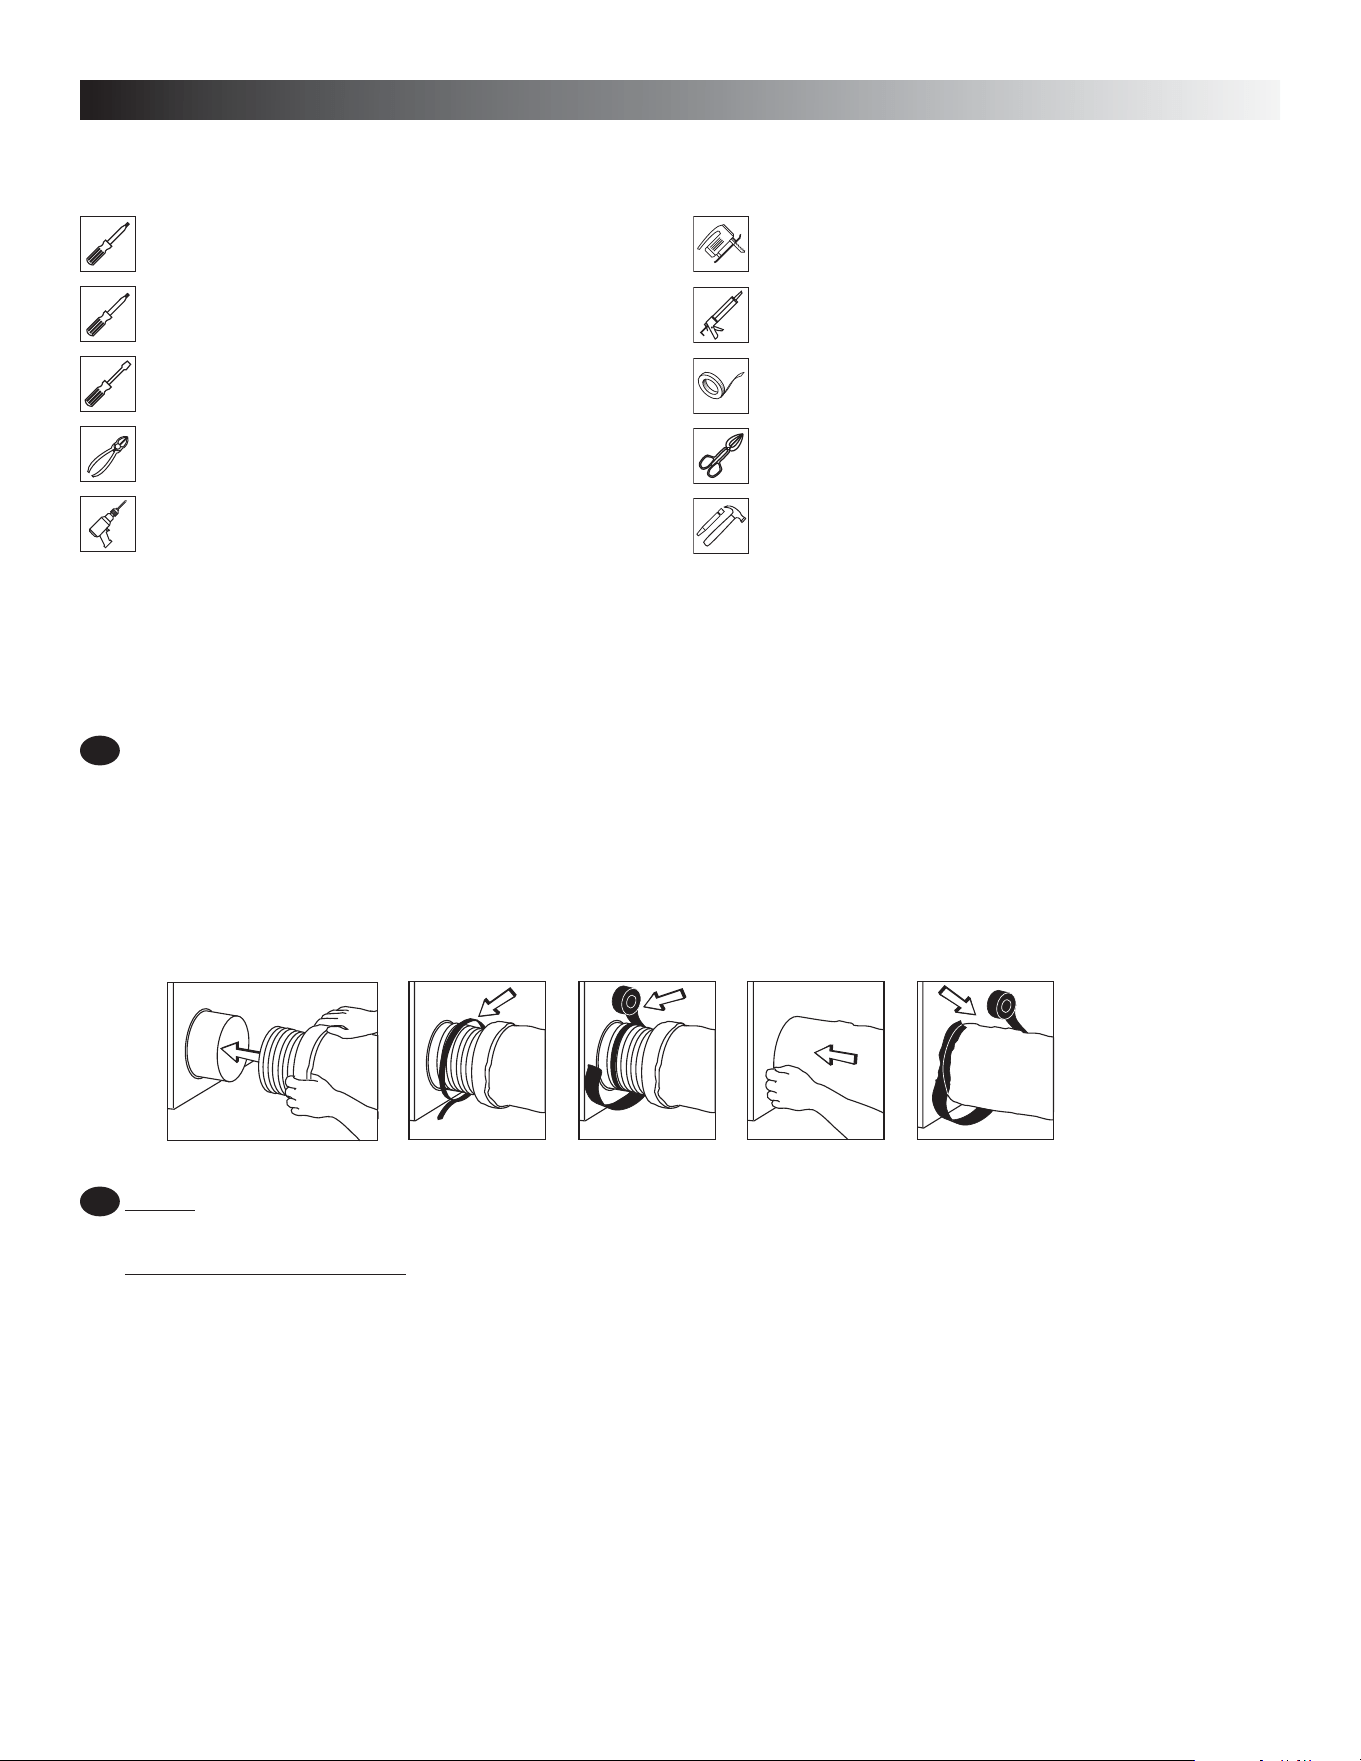
You should follow the procedure below to “connect” an insulated flexible duct to its corresponding opening:
a) Connect the interior flexible duct to the hole using screws and/or a duct tie.
b) Carefully seal the connection with duct tape.
c) Pull the insulation over the joint.
d) Once more apply duct tape to the joint making an airtight seal. Avoid pulling the tape too tight around the duct, as this will
compress the insulation making it loose its efficiency.
Cut out all the round holes that will permit the flexible duct to pass through walls, floors and ceilings, as well as the holes where you
intend to install all round registers (diffusers). A 6” duct requires a 6¼” hole and an 8” duct requires an 8¼” hole.
Installation of round registers (included in your kit, if need be):
a) Connect the duct to the plastic support provided (6” ring-pipe assembly).
b) Screw the plastic support into the ceiling.
c) Screw the register onto the plastic support.
1
2
VJ0010
a) a) b) c) d)
Loading ...
Loading ...
Loading ...