Loading ...
Loading ...
Loading ...

27
USING THE GRILL
EN
IMPORTANT!
Never place food over a sear burner before it is fully pre-heated. Food particles and grease dripping
onto a cold sear burner can cause damage.
Searing hints
Your sear burner can be used to achieve perfect sear lines or surface browning on your food
before moving it to a low heat to finish the cooking process. The sear burner is ideal for the sear
part of the reverse sear cooking method as it provides optimal conditions for direct searing.
Due to intense heat produced by the sear burner, we recommend keeping a close eye on your
food & turning it constantly for optimal searing.
Do not allow the sear burner to get wet
Failure to keep the sear burner dry may result in product damage or poor performance. If the burner
does get wet, allow it to dry completely before use. The sear burner is not dishwasher safe.
1 Remove the sear burner (refer to page 36)
2 Rest the burner upside down to allow the water to drain.
3 Let the burner dry before reinstalling into the grill (refer to page 36)
If the burner flares up or does not turn red during the pre-heat process, the burner may require
replacement.
1 Ensure that the drip pan and grease tray are in place.
The sear burner should be visually checked before
each use.
2 Light the sear burner & the adjacent U Burner following the "LIGHTING INSTRUCTIONS"
3 Once you have verified the sear burner is lit, set to "MAX" for sear burner & "SEAR" for U-burner
and pre-heat for 10 minutes with the hood down. If using LP gas, or if the sear burner area is already
warm, preheating your grill for at least 5 minutes will allow the sear burner area to warm up to searing
temperatures. Ensure the ceramic tiles are uniformly red in appearance before use.
4 Place the food on the grill and cook to the desired doneness. Adjust heat setting, if necessary.
The control knob may be set to any position between “MAX” and “LOW".
Some food particles will show as
yellow flames but should burn off.
5 When you have finished using the sear burner, turn the control knob to "OFF" and shut off the main
gas supply.
6 Allow the grill to cool and clean the grates, drip pan and grease tray after each use.
Sear burner grate
The sear burner grate should be used directly over the sear burner. This grate
has be designed to provide clean sear lines and optimal heat distribution.
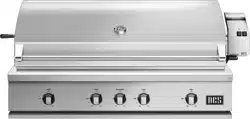
Using the Sear burner (some models only)
Dual-sided grates
The double-sided grates provide varying surfaces for varying textures. The
W-shaped side creates nice sear lines for steaks, chicken and chops and routes
oil and grease away from the food. The opposite radius side offers more surface
area for support and handling of delicate items like scallops. See below for a
sample list of which foods to cook on which side of the grate. The dual-sided
grates are not to be used over the sear burner.
Loading ...
Loading ...
Loading ...