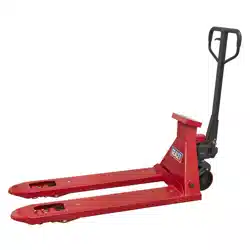
PALLET TRUCK WITH SCALES - 2000KG CAPACITY
1150 X 555MM
MODEL NO: PT1150SC.V4
Thank you for purchasing a Sealey product. Manufactured to a high standard, this product will, if used according to these instructions,
and properly maintained, give you years of trouble free performance.
IMPORTANT: PLEASE READ THESE INSTRUCTIONS CAREFULLY. NOTE THE SAFE OPERATIONAL REQUIREMENTS, WARNINGS & CAUTIONS. USE
THE PRODUCT CORRECTLY AND WITH CARE FOR THE PURPOSE FOR WHICH IT IS INTENDED. FAILURE TO DO SO MAY CAUSE DAMAGE AND/OR
PERSONAL INJURY AND WILL INVALIDATE THE WARRANTY. KEEP THESE INSTRUCTIONS SAFE FOR FUTURE USE.
1. SAFETY
8 DO NOT use a faulty or damaged truck.
8 DO NOT adapt or modify the truck.
9 Before using the truck all parts and working mechanisms should be checked for wear or damage. Pay particular attention to the wheels,
handle and fork lifting and lowering mechanism. Any parts found to be worn, damaged or suspect should be repaired or replaced before
the truck is used. All repairs must be carried out by an authorised Sealey service agent.
9 Personnel who operate the truck and those in the vicinity of operation should wear safety shoes with reinforced toe caps at all times.
8 DO NOT place any part of your body in the lifting mechanism or under the forks or load.
8 DO NOT allow others to ride on the truck.
8 DO NOT lift or move unstable or loosely stacked loads.
9 Take special care when moving long, high or wide loads in order not to dislodge the load by striking any architectural features, permanent
fixtures, vehicles or people in the area of operation.
9 Always ensure that the load is evenly distributed across the forks with the centre of the load being at the halfway point of the length of
the forks.
8 DO NOT overload the truck - refer to the specification for maximum permitted load.
9 If a load is left unattended even for a very short period of time it should be lowered to the ground.
9 When not in use the truck should be left in the lowered position.
9 Ensure that the width and length of the forks is correct for the pallet to be lifted.
9 Ensure that the truck is sufficiently inserted into the pallet to lift the full width and depth of the pallet.
8 DO NOT use truck on sloping or uneven ground and do not attempt to negotiate curbs, steps or ramps. Only use the truck on level, flat,
and hard surfaces.
9 The operator of the truck must be physically capable of controlling the load selected; particularly in relation to stopping a rolling load.
8 DO NOT use the truck in areas of low lighting (minimum 50 lux or less).
2. INTRODUCTION
Heavy-duty pallet truck suitable for warehouse and general handling duties. Features built-in weighing scales with an accuracy of +/-1kg.
6-Digit, high contrast LCD display. Control panel has a tare function to allow for packaging weight. Scales powered by a built-in 6V/4.5A
rechargeable battery. Supplied with charging level indicator pin charger. This item is heavy. Extra assistance must be provided at the
delivery point to help its safe delivery.
3. SPECIFICATION
Model No: PT1150SC.V4
Battery: 6V/4.5A Lead Battery
Capacity: 2000kg
Display: 6-Digit LCD
Fork Spread: 115mm
Forks (Length x Overall Width): 1150 x 555mm
Maximum Height: 200mm
Minimum Height: 85mm
Wear safety
footwear
Refer to
instruction
manual
PT1150SC.V4 Issue 3 (4) 21/02/24
Original Language Version
© Jack Sealey Limited
4. ASSEMBLY
REFER TO ATTACHED PARTS LIST.
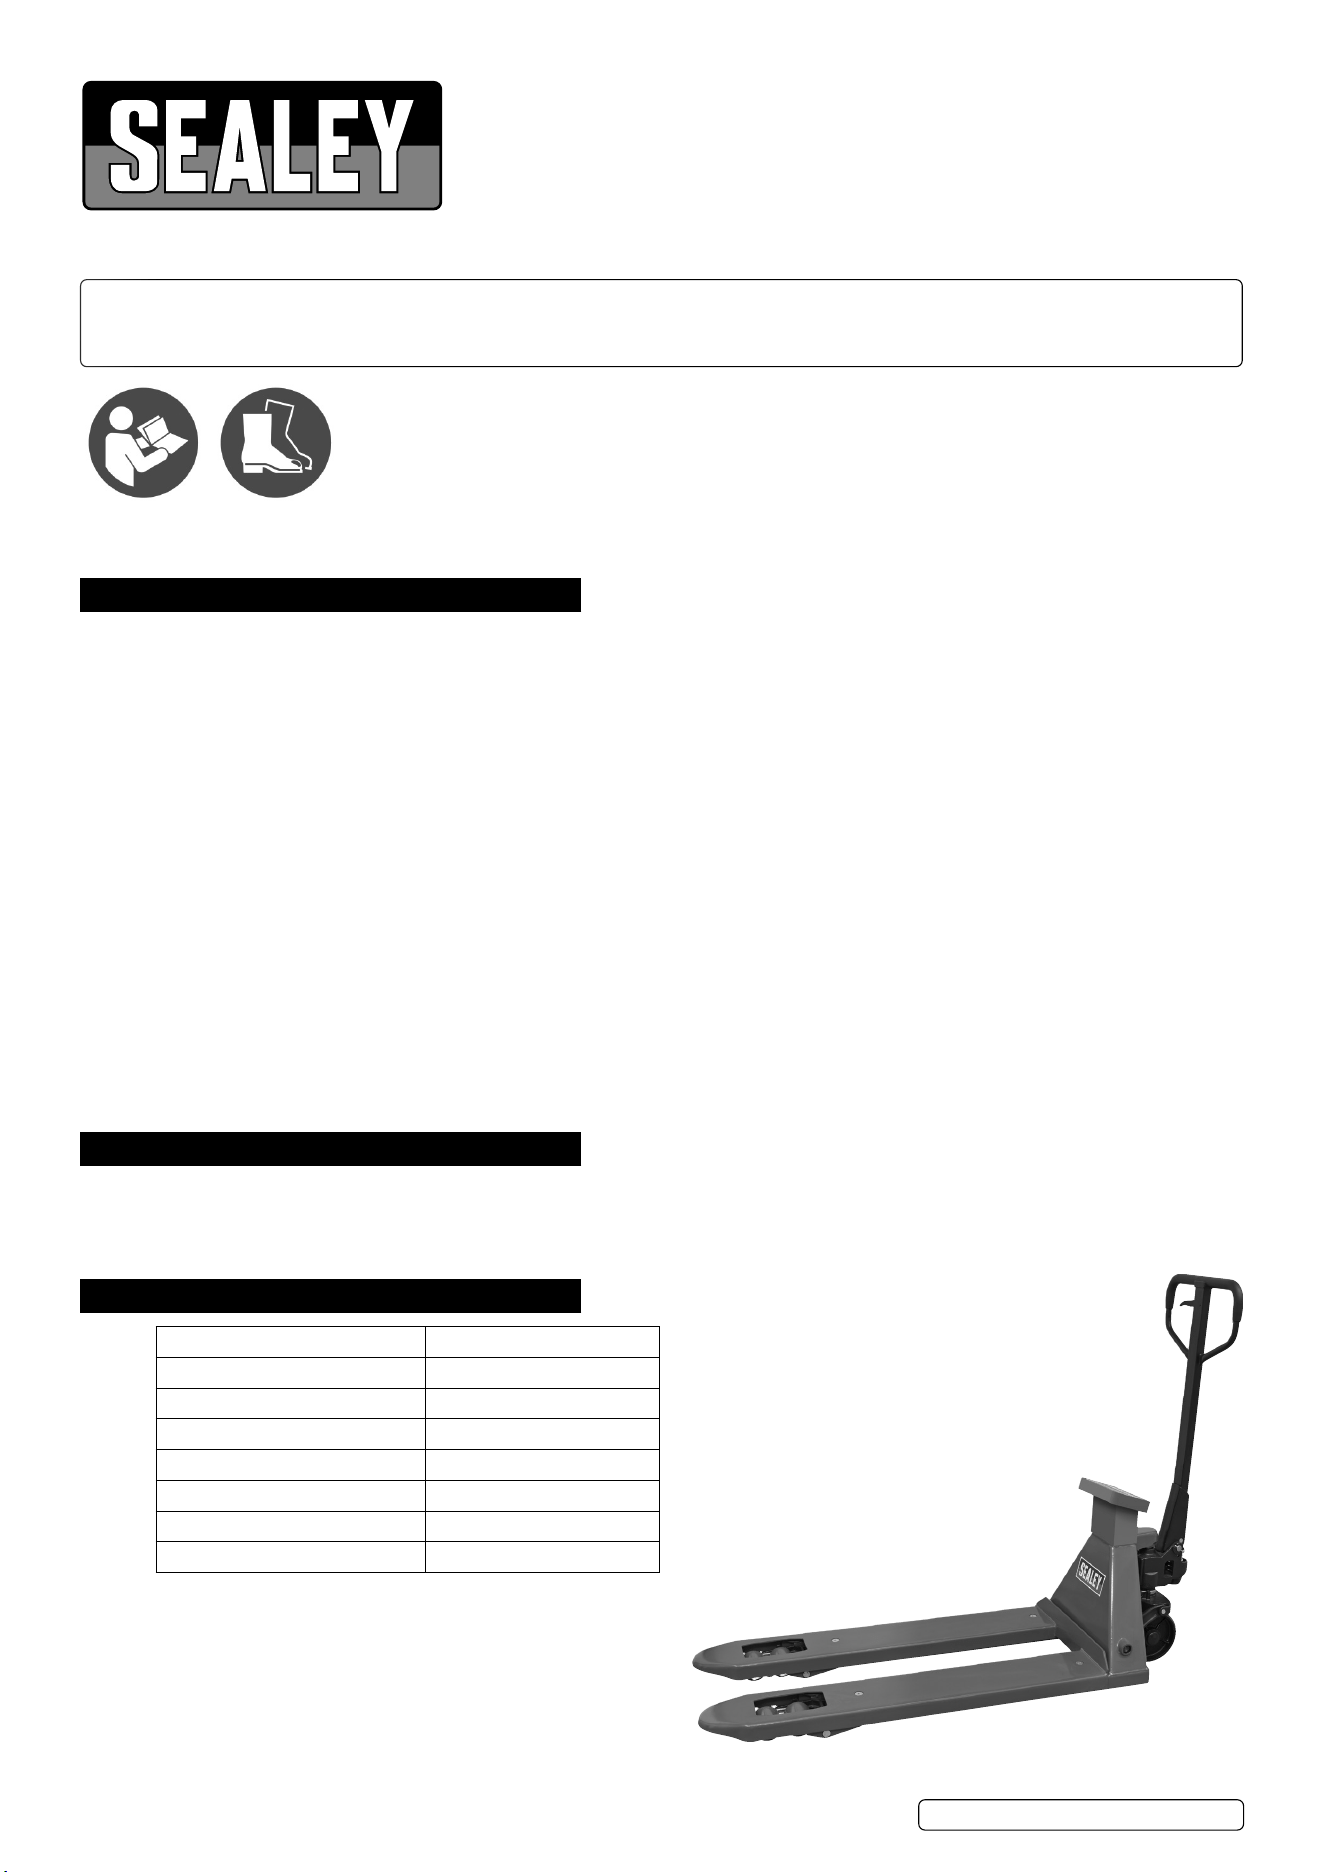
4.1. ATTACHING THE DISPLAY
Feed the cables through the base
assembly.
Attach the display housing with the xings
supplied.
Attach the cables to the display before
securing the display to the housing.
FIG.1 FIG.2
FIG.3
4.2. ATTACHING THE HANDLE
Keep the pin in position until AFTER
assembling the handle.
Secure the handle using the handle axle
and spring pins.
Attach the release rod chain to the
adjusting nut.
FIG.4
FIG.5
FIG.6
5. OPERATION
5.1. DISPLAY FUNCTIONS
FIG.7
ON/OFF
Press to turn on.
Hold to turn off.
Press to switch between kg/lbs.
ZERO/TARE
Press to clear the current reading.
Hold to tare the weight.
PRINT - NOT AVAILABLE ON THIS MODEL
Press to print the result shown on the screen.
Hold to enter time and date setting.
SUM
Press to enter accumulation mode.
Press again to clear before weighing the next item.
Hold to exit accumulation mode.
HOLD
Place goods on the platform.
Hold button to lock the value.
Press to exit.
PT1150SC.V4 Issue 3 (4) 21/02/24
Original Language Version
© Jack Sealey Limited
5.2. CALIBRATING THE SCALES
The scales should be calibrated for accurate readings.
5.2.1. Press the HOLD button for 5 seconds to enter the menu.
5.2.2. Press the SUM button 3 times to switch to ‘04’. This is the calibration mode.
5.2.3. Place the weight on the scales.
NOTE: accurate calibration requires the weight to be between 200kg and 2000kg.
5.2.4. Keep the weight on the scale. Press the HOLD button to enter calibration mode. The screen will ash.
5.2.5. Adjust the value to the same as the weight using the SUM and PRINT buttons to increase/decrease the value accordingly.
5.2.6. Press the HOLD button to conrm and exit the mode. Calibration is now complete.
5.3. RESTORING FACTORY SETTINGS
NOTE: this process will reset the calibration to factory settings. Follow the instructions above to recalibrate.
5.4. Turn on the device and press HOLD for 5 seconds to enter the menu.
5.5. Press the SUM button 2 times to switch to ‘03’.
5.6. Press HOLD to conrm and exit. Factory reset is now complete.
5.7. PRINTING TIME SETTINGS
The time and date can be adjusted by following the steps below:
5.7.1. Hold the PRINT button to enter time settings.
5.7.2. Press the SUM/PRINT buttons to increase/decrease the value.
5.7.3. Press the ZERO button to conrm.
NOTE: the sequence of adjustment is as follows: year; month; day; week; hour; minute; second
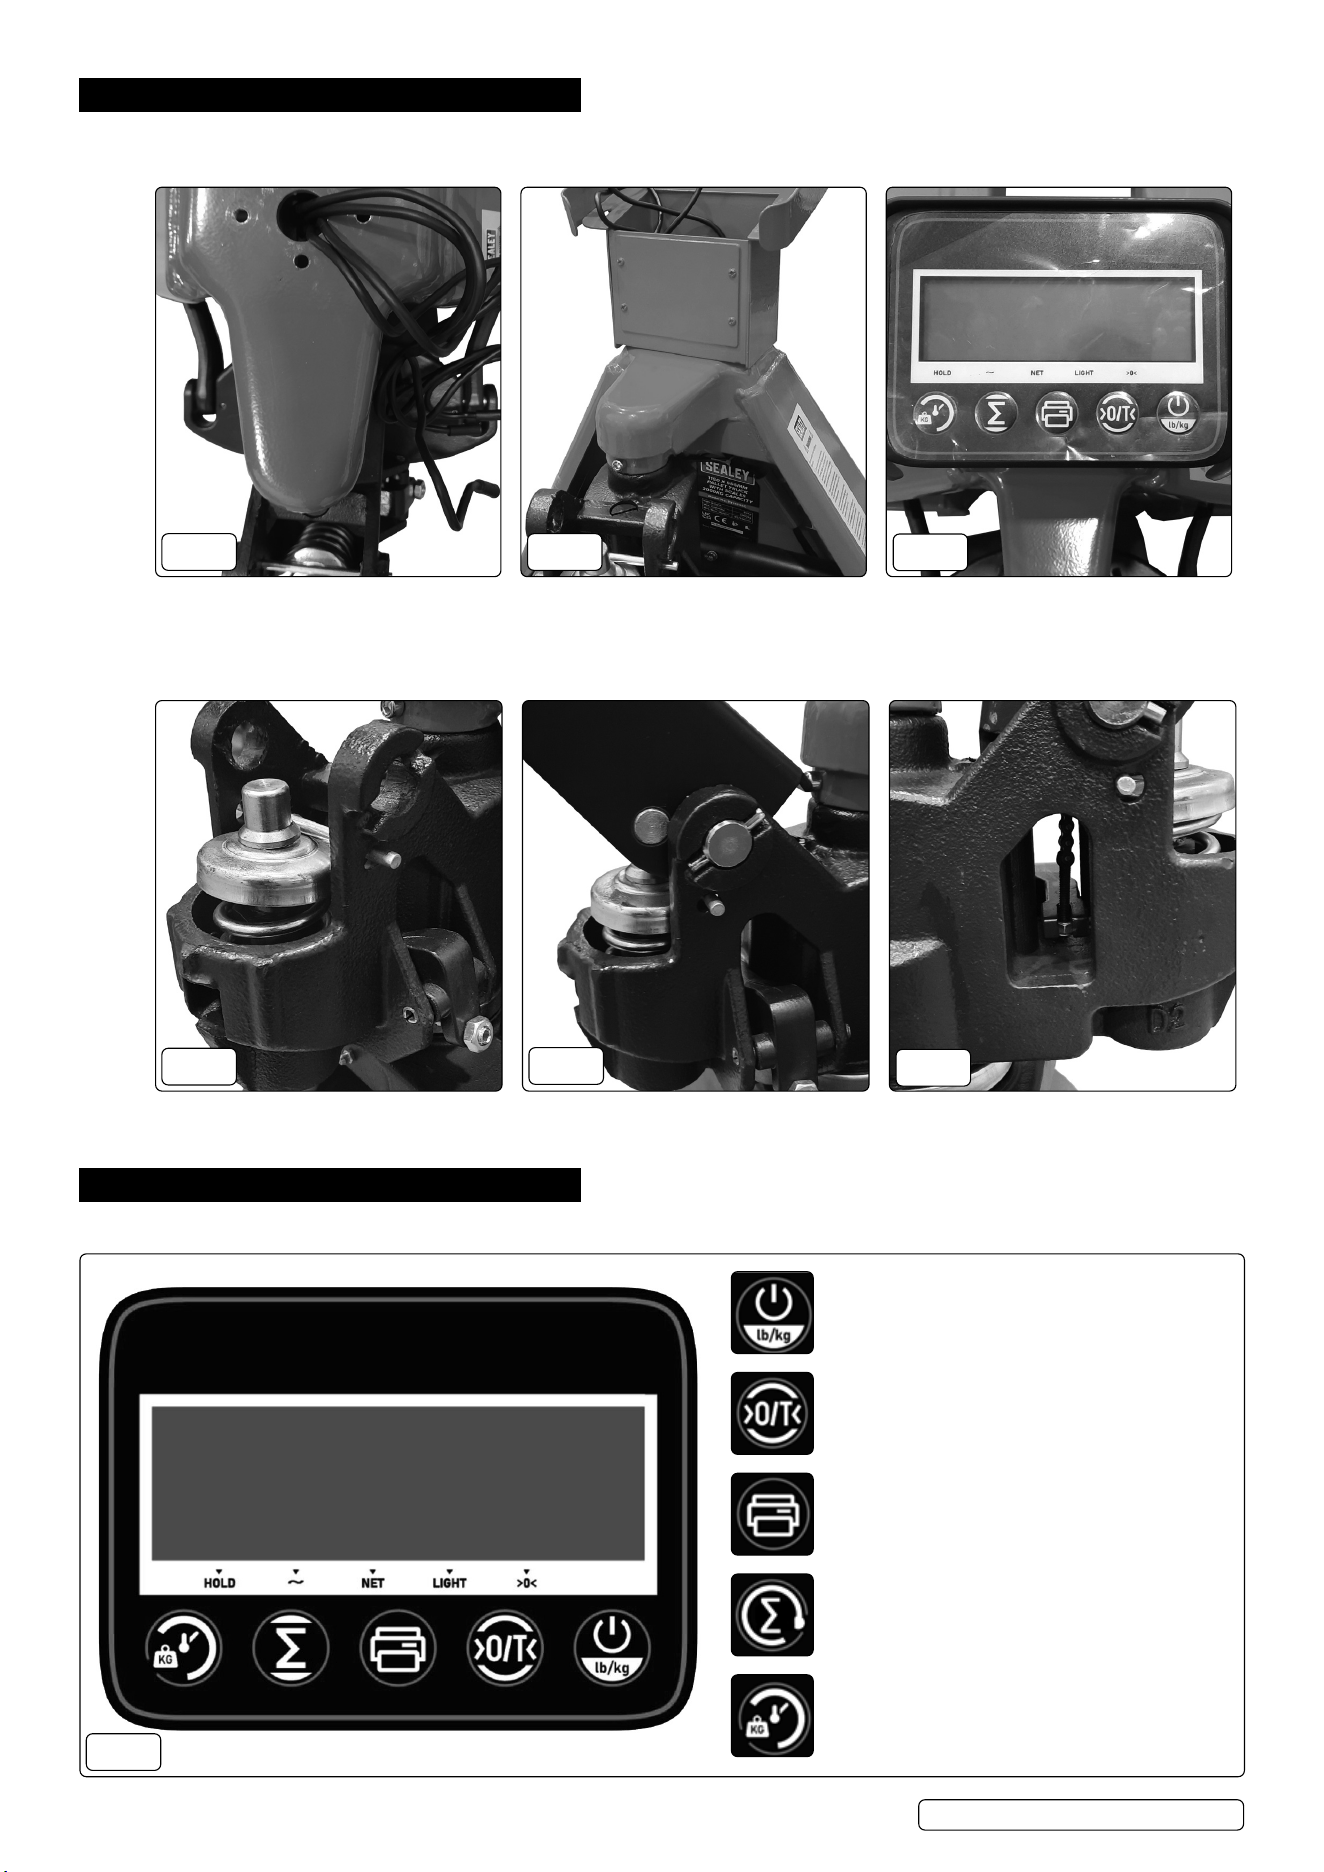
5.8. HANDLE POSITIONS (FIG.8)
LOWER
Hold the control lever up to lower
DRIVE
Keep the control lever in the central position
RAISE
Keep the control lever down and pump the
handle to raise.
FIG.8
FIG.9
5.9. OPERATING THE PALLET TRUCK
WARNING!
An operator must be fully conversant with the safety instructions.
5.9.1. Prior to operating the pallet truck, check the wheels, the operating handle and the fork unit to ensure they are fit for purpose.
5.9.2. Move the truck with the operating handle control lever in the DRIVE position, as this makes the operating handle easier to move and also
depressurises the hydraulic pump. DO NOT overload the pallet truck.
5.9.3. Ensure that the goods being transported are placed on the middle of the pallet truck forks. Refer to fig.9.
5.9.4. If the load is unstable or poorly loaded the warning symbol will show when the truck is moved.
6. MAINTENANCE
6.1. DAILY MAINTENANCE CHECK
6.1.1. Check wheels and axles for foreign objects that can jam the wheels.
6.1.2. Unload the forks and return them to the lowest position after each use.
6.2. OIL CHECK
6.2.1. Check the oil level at six monthly intervals. Sealey hydraulic jack oil is used with the pallet truck. The viscosity of the oil should be 30cSt at
40°C. The amount used in the pallet truck is approximately 0.4 litres.
6.3. LUBRICATION
6.3.1. The bearings and shafts of the pallet truck have long-life grease applied to them during manufacture. The bearings will only require
greasing at monthly intervals.
6.4. PURGING AIR FROM THE HYDRAULICS
6.4.1. Air can get into the hydraulic oil through transportation, or the pump becoming misaligned. As a result, the forks will not elevate.
6.4.2. The air can be purged by setting the control level to the LOWER position and pumping the operating handle up and down for 30 - 40
seconds.
6.4.3. When the pallet truck is not in use, lower the forks and park the truck where it will not be a
hazard.
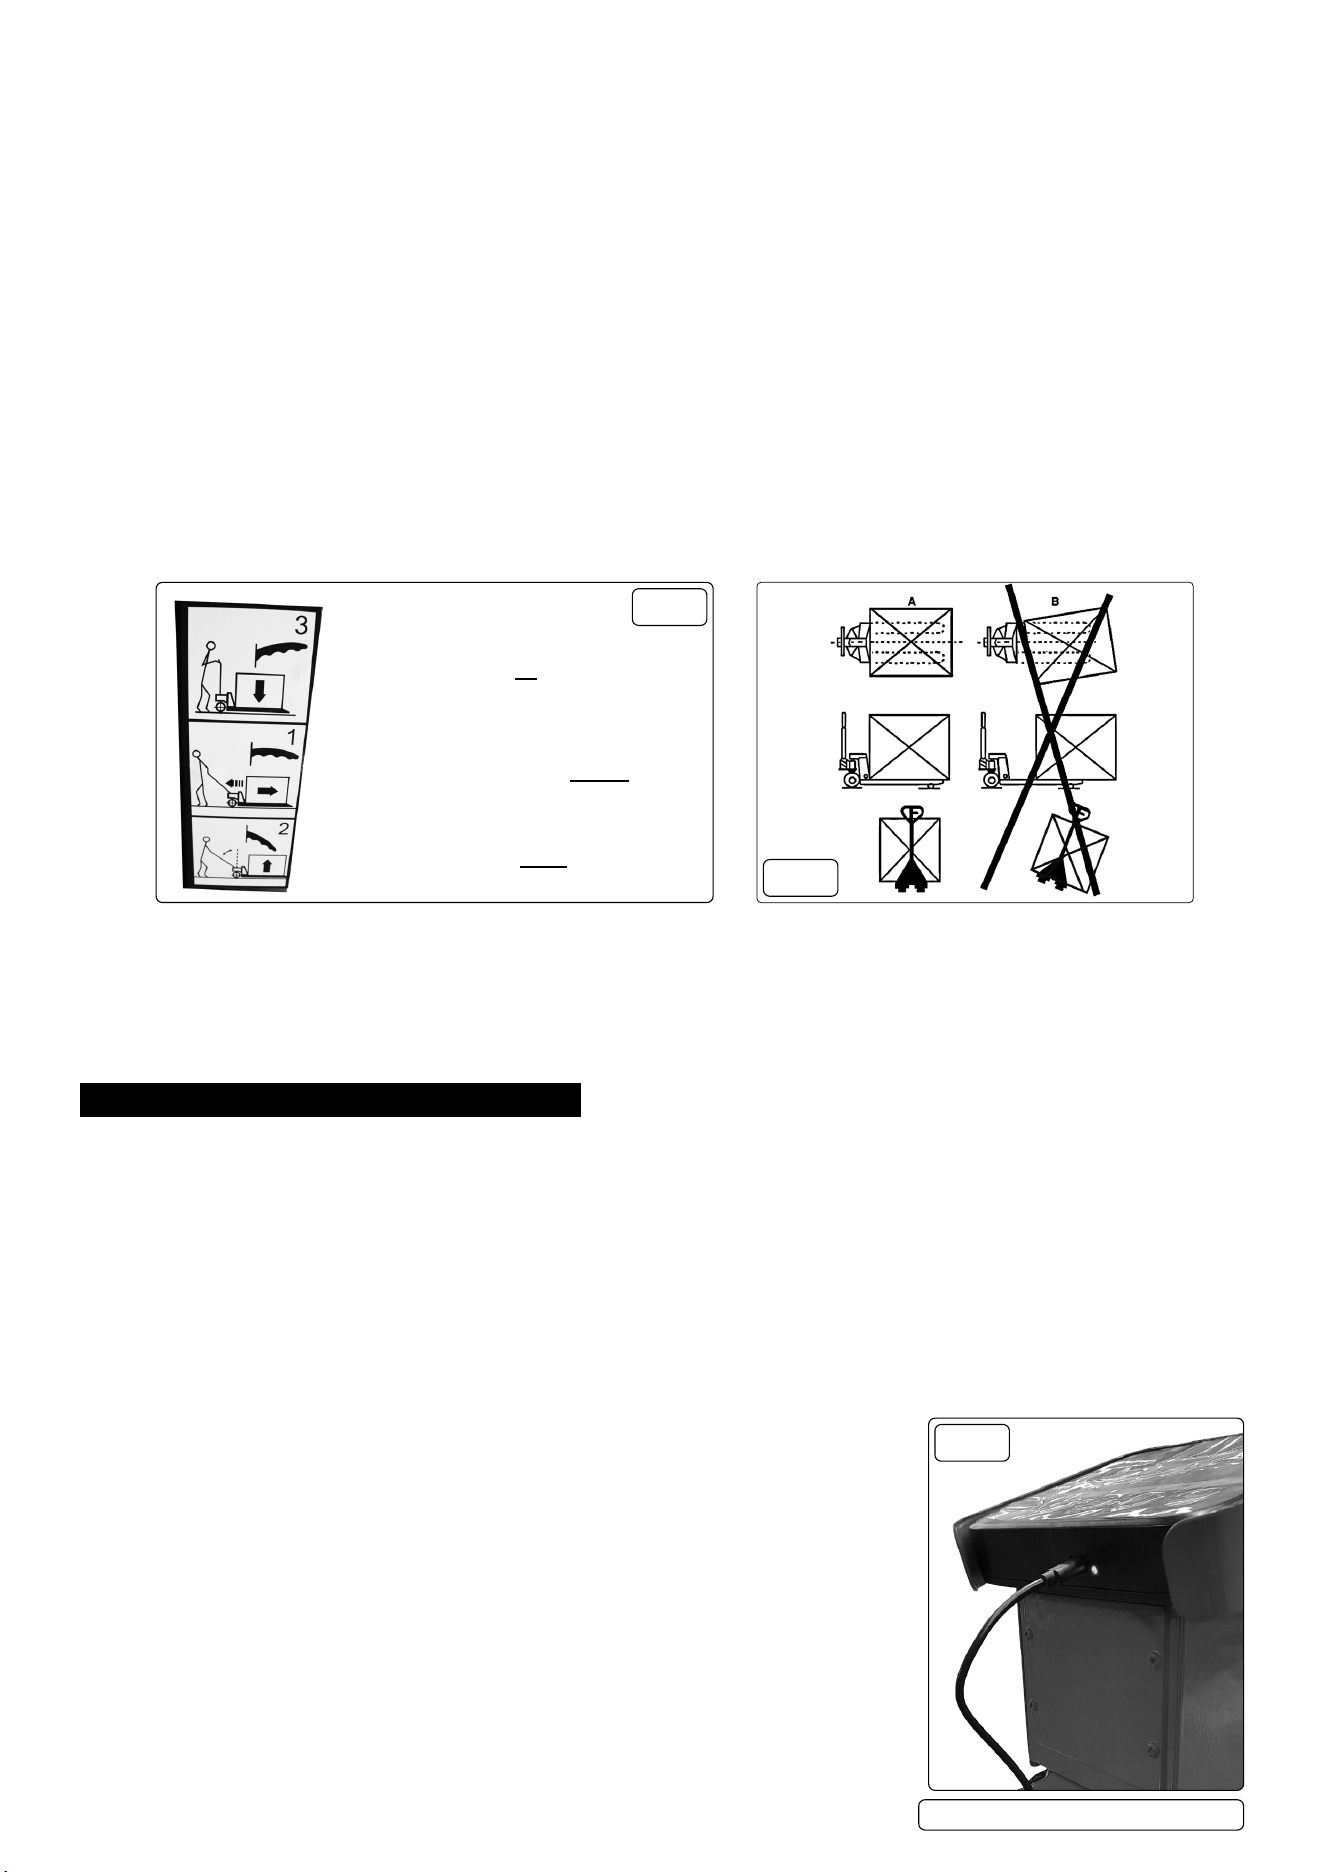
6.5. BATTERY MAINTENANCE
6.5.1. The electronic scale has a built-in lithium battery, which can work continuously for four weeks or
longer when fully charged.
6.5.2. Plug the charger in to charge the battery (fig.10). The indicator light will be in red when charging
and turns green if the battery is full.
NOTE: charge will last 8-10 hours when the device is in the OFF state.
6.5.3. In order to prolong the service life of the battery, be sure to fully charge it before using it.
6.5.4. If the electronic scale is not used for a long time, it must be charged every 3 months for 12
hours each time.
6.5.5. Be careful when handling or installing. Avoid strong vibration. Avoid shock or impact to prevent
short circuit inside the battery.
PT1150SC.V4 Issue 3 (4) 21/02/24
Original Language Version
© Jack Sealey Limited
FIG.10
PT1150SC.V4 Issue 3 (4) 21/02/24
Original Language Version
© Jack Sealey Limited
Sealey Group, Kempson Way, Suffolk Business Park, Bury St Edmunds, Suffolk. IP32 7AR
01284 757500 sales@sealey.co.uk www.sealey.co.uk
Note: It is our policy to continually improve products and as such we reserve the right to alter data, specifications and component parts without prior
notice. Please note that other versions of this product are available. If you require documentation for alternative versions, please email or call
our technical team on technical@sealey.co.uk or 01284 757505.
Important: No Liability is accepted for incorrect use of this product.
Warranty: Guarantee is 12 months from purchase date, proof of which is required for any claim.
WASTE ELECTRICAL AND ELECTRONIC EQUIPMENT REGULATIONS (WEEE)
When this product is no longer required, or has reached the end of it’s useful life, please dispose of it in an environmentally friendly way,
in accordance with local waste regulations.
BATTERY INFORMATION
Under the Waste Batteries and Accumulators Regulations 2009, Jack Sealey Ltd would like to inform the user that this product contains
one or more batteries.
Parts support is available for these products. Please email sales@sealey.co.uk or telephone 01284 757500
6.6. DISPLAY MAINTENANCE
6.6.1. When the power monitoring icon is empty, the device will automatically shut down after power on. Charge the device as soon as possible.
8 DO NOT use outdoors in rainy and snowy weather. Long time exposure under the sun is also prohibited.
6.6.2. The housing of the device can be cleaned with a soft cleaning cloth and daily washing solvent.
8 DO NOT use industrial solvents to clean or spray directly on the surface of the device.
6.6.3. It is recommended that users calibrate the device and sensors regularly to ensure accuracy during use.
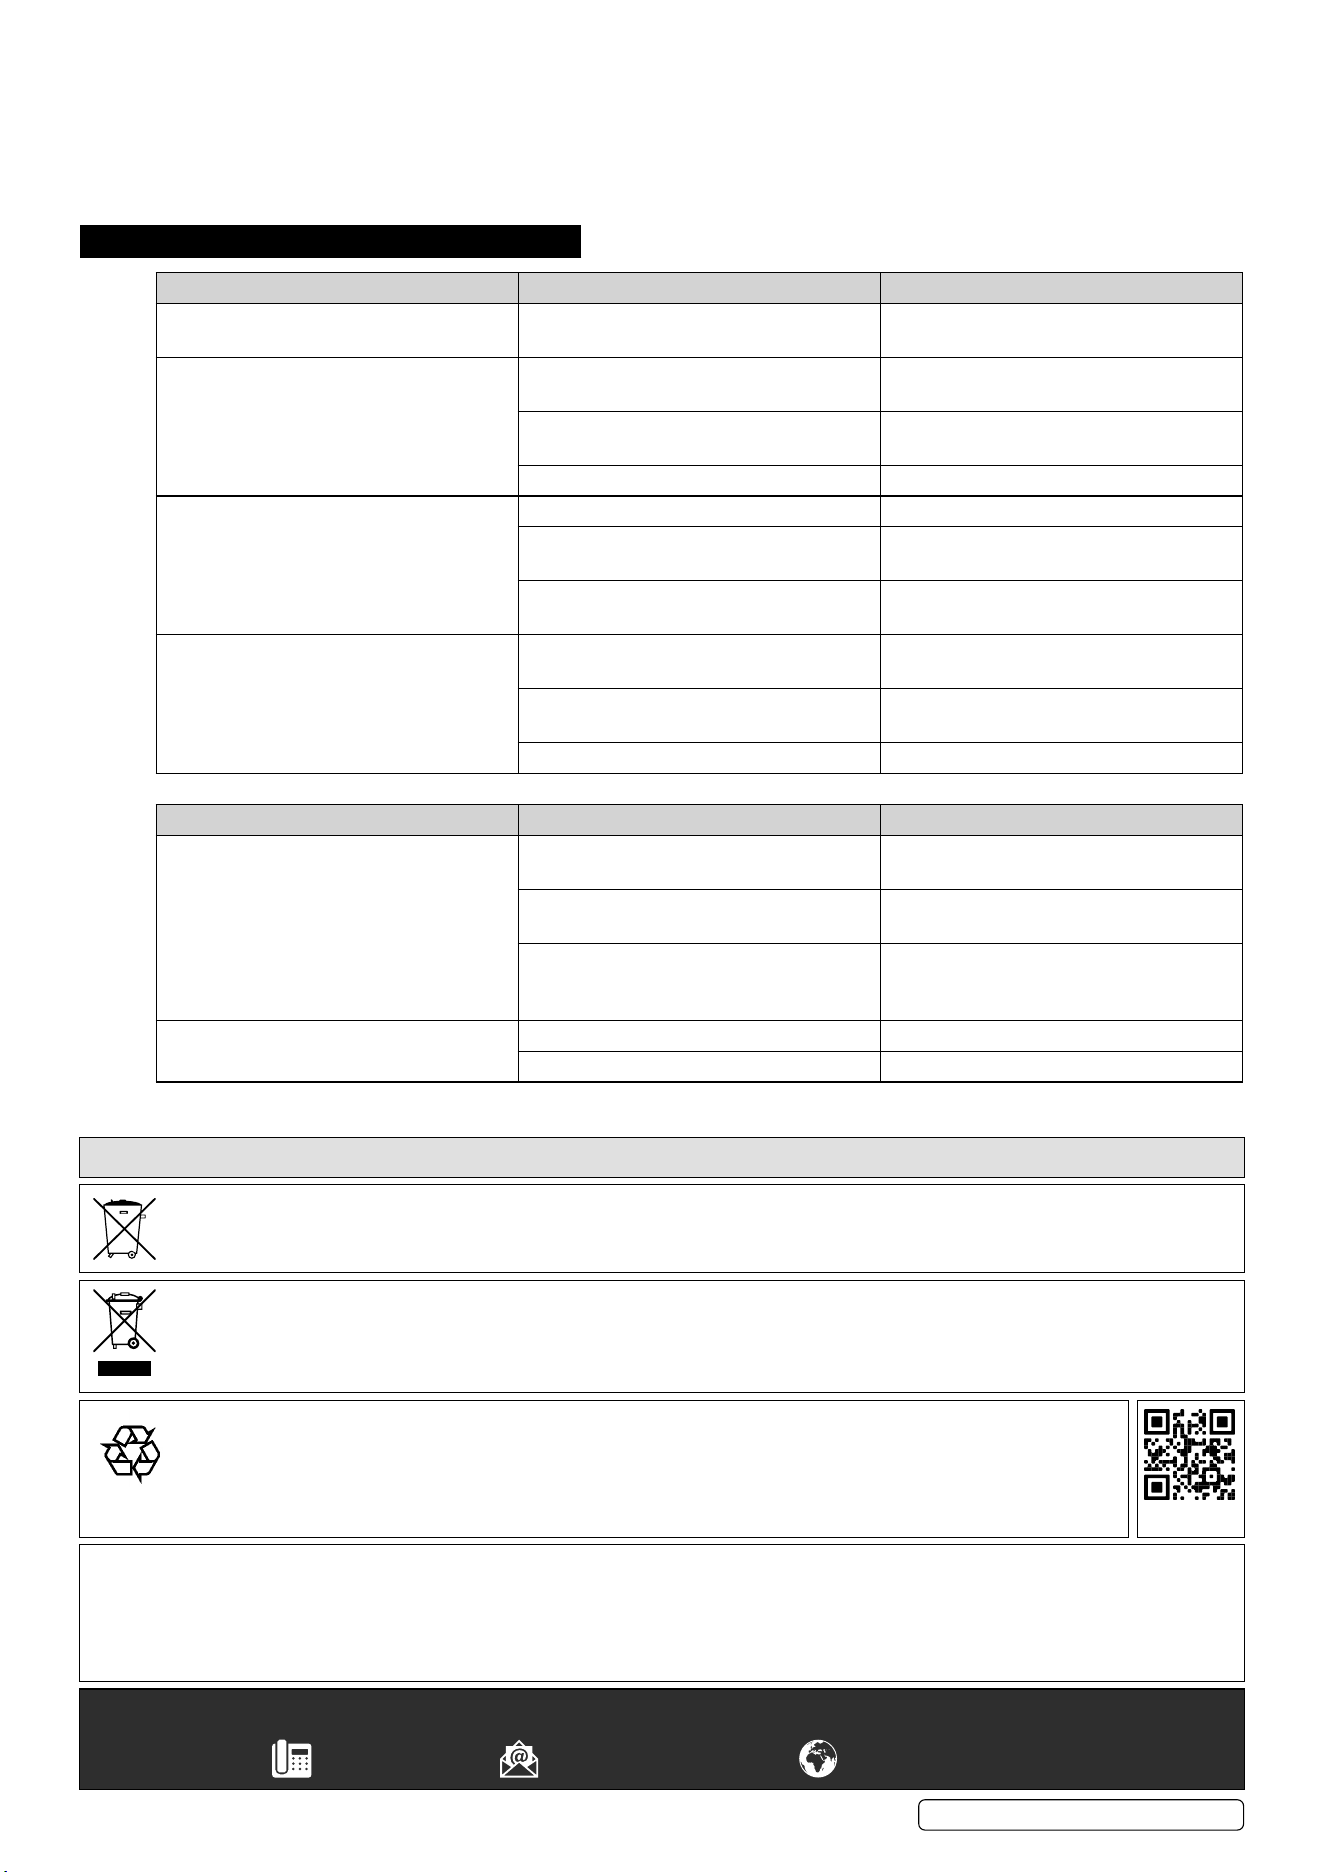
7. TROUBLESHOOTING
PROBLEM (PALLET TRUCK) CAUSE SOLUTION
The forks cannot be raised to their
maximum height.
There is insufcient oil in the reservoir. Replenish the oil to the correct level.
Refer to maintenance section.
The forks cannot be raised. No hydraulic oil or impurities or air in the
oil.
Replenish or change the oil.
The adjusting nut is too high keeping the
pumping valve open.
Reset the adjusting nut or bolt.
Air has entered the hydraulic system. Purge air from the hydraulic system.
The forks cannot be lowered. The piston rod or the pump is deformed. Replace the piston rod or pump.
Forks have been kept in the raised
position resulting in the rod jamming.
Keep the forks in the lowest position when
not in use.
The adjusting nut or bolt is incorrectly
positioned.
Adjust the nut or bolt.
The forks lower without the release valve
operating.
Impurities, or air, has got into the release
valve oil.
Replace the oil/or purge the air from valve.
Parts of the hydraulic system have been
damaged.
Inspect and replace the damaged parts.
Adjusting nut or bolt incorrectly positioned. Adjust the nut or screw.
PROBLEM (WEIGHING UNIT) CAUSE SOLUTION
Scale is not accurate. The fork shoe is touching the bottom part
of the scale.
Remove anything that restricts movement
of the scale.
Cable in junction box is loose. Check the connection in the junction box
and conrm it is secure.
One of the load cells is broken. Apply weight to all four corners of the
scale and the load cell with the different
weight should be replaced.
Display will not turn on. Battery voltage is too low. Replace batteries.
Battery life is complete. Replace batteries
ENVIRONMENT PROTECTION
Recycle unwanted materials instead of disposing of them as waste. All tools, accessories and packaging should be sorted,
taken to a recycling centre and disposed of in a manner which is compatible with the environment. When the product
becomes completely unserviceable and requires disposal, drain any fluids (if applicable) into approved containers and
dispose of the product and fluids according to local regulations.
REGISTER YOUR
PURCHASE HERE
