Loading ...
Loading ...
Loading ...
ASSEMBLY INSTRUCTIONS
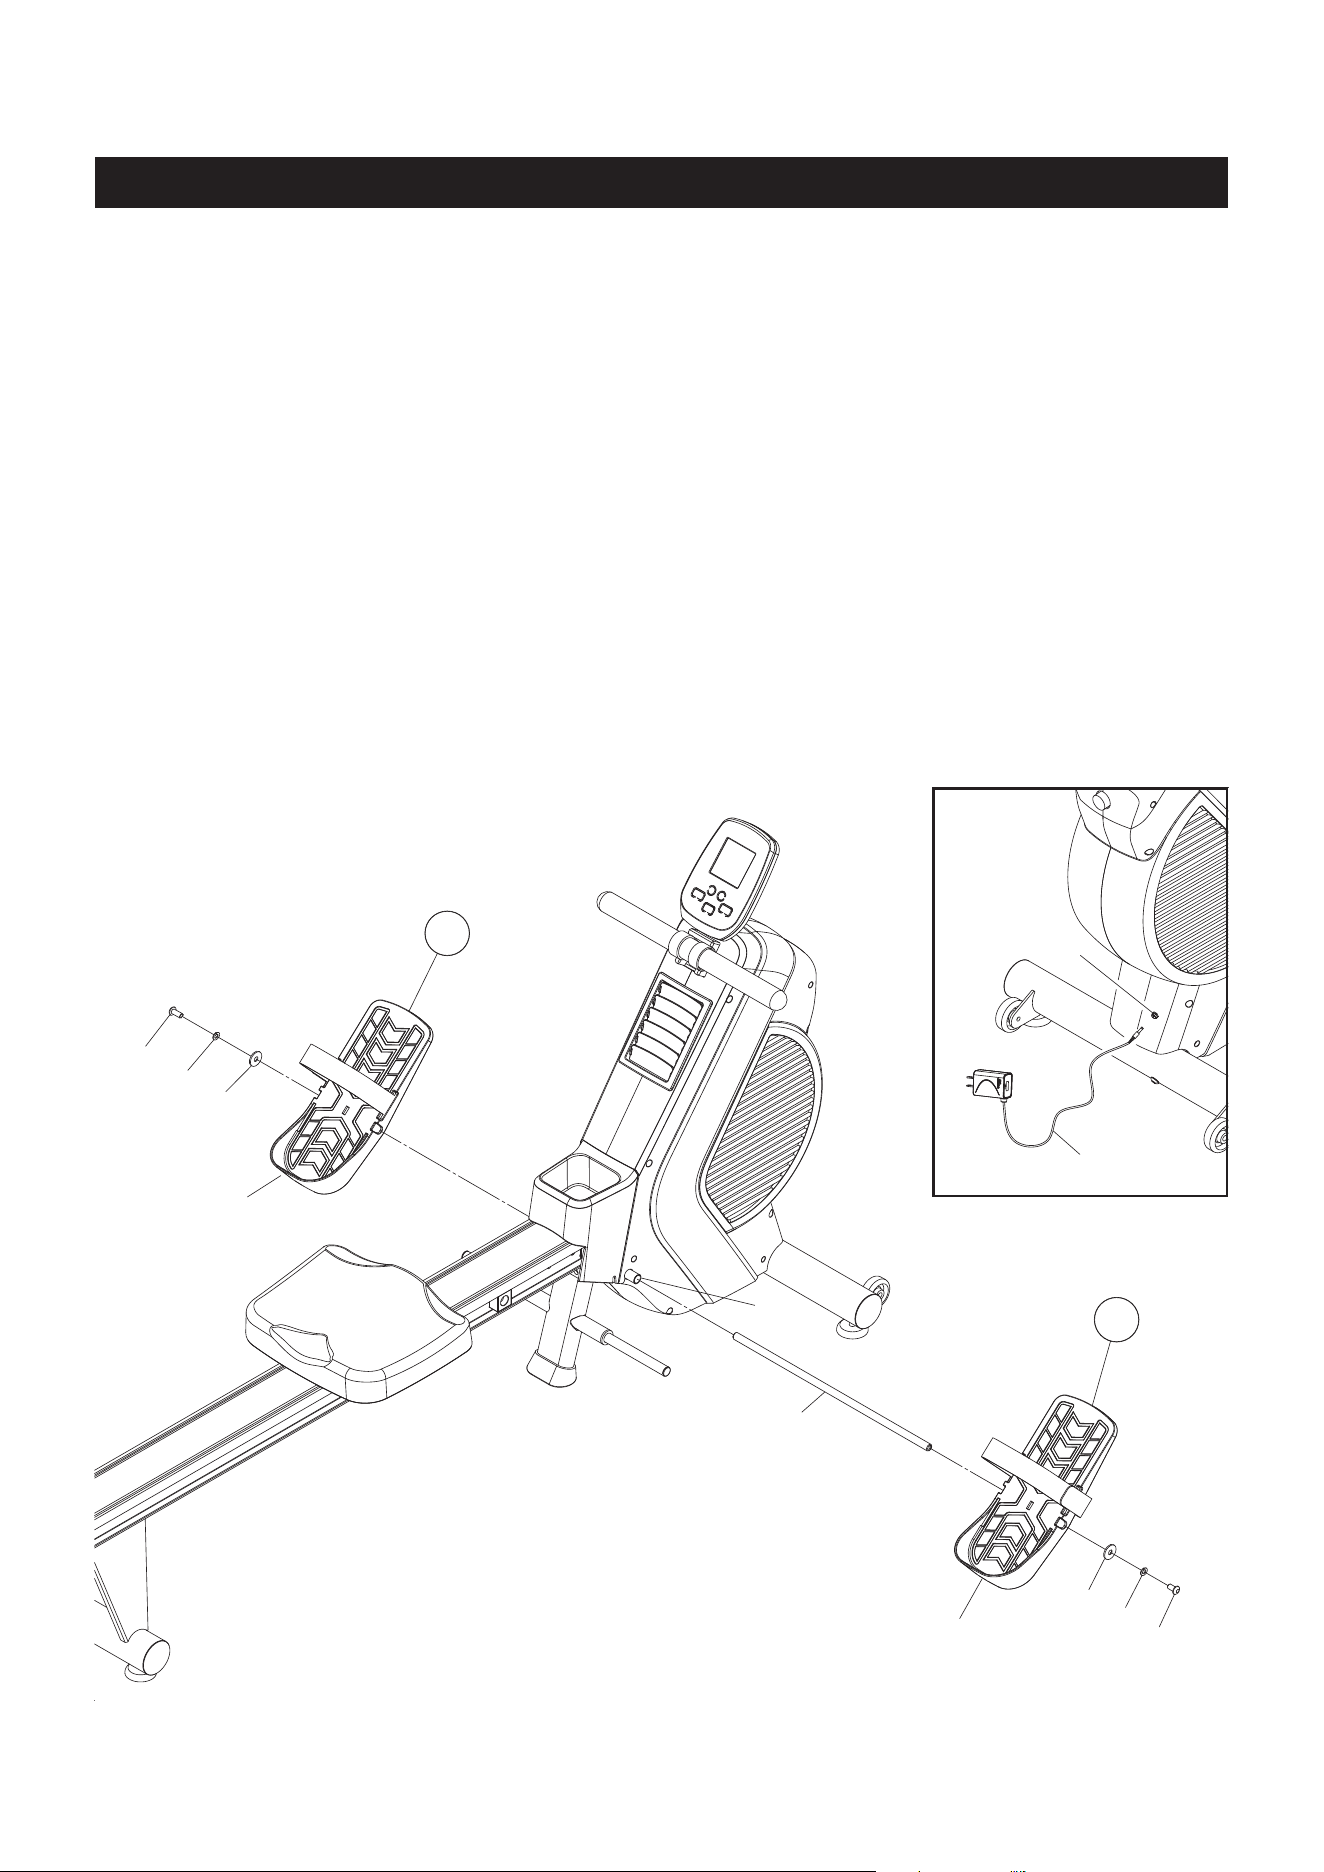
STEP 8
There is an “L” decal on the left PEDAL CAP(43L), and an “R” decal on the right PEDAL CAP(43R). Insert
the PEDAL SHAFT(6) through the tube located on the MAIN FRAME(1). Slide the left PEDAL CAP(43L)
onto the left side of the PEDAL SHAFT(6). Slide the right PEDAL CAP(43R) onto the right side of the
PEDAL SHAFT(6). Then secure the PEDAL CAPS(43) with BUTTON HEAD BOLTS(M8x1.25x15mm)
(66), LOCK WASHERS(68), and FENDER WASHERS(M8)(96) at both ends of the PEDAL SHAFT(6).
You need to use two Allen Wrenches to tighten the BUTTON HEAD BOLTS(M8x1.25x15mm)(66) at both
ends of the PEDAL SHAFT(6) at the same time.
STEP 9
Refer to detail view. Plug the ADAPTER(56) into the SOCKET of the POWER WIRE(107) located on the
front of the rower. Plug the ADAPTER(56) into an electrical outlet.
11
96
68
66
96
66
68
43L
43R
1
56
107
6
L
R
Loading ...
Loading ...
Loading ...