Loading ...
Loading ...

3
ninjakitchen.com
4
ninjakitchen.com
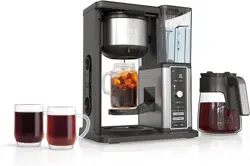
USING THE CONTROL PANEL PREPARING FOR USE
SETTING THE CLOCK
HIGH-ALTITUDE CALIBRATION BREW
1 Programmable Digital Clock
2 Hour/Minute (H/M) Button
3 WARM Indicator/Button
4 Delay Brew Button
5 Multi-Serve Dial
a Small Cup
b Cup
c XL Cup
d Travel Mug
e XL Travel Mug
f 1/4 Carafe
g Half Carafe
h Full Carafe
6 Custom Brews
a Classic Brew
b Rich Brew
c Over Ice Brew
d Cold Brew
7 Drip Stop Indicator
8 Intelligent Clean Cycle
Indicator/Button
9 Power Button
1
3
5c
5
7
8
5a
5b
6a
6b
6d
6c
24
5e5d
5h
5g
5f
9
1 When the unit is plugged in, the clock will flash on the control
panel to indicate that the time has not been set.
2 Press the H/M button until you reach the current time. The
AM or PM indicator will illuminate on the left side of the
display as you are setting the time.
3 After 5 seconds, the clock will stop flashing and the clock will
be set.
NOTE: If the clock stops flashing and does not display the correct time of day, pressing the H/M
button at any time will cause the clock to flash again. You can now reprogram the correct time by
following the previous steps.
NOTE: If you unplug the coee maker or in the event of a power loss, you will need to reset the clock.
NOTE: Pressing the CLASSIC, OVER ICE, COLD BREW, or Power button will cancel the calibration cycle.
NOTE: Functions and some sizes
may vary by model.
Remove all packaging material and stickers from the coee maker. Wash the water reservoir, carafe,
removable filter holder, and permanent filter (not included on all models) in warm, soapy water with
a soft cloth. Rinse parts and dry thoroughly. Before first use, prime the system by running a Full
Carafe, Classic brew cycle with water only. After the cycle is complete, discard the water. For detailed
instructions, refer to the Priming Your Ninja Hot & Iced Coee Maker section.
PLEASE KEEP THIS IMPORTANT SAFEGUARD IN MIND WHEN USING THE APPLIANCE:
DO NOT run the appliance without water.
Required for users in high-altitude areas. Not running the high-altitude calibration brew in a high-
altitude area will result in excessive steaming during brewing.
Because water boils at lower temperatures at higher altitudes, running a calibration cycle before
your first brew allows the unit to detect the boiling point of water at your location. Running a
calibration cycle will help deliver a consistent brew each time.
1 Fill the water reservoir up to, but not exceeding, the Full line.
2 Place the empty filter holder into the brew basket, and an empty vessel in the machine.
3 Press and hold both CLASSIC and OVER ICE until clock displays CAL.
4 A calibration cycle will begin. When complete, the unit will beep and End will appear on the clock
display. Discard the water in the vessel.
NOTE: This calibration is permanently saved and will not be lost if power is interrupted or brewer
is unplugged. Brewer can be re-calibrated at any time if it is used at a dierent altitude.
Loading ...
Loading ...
Loading ...