Loading ...
Loading ...
Loading ...
7weber.com
PRODUCT FEATURES
m WARNING: Only set up the cart on a stable and
level outdoor surface. Never set up the cart on
a sloping surface.
m WARNING: Use caution when removing slide-
out catch pan and disposing of hot grease.
m WARNING: Do not store the grill while the LP
cylinder is attached.
m WARNING: Do not store or transport a
disconnected LP cylinder inside the grill.
m CAUTION: Do not move the grill when in use.
Allow the grill to cool before moving or storing.
m CAUTION: Do not lift the grill by the lid handle
as this could result in damage to the lid lock.
m CAUTION: Do not stack additional items on grill
during storage or transit.
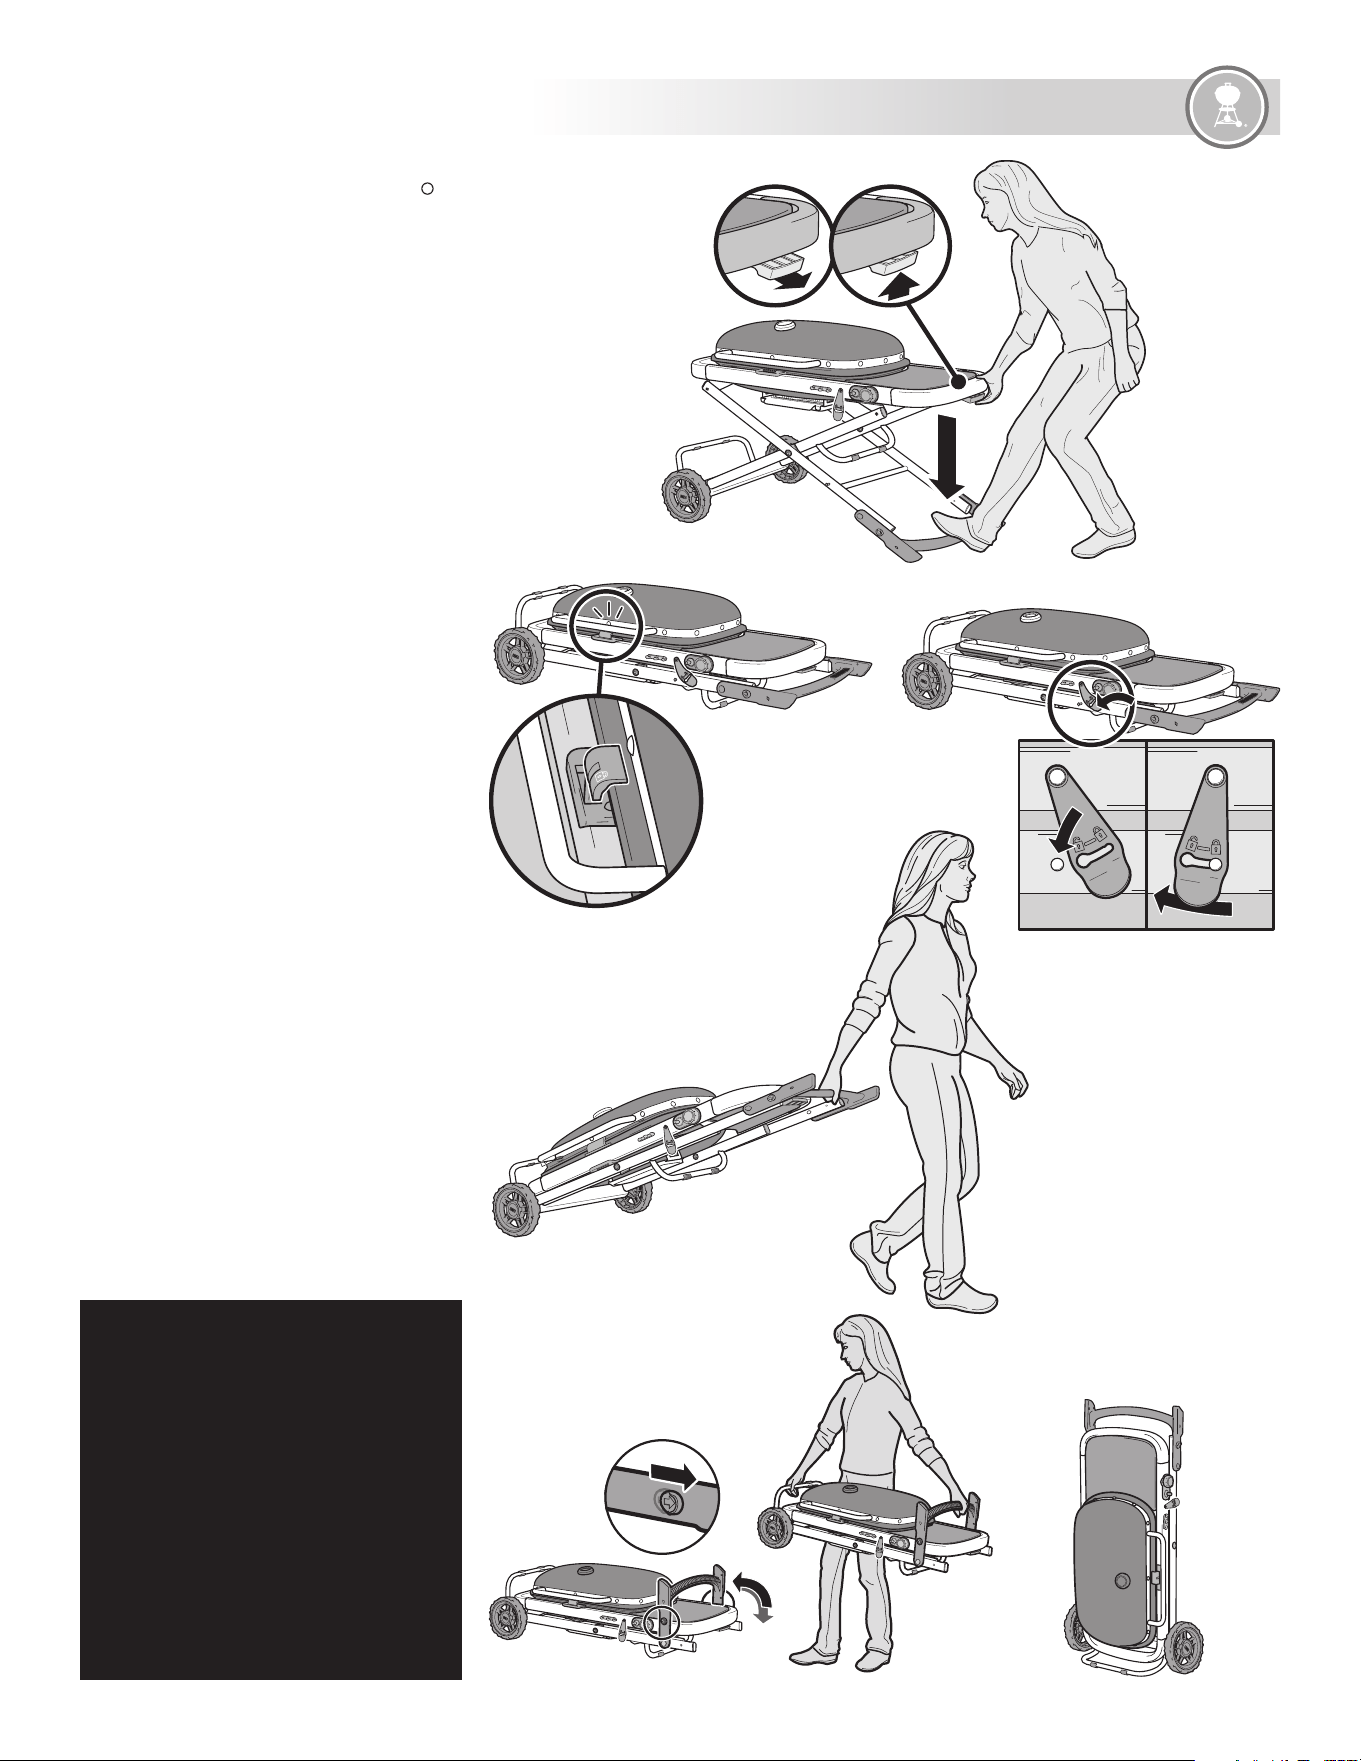
Lowering the Grill
1) Make sure the burner control knob is in the o (
)
position.
2) Close the lid.
3) Allow the grill to cool completely.
4) Remove the LP cylinder. Refer to "Removing the LP
Cylinder."
NOTE: A safety feature of the release lever actuates
when the LP cylinder is installed. The release lever
becomes locked out and the cart cannot be folded
down while the LP cylinder is connected.
5) Always check the slide-out catch pan to clean or
replace the disposable drip tray.
6) To lower the cart, make sure to keep one foot on the
foot stand at the base of the grill and grasp the end
of the side table frame (a).
Carefully disengage the release lever beneath the
side table by: 1) pulling the lever toward you, and
2) lifting it up toward the end-rail. Then, slowly lower
the grill keeping your foot in place.
Important: Use caution when lowering the cart.
Always guide the cart while moving to the down
position by maintaining a steady grip on the frame.
Repeated lowering of the cart without maintaining
a grip on the frame may cause damage to the gas
spring.
Transportation and Storage
1) Once the cart is folded down, the automatic lid
lock engages to keep the lid and cooking grates in
place (b). To secure the cart in the folded position,
fasten the cart lock over the pin (c) and move it to the
locked position.
2) After the cart is lowered and locked, the grill is ready
to roll (d).
3) For added convenience in the folded position, rotate
the foot stand upward by first sliding back the red
tabs on the side of the frame (e). This provides areas
on both ends of the grill for lifting into storage or
transportation.
NOTE: Do not lift the grill by the lid handle.
4) After a thorough cleaning, store the grill upright for a
smaller footprint (f).Follow the steps in the "Cleaning
and Maintenance" section of this owner's manual.
b.
c.
a.
e.
f.
d.
Loading ...
Loading ...
Loading ...