
Loading ...
Loading ...
Loading ...
12
OPERATION
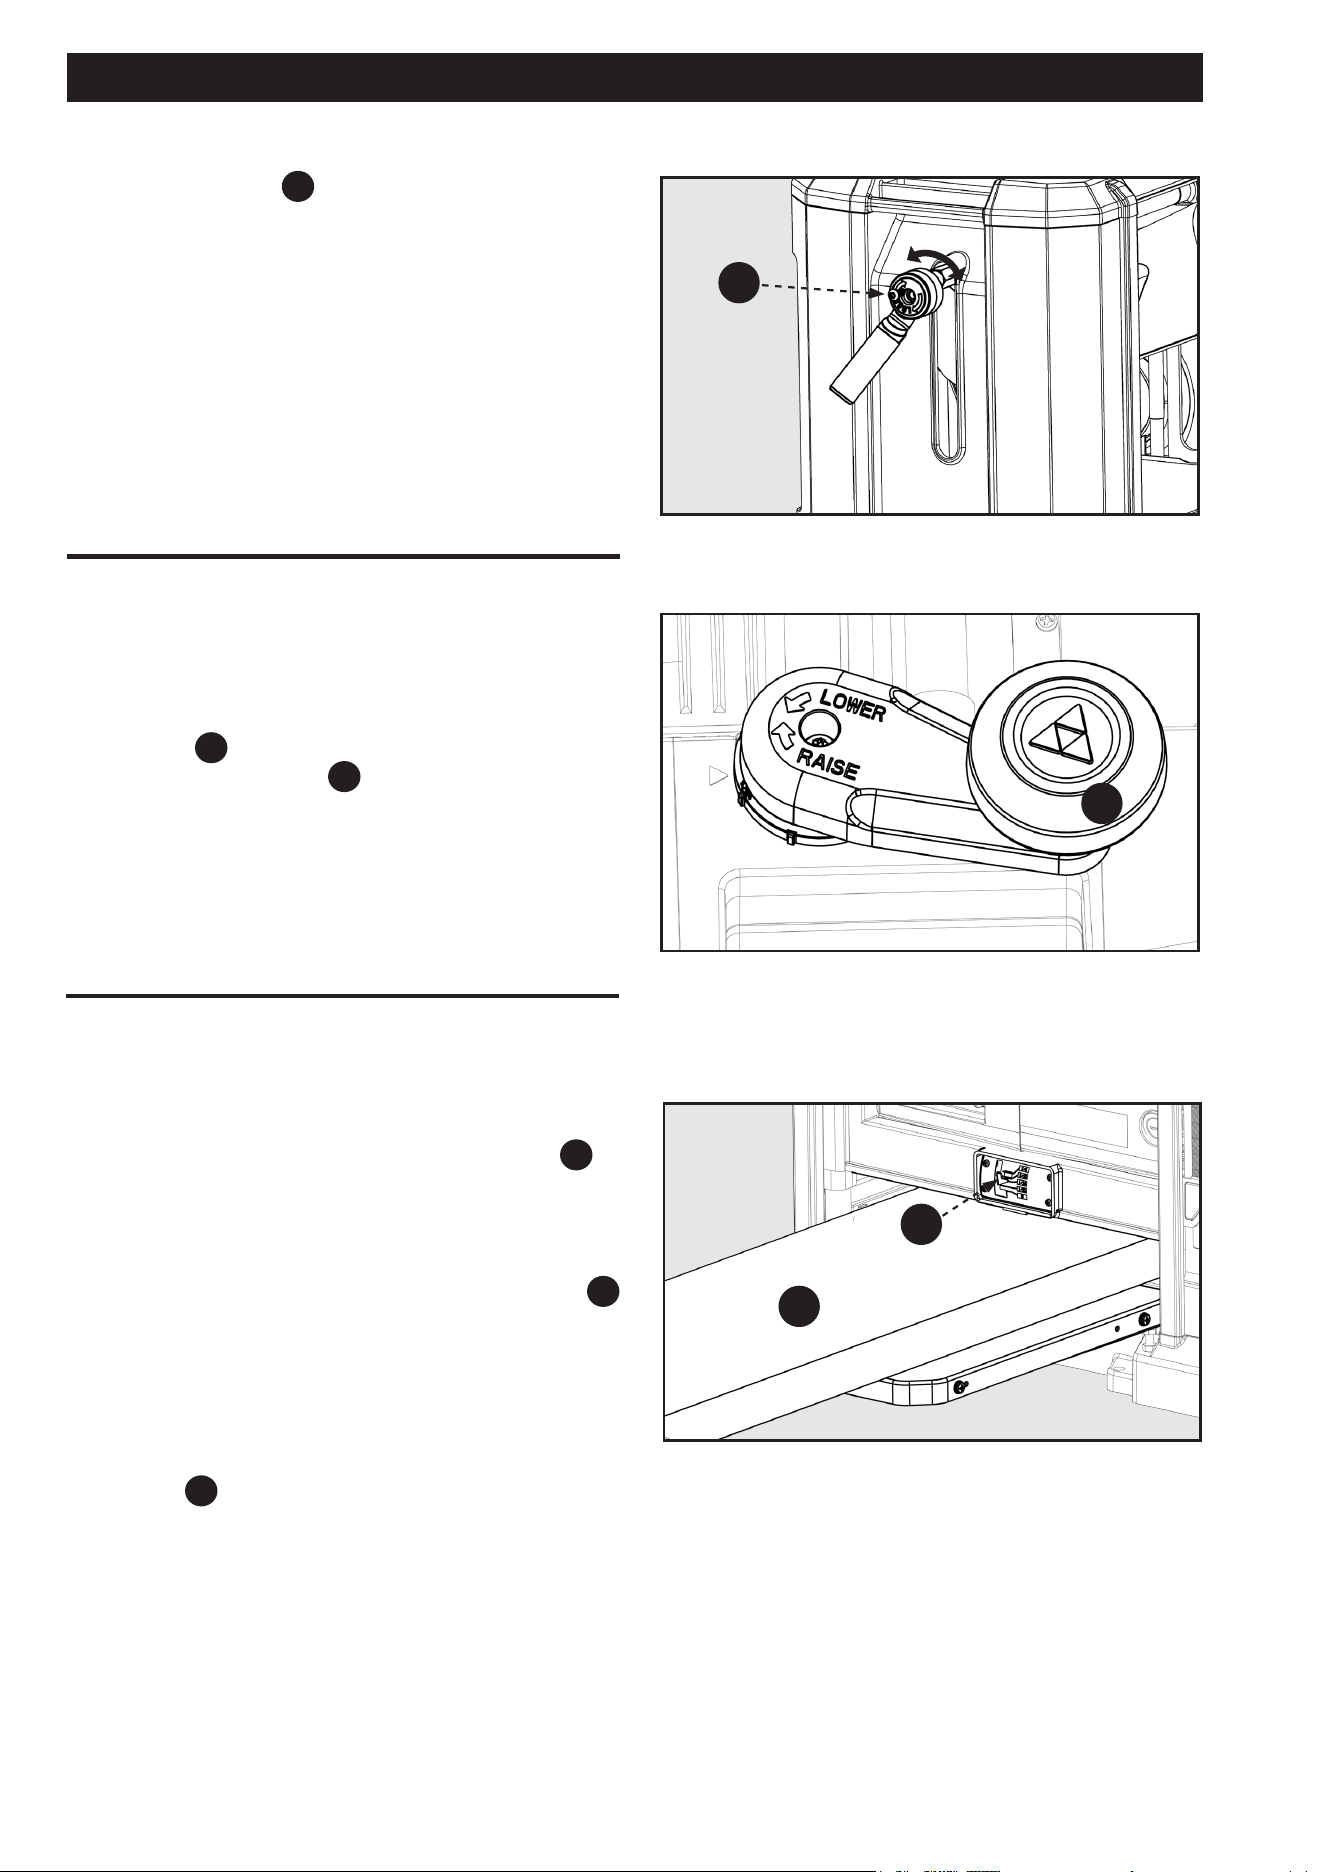
USING THE CUTTERHEAD LOCK
The cutterhead lock
PC4
, see Figure 13, prevents the
cutterhead depth from being able to change. This helps to
eliminate snipe in the board that is being planed. Snipe can also
be eliminated by butting boards end to end and feeding them
through the planer. Long boards should ALWAYS be
supported, when feeding them through the planer to help
eliminate snipe.
NOTE: To lock the cutterhead, turn handle clockwise. To
unlock, turn handle counterclockwise.
FIGURE 13
The main housing contains the cutterhead, feed rollers,
dust deflector and motor. Raising and lowering the main
housing controls the depth of cut.
1. To adjust the main housing, unlock the cutterhead lock
handle
PC4
, see Figure 13. Turn the cutterhead height
adjusting handle
PC3
clockwise to raise or
counterclockwise to lower the cutterhead. One
revolution of the handle in Figure 14 will move the
cutterhead up or down 1/16 inch (1.6mm). Once the
cutterhead is at the desired height, lock the cutterhead
assembly in place by engaging the cutterhead lock
handle.
ADJUSTING THE HEAD ASSEMBLY
FIGURE 14
Lock
Unlock
PC3
PC4
USING THE MATERIAL REMOVAL
GAUGE
See Figure 15.
Your planer is equipped with a material removal gauge
A
. It
is used to indicate the amount of wood that will be removed in
one pass with the carriage set at its current height. The material
removal gauge reads across the entire width of the planer
head.
1. Slide approximately 3 inches of the workpiece
B
under the carriage.
2. Be sure that the workpiece is lying at against the table
of the planer. If the workpiece is inserted at an angle,
the reading may be inaccurate.
3. Lower the carriage on the workpiece until the material
removal bar engages the wood. You will see the red
arrow
A
moving up the scale to indicate the amount
to be removed with the carriage at that height.
4. Adjust the carriage height until the desired depth of cut
appears on the gauge.
NOTE: Record this depth as you may have to back the
cutterhead o the board to allow you to remove it. Once this is
done, pull the material out from under the carriage and reset
the cutterhead to the desired depth.
5. Turn the unit on and feed your material into the cutter
head.
FIGURE 15
A
B
Loading ...
Loading ...
Loading ...