Loading ...
Loading ...
Loading ...
OPERATION
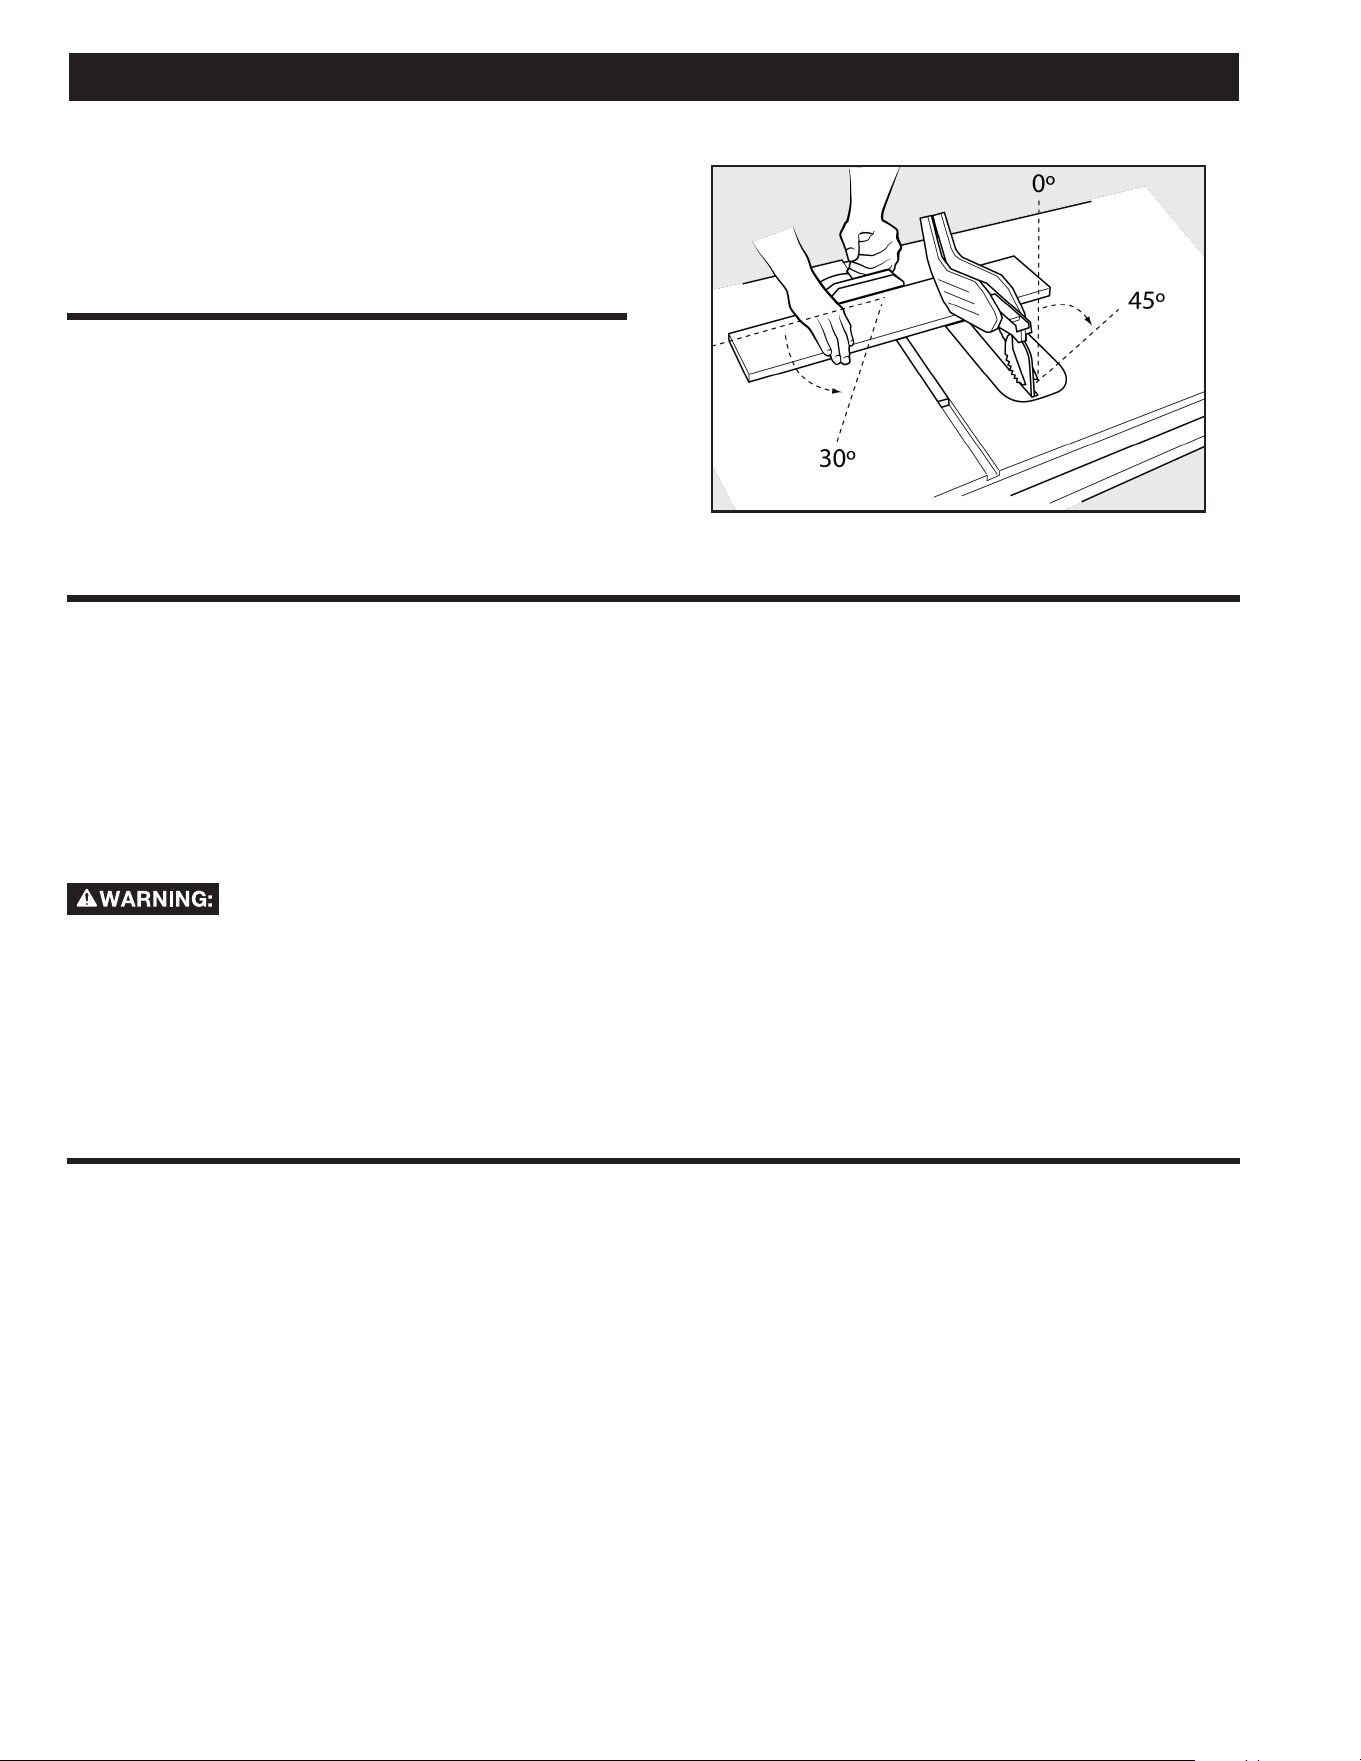
COMPOUND MITER CUTS
This is a combination of bevel crosscutting and mitering.
Refer to Figure 32 and follow the instructions for both bevel
crosscutting and mitering. Remember to use the right miter
slot for all bevel cuts.
LARGE PANEL CUTS
Place workpiece supports at the same height as the saw table
behind saw to support the cut workpiece, and alongside (s) of
saw, as needed. Depending on shape of panel, use rip fence or
miter gauge to control workpiece. If a workpiece is too large to
use either a rip fence or a miter gauge, it is too large for this
saw.
FIGURE 32
NON-THROUGH CUTS
The use of a non-through cut is essential to cutting grooves,
rabbets and dados. Non-through cuts can be made using a
standard blade having a diameter of 10 inches or less. Non-
through cuts are the only type of cuts that should be made
without the blade guard assembly installed. Make sure the
blade guard assembly is reinstalled upon completion of this
type of cut.
• Never feed wood with hands when making any non-
through cuts such as rabbets. Always use miter gauge,
push blocks or push sticks, and featherboards where
appropriate.
• Read the appropriate section which describes the type of
cut in addition to this section on non-through or dado cuts.
For example, if your non-through cut is a straight cross
cut, read and understand the section on straight cross cuts
before proceeding.
• Once all dado and non-through cuts are completed, unplug
saw and reinstall riving knife or return it to raised position.
Install anti-kickback pawls and blade guard.
• Carefully follow the instructions accompanying any
specialized blades and molding cutters for proper
installation, set up and operation.
• When making non-through cuts, follow all applicable
warnings and instructions listed below in addition to those
listed above for the relevant through cut.
• When making a non-through cut, blade is covered by
workpiece during most of cut. Be alert to exposed blade at
start and nish of every cut.
MAKING A NON-THROUGH CUT
1. Unplug saw.
2. Unlock release lever.
3. Adjust bevel angle to 0°.
4. Lock release lever.
5. Remove blade guard and anti-kickback pawls.
6. Place riving knife in “lowered” position. (see RIVING
KNIFE HEIGHT SETTINGS Section on page 20)
7. Set blade to correct depth for workpiece.
8. Depending on shape and size of wood, use either rip
fence or miter gauge.
9. Plug saw into power source and turn saw on.
90º
10. Let blade build up to full speed before moving
workpiece into blade.
11. Always use push blocks, push sticks, and/or
featherboards when making non-through cuts to reduce
the risk of serious injury.
12. When cut is made, turn saw o. Wait for blade to come
to a complete stop before removing workpiece.
13. When cut is complete re-adjust riving knife to position
as detailed on page 20.
• Once all non-through cuts are completed, unplug saw and
reinstall riving knife in raised position. Install anti-kickback
pawls and blade guard.
26 27
Loading ...
Loading ...
Loading ...