Loading ...
Loading ...
Loading ...
49-1000364 Rev. 5 31
INSTALLATION INSTRUCTIONS
STEP 9 ADJUST DOOR SWING
(Cont.)
Installation Instructions
STEP 10 CONNECT WATER
SUPPLY (Cont.)
• Turn the water on to flush debris from the line. Run
about a quart of water through the tubing into a
bucket, then shut off the water.
Copper Tubing:
6OLSD´QXWDQGIHUUXOHSURYLGHGRYHUERWKHQGV
RIWKHFRSSHUWXELQJ,QVHUWWKHWXEHLQWRWKHXQLRQ
fitting on the unit and tighten the nut to the union.
• Turn on the water to check for leaks.
SmartConnect
™
Tubing:
NOTE: The only GE Appliances-approved plastic
tubing is supplied in the SmartConnect
Refrigerator
7XELQJNLWV'RQRWXVHDQ\RWKHUSODVWLFZDWHUVXSSO\
line because the line is under pressure at all times.
Other types of plastic may crack or rupture with age
and cause water damage to your home.
SmartConnect
5HIULJHUDWRU7XELQJ.LWVDUHDYDLODEOH
in the following lengths:
¶P:;;
¶P:;;
¶P:;;
¶P:;;
,QVHUWWKHPROGHGHQGRIWKHWXELQJLQWRWKH
refrigerator connection. Tighten the compression nut
until it is just hand tight.
• Tighten one additional turn with a wrench.
2YHUWLJKWHQLQJFDQFDXVHOHDNV
• Turn on the water to check for leaks.
• Run dispenser, if available, for 2 minutes or 1 gallon
RIZDWHU,WLVQRUPDOIRUWKHGLVSHQVHUWRVSXWWHUIRU
the first few cups.
NOTE: Make sure excess tubing length does not
interfere with the toekick installation.
STEP 10 CONNECT WATER
SUPPLY
WARNING
Connect to potable water supply
only.
AVERTISSEMENT
Raccordez l’appareil à une
alimentation d’eau potable seulement.
ADVERTENCIA
Realice la conexión a un
suministro de agua potable únicamente.
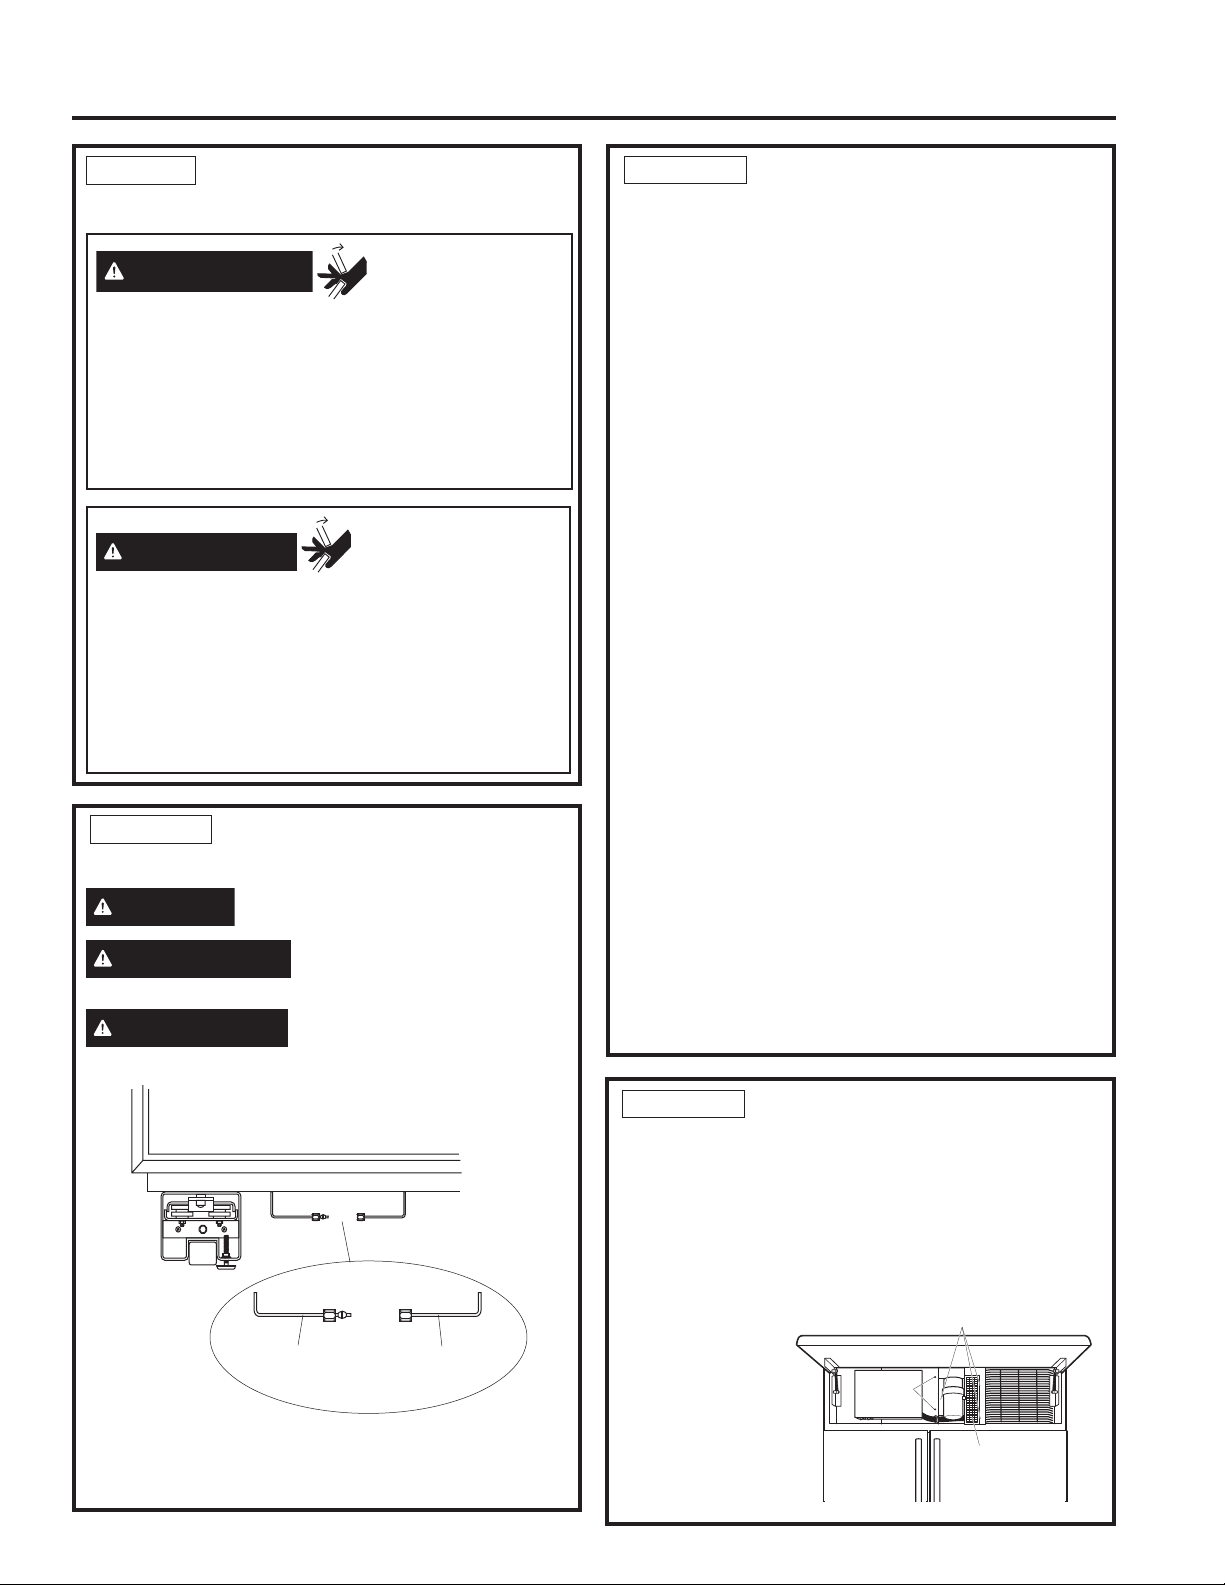
• Locate and bring the tubing to the front of the
cabinet.
Refrigerator
Water Supply
House
Water Supply
AVERTISSEMENT
Risque de
pincement de la
garniture de porte
Une installation incorrecte représente un risque de
SLQFHPHQWSRXUOHVGRLJWVHQWUHOHF{WpGHODJDUQLWXUHGH
porte et les armoires lors de l’ouverture ou de la fermeture
de la porte, spécialement pour les enfants. Pour réduire
FHULVTXHYRXVGHYH]VXLYUHOHVLQVWUXFWLRQVG¶LQVWDOODWLRQ
selon les dimensions des armoires, l’assemblage de
garniture et l’angle de butée de la porte.
ADVERTENCIA
Riesgo de
Lastimaduras con
el Borde de la
Puerta
Una instalación inadecuada puede crear el riesgo de
lastimadura de un dedo entre el borde lateral de la puerta
y los gabinetes al usar la puerta, especialmente para los
QLxRV$ILQGHPLQLPL]DUHVWHULHVJRGHEHUiVHJXLUODV
instrucciones de instalación acordes a las dimensiones
del gabinete, ensamble de los bordes, y ángulo de
bloqueo de la puerta.
STEP 11 CONNECT POWER,
CLOSE GRILLE PANEL
• Open the grille panel.
• Plug in the power cord (if necessary) by reaching
into the opening next to the water filter. The water
filter guard will need to be removed for access
(some models). Remove the 3 screws holding it in
SODFH,IDFFHVVLVVWLOOWRRWLJKWUHPRYHWKHVFUHZV
holding the water
filter bracket and
move aside. Plug
in the power
cord. Secure
the bracket and
guard with the
original screws.
Water Filter
Guard in Front of
Electric Outlet
Access
Bracket
Screws
Screws
Loading ...
Loading ...
Loading ...