Loading ...
Loading ...
Loading ...
Page 13 • JL Audio, Inc., 2020 Continued on Next Page
STEP 80
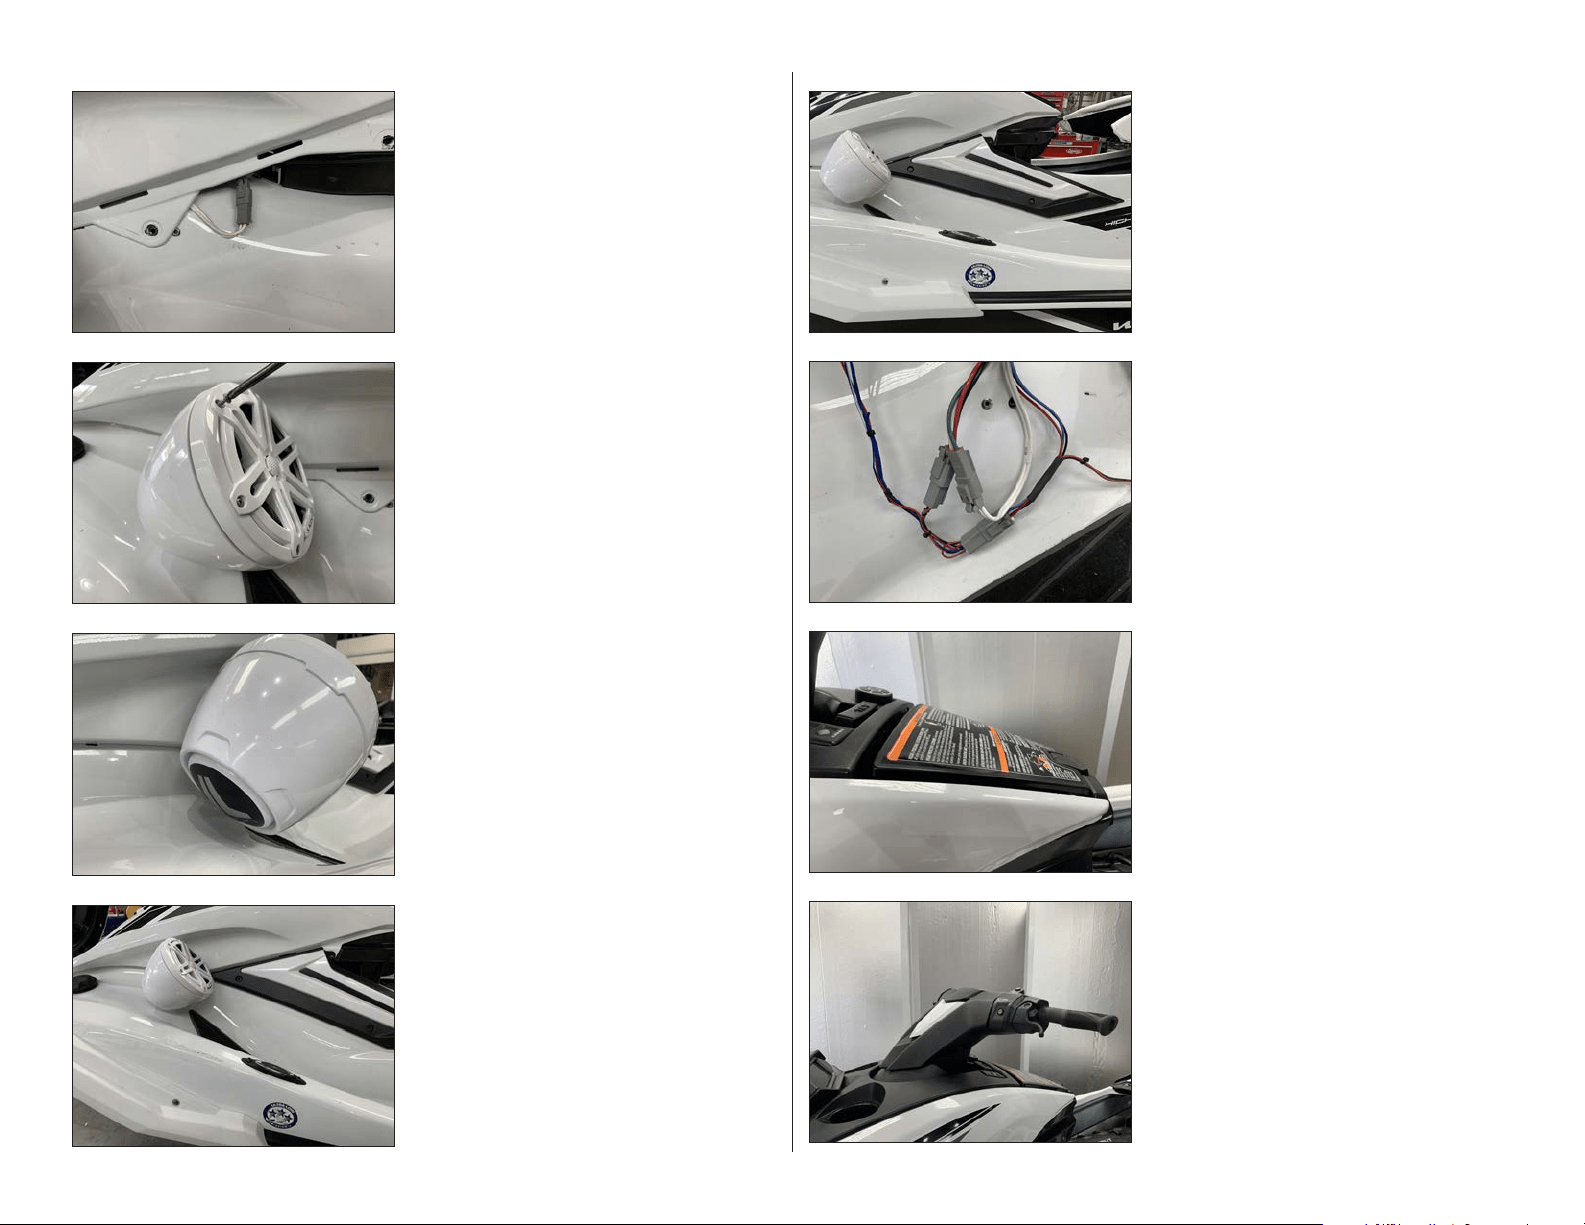
Reinstall the handle bar to the factory torque
specification.
Reinstall the throttle control and steering
column cover panel, then reinstall the lower
and upper handle bar cover panels.
STEP 79
Reinstall the center storage compartment lid.
STEP 78
Connect the MBT-CRXv2 wiring and sub
connector, if applicable, to the Amplifier Harness.
Slide a piece of 2” Heat Shrink Tubing over each of
the RCA Interconnects, and connect to the MBT-
CRXv2. Position the 2” Heat Shrink Tubing over the
joined connections and shrink using a heat gun or
torch. Secure wiring with Cable Ties.
NOTE: The remaining red and black wires are provided
for use with optional Yamaha accessories. Apply 1”
Heat Shrink Tubing to any connections or if left unused.
STEP 77
Reinstall the three accent panel screws
removed in Step 8.
Repeat Steps 63-77 for the starboard side.
STEP 76
Reinstall the accent panel on the port side.
STEP 75
Remove the adhesive backing from the Rear
Logo Appliqué. With the logo positioned at the
desired angle, attach the Rear Logo Appliqué,
gently pressing on the center to remove any air
pockets.
STEP 74
Remove the six #8 x 1-1/4” Pan Head Screws
and #8 Flat Washers, rotate the speaker to the
desired angle, and reinstall.
STEP 73
Connect the speaker cable from VEX Speaker
Enclosure to the left speaker connector from
the Amplifier Harness.
Reinstall the remaining two screws at the front
of the body panel
SLPK-YA-19FXC / SLPK-YA-19FXC-SUB INSTR_SKU# 011531
Loading ...