Loading ...
Loading ...
Loading ...
Page 12 • JL Audio, Inc., 2020 Continued on Next Page
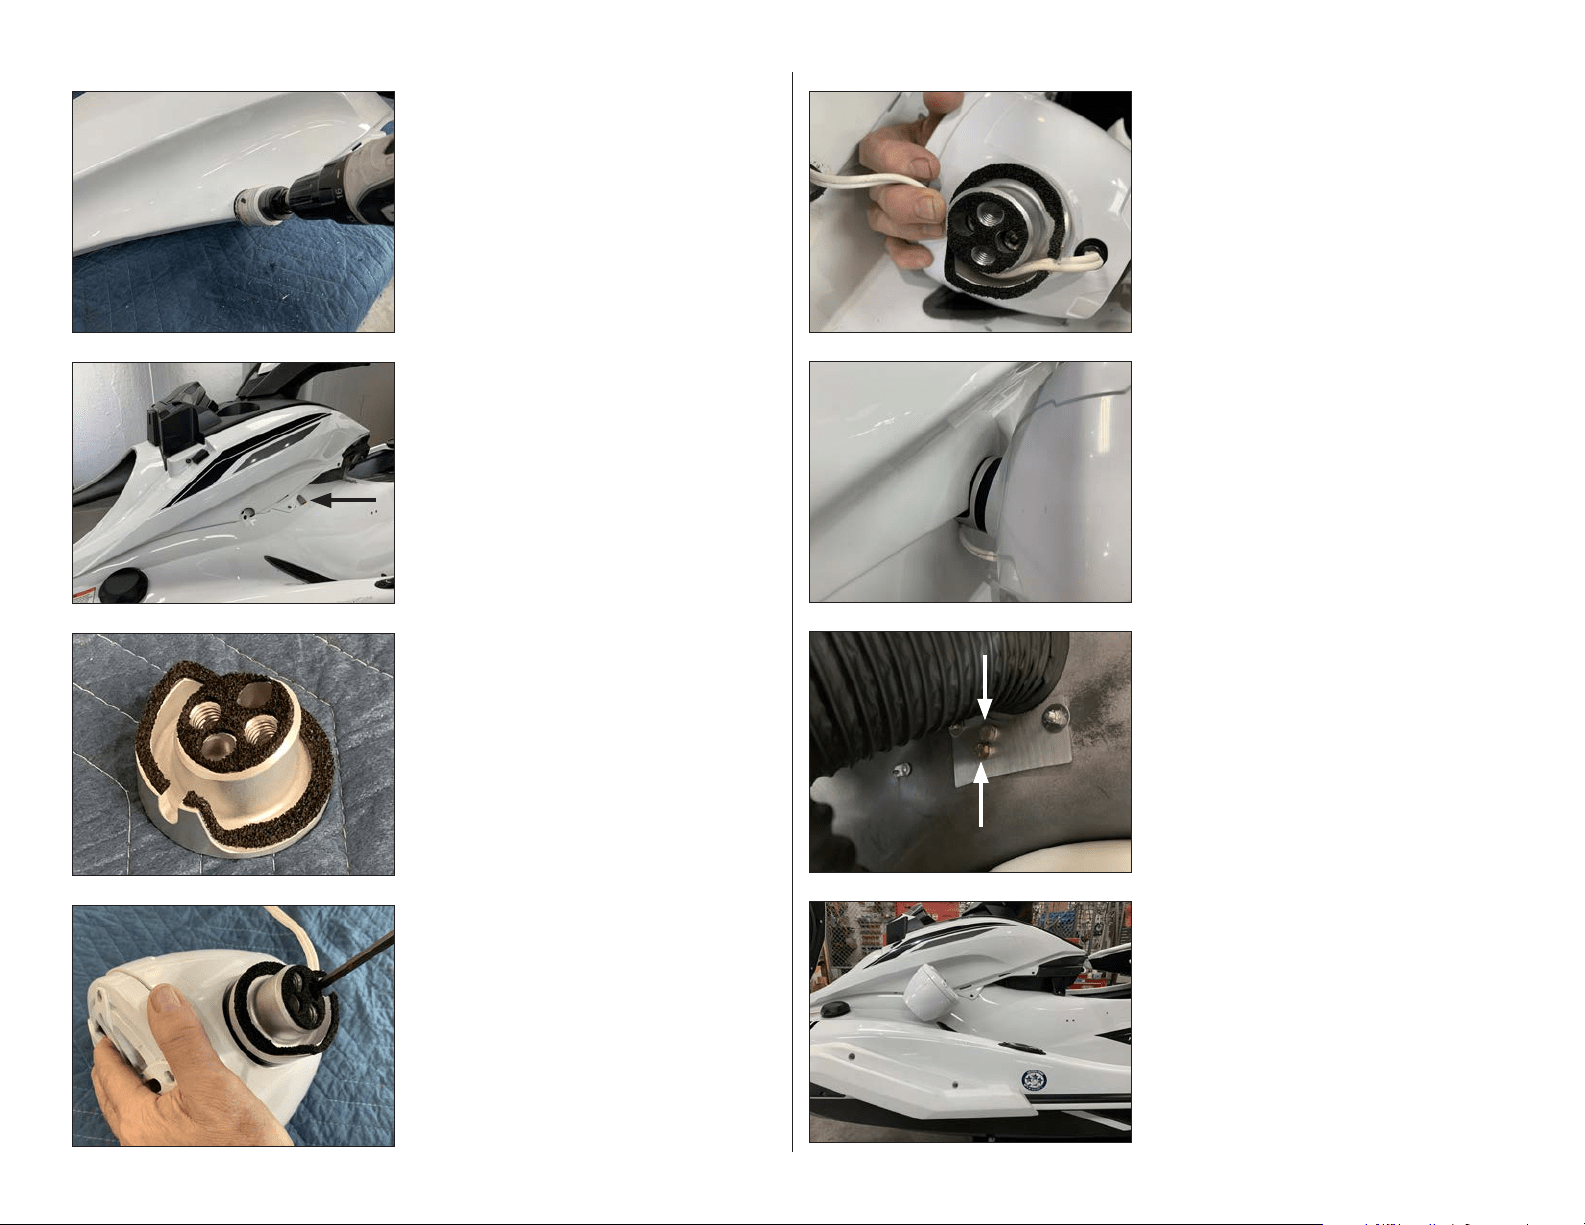
STEP 72
Pictured is a VEX Speaker Enclosure installed
on the port side in the proper orientation.
STEP 71
Slide a 7/16” Split Lock Washer over each of two
7/16 - 14 x 7/8” Hex Head Bolts. Apply Loctite®
Threadlocker to each assembly, and secure the
VEX Speaker Enclosure to the vessel through
the holes in the Back Plate from inside the hull,
and fully tighten.
STEP 70
Align the Port VEX Adaptor with hole cut in the
body panel in Step 65.
STEP 69
Route the speaker cable exiting the VEX
Speaker Enclosure around the channel in the
Port VEX Adaptor, then pass the cable under
the body panel and toward the rear of the
panel.
STEP 68
Align the Port VEX Adaptor to the top of a
VEX Speaker Enclosure, with the notch on the
Port VEX Adaptor oriented to the rear. Apply
Loctite® Threadlocker to a pair of M6 - 1 x
20mm Socket Cap Screws, secure the Port VEX
Adaptor to the VEX Speaker Enclosure, and
fully tighten.
STEP 67
Apply the Port VEX Adaptor Gasket to the back
of the Port VEX Adaptor.
STEP 66
Reinstall the body panel. Reinstall the two
factory screws in the top of the console and
the two screws removed in Step 7.
Ensure the left speaker connector from the
Amplifier Harness is accessible at the rear of
the panel.
STEP 65
Turn the body panel over. Using a 1-7/8” hole
saw, carefully enlarge the pilot hole.
SLPK-YA-19FXC / SLPK-YA-19FXC-SUB INSTR_SKU# 011531
Loading ...
Loading ...