Loading ...
Loading ...
Loading ...
INSTALLATION
Installing the wall mount
CAUTION
• Install the wall mount on a hard concrete
wall.
– If it is installed on a wood or plaster wall,
the product may fall.
#1
Assembling the wall mount
• To disassemble the wall mount, follow steps
in reverse order.
#2
Installing the wall mount
01
The wall mount installation should be set
so the top of the wall mount is 113cm
from the oor.
02
Using the wall mount as a template, mark
where the screw holes will be placed.
03
Drill the holes to a depth of 50mm using
a 6mm drill bit, and put the provided
screw anchors into the hole.
04
Fix the wall mount to the wall with the
provided screws.
05
Plug in the wall mount, place the vacuum
into the wall mount, and then conrm that
the battery level indicator is displayed.
❇ Please refer to the QR code for
detailed information on the
installation of the wall mount.
Installation
INSTALLATION
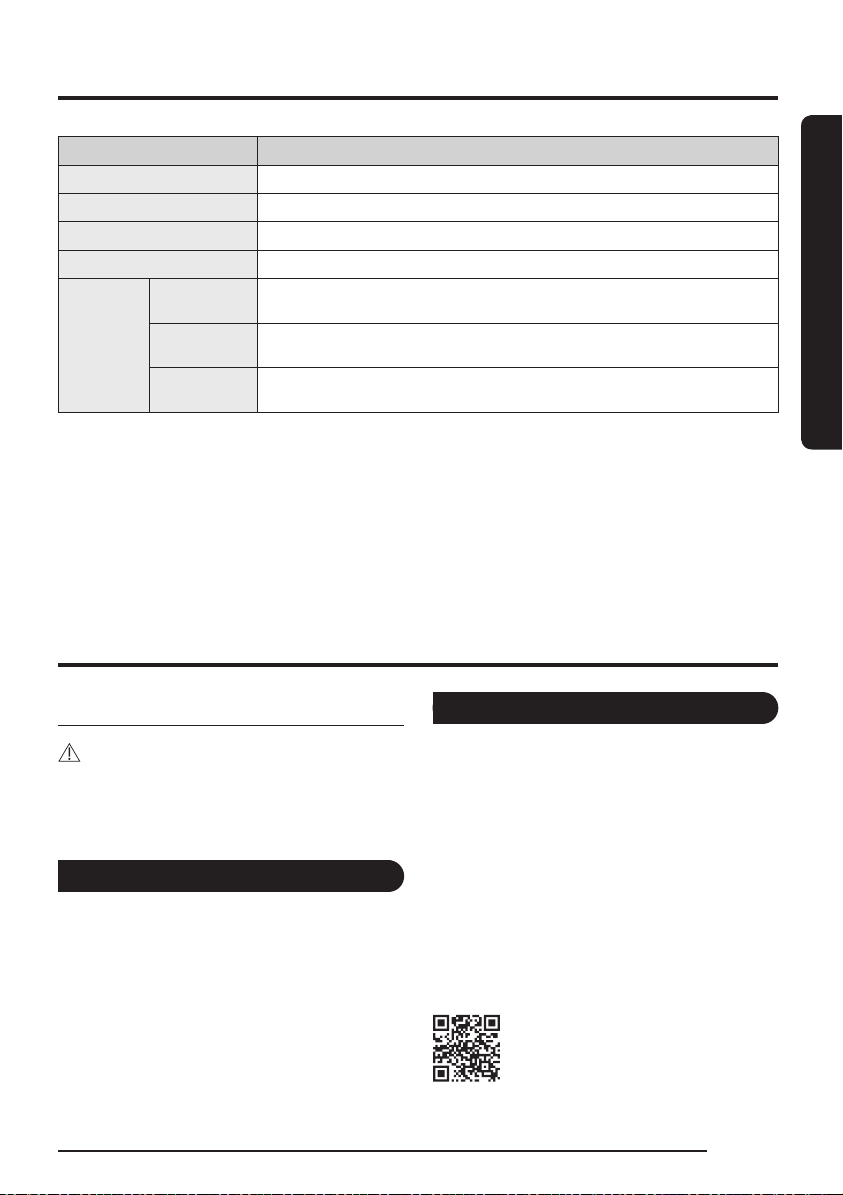
Product Specication
Model VS20B75**** Series
Power 100-240 V
~
50-60Hz
Rated power consumption
550W
Battery specication Lithium-ion 21.6 V, 1800 mAh, 6 cell
Charging time 3.5 hours
Cleaning
time
[Default:
(MID)]
Handy
Approximately 3 minutes(JET)/ Approximately 5 minutes(MAX)/
Approximately 30minutes(MID)/ Approximately 60minutes(MIN)
Soft Action
Brush
Approximately 5 minutes(JET)/ Approximately 9 minutes(MAX)/
Approximately 18minutes(MID)/ Approximately 27minutes(MIN)
Turbo Action
Brush
Approximately 5 minutes(JET)/ Approximately 9 minutes(MAX)/
Approximately 18minutes(MID)/ Approximately 27minutes(MIN)
❇ Charging and cleaning time may differ depending on the brushes and the conditions of use.
English
11
2023-05-04 오후 2:07:28
Loading ...
Loading ...
Loading ...