Loading ...
Loading ...
Loading ...
Using Quick Sampling
PSR-E473, PSR-EW425 Owner’s Manual
45
This operation lets you restore the default samples
for each Quick Sampling pad. However, keep in mind
that this deletes the samples you have assigned to
the pads.
1
Press the [CAPTURE] button to enter the
Quick Sampling mode.
2
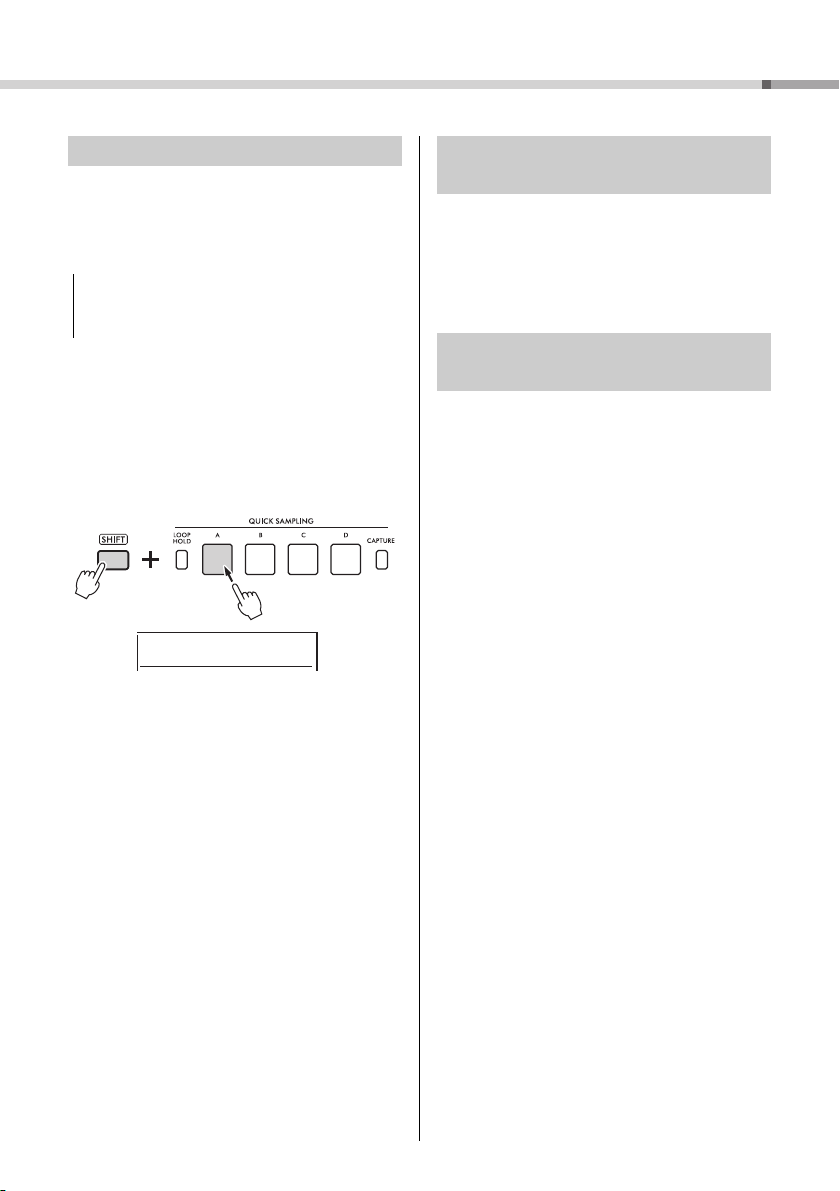
While holding the [SHIFT] button, press
the Quick Sampling pad that has the
sample you want to delete.
The pad flashes, and “ClrSMPL?” appears on the
display.
3
Press the [ENTER] button.
The Quick Sampling pad’s light comes on, and
“Sure?” appears on the display.
To cancel this operation, press the [EXIT] button.
If you cancel the operation, the Quick Sampling
pad’s light goes off and the instrument returns to
the status described in Step 2.
4
Press the [ENTER] button again.
“Writing!” appears briefly on the display, the Quick
Sampling pad’s light goes off, and the default
sample is restored.
5
Press the [CAPTURE] button to exit
Quick Sampling mode.
You can import WAV files that are stored on a USB
flash drive into the internal memory as samples, and
assign them to Quick Sampling pads.
For details, refer to the Reference Manual on the
website (page 11).
Samples that are assigned to Quick Sampling pads
[A] to [D] can individually be saved to a USB flash
drive as sample files.
Sample files that have been saved to a USB flash
drive can be imported and re-assigned to the pads.
For details, refer to the Reference Manual on the
website (page 11).
Restoring the Default Samples
Restoring the default samples overwrites any samples that
you have assigned to the pads. Save important samples you
want to keep to a USB flash drive (page 56) before restoring
the default samples.
NOTICE
ClrSMPL?
Press and hold
Sampling a WAV File from a USB
Flash Drive
Saving a Sample to a USB Flash
Drive
Loading ...
Loading ...
Loading ...