Loading ...
Loading ...
Loading ...
(only for NL)
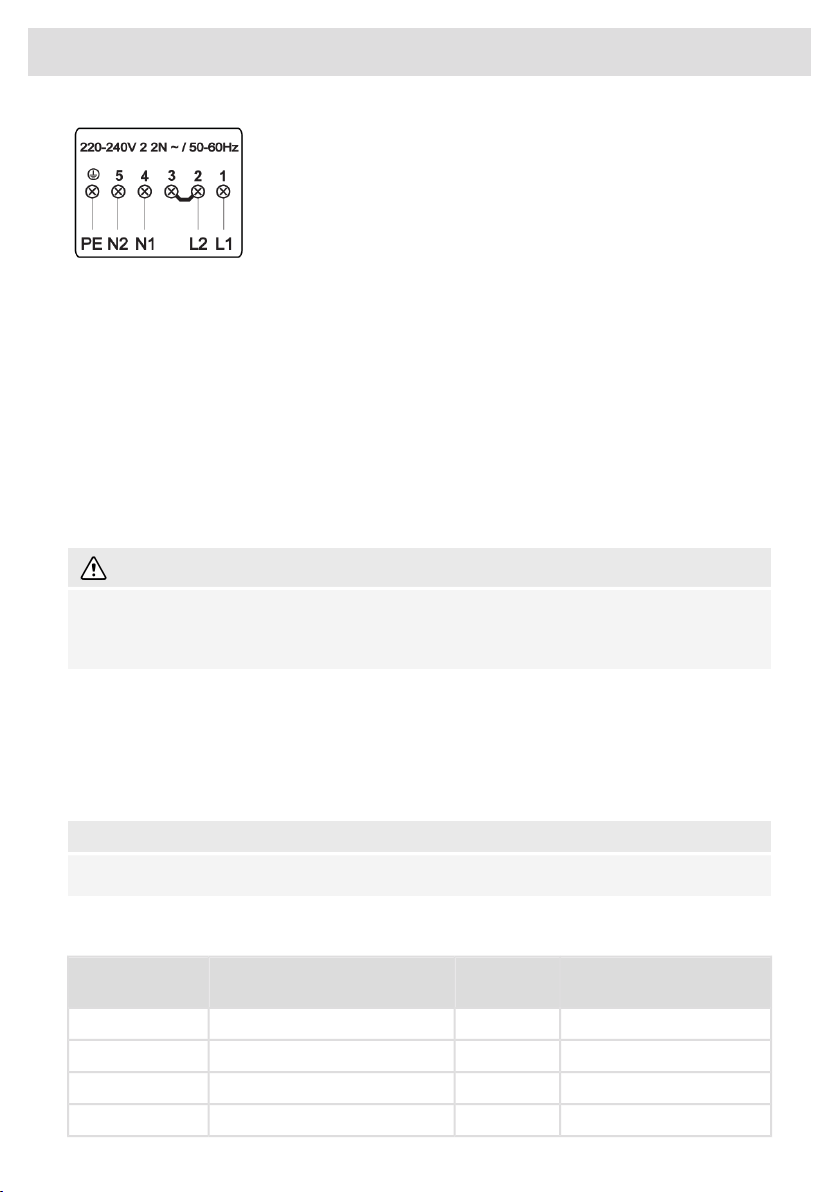
2 phases, 2 neutral conductors (220–240 V 2-2N~, 50-60 Hz)
To reach the rated maximum power two fuses of 16A are needed.
The 2 fases (L1 and L2) should be secured by only one and the same
earth leakage breaker. It is not allowed to run L1/N1 threw a different
earth leakage breaker than L2/N2.
Install a jumper between terminals 2 and 3!
Connection only for BE
1. Check the voltage. Before connecting the appliance, make sure the voltage specified on the
rating plate conforms to the voltage of your power mains. The voltage of your power mains
(220–240 V between L1 and L2) should be checked by an expert using an appropriate measuring
device.
2. Open the cover of the connection terminal box.
3. Connect the wires according to your type of appliance.
4. The jumpers are provided seperately.
5. Change the power limitation in the Settings when needed. See chapter Settings Con for
connection setting.
WARNING!
The appliance may only be connected by an authorised expert. False connection can destroy
parts of the appliance. In such case, there is no right to warranty. Disconnect the appliance from
the power mains before any repair or maintenance operation.
Power cord
• Run the power cord through a cord strain relief (clamp) which protects the cable from being
pulled out.
Connection diagram
For appliance types: BI3CA… .
NOTE!
Note: The appliance type can be found on the rating plate on the bottom of the appliance.
Power cord core cross sectional area should be at least 1,5 mm² for the following current limiter
settings which should be adjusted to your circuit breakers:
Number and cross section
of Power cord wires
Power cord
type
Connection typeCurrent limiter
settings
3x1,5 mm²H05V2V2-F2 phase conductors1x16A
3x1,5 mm²H05V2V2-F2 phase conductors1x13A
3x1,5 mm²H05V2V2-F2 phase conductors1x10A
3x1,5 mm²H05V2V2-F2 phase conductors1x06A
56
Electrical installation
Loading ...
Loading ...
Loading ...