Loading ...
Loading ...
Loading ...
13
mWARNING! Replacing the auger blades involves close
operation with the auger and the blades. To avoid injury caused
by unintentional starting, make sure the batteries are not
inserted before proceeding with the operation, and wear heavy
duty gloves during operation.
Tools Required (Not Provided):
• 10 mm wrench
• 13 mm wrench
• Heavy duty gloves
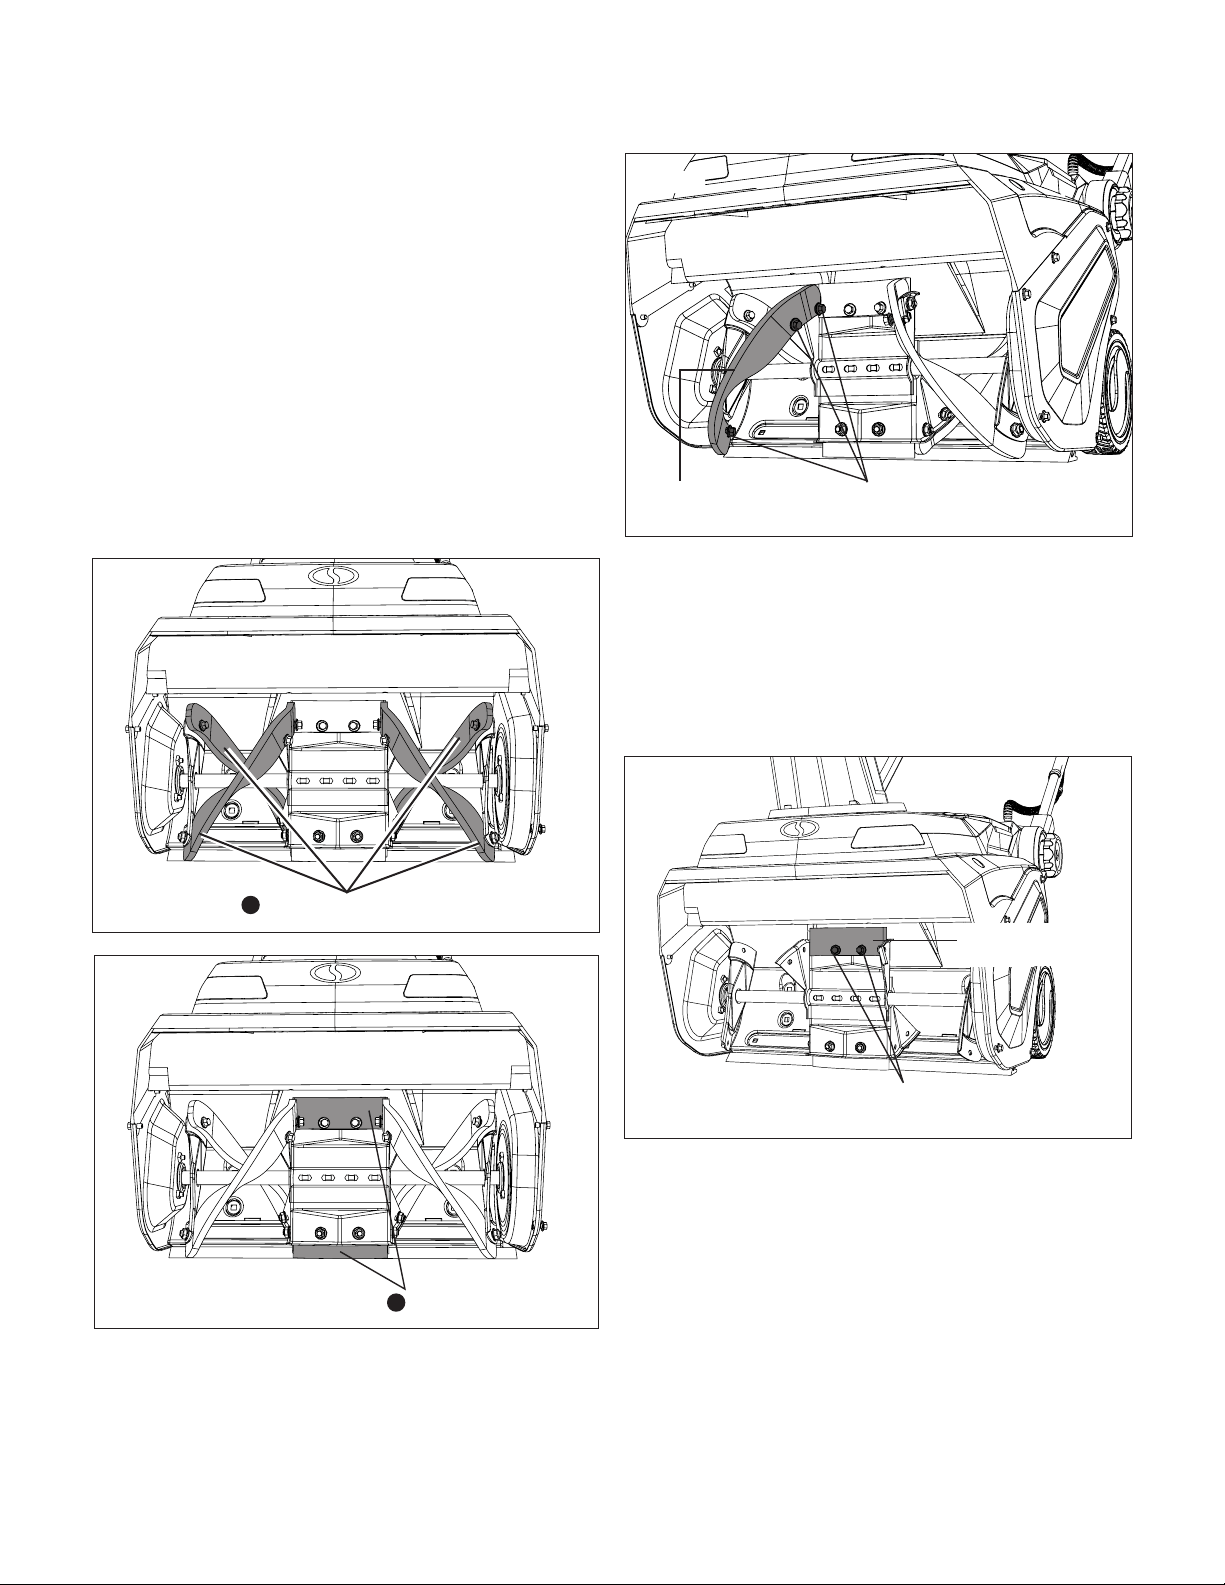
In total there are 6 blade pieces fixed by 16 sets of screws,
washers and nuts in the unit. When replacing worn auger
blades, pay close attention to the order in which you remove
them. Remove the 4 blade pieces on the sides first, and then
the 2 blade pieces fixed on the middle steel plate. Assemble the
new auger blades in the reverse order of the disassembly (Figs.
20 – 21).
1. To remove the first blade on the side, use a 10 mm wrench
to hold the bolt steady, and use a 13 mm wrench to loosen
and remove the nut. Repeat the operation to remove all 3
sets of bolt and nut, and gently remove the blade from the
auger (Fig. 22).
Blades on the sides
1
Fig. 20
Blades on the plate
Fig. 21
2
2. Follow the same instruction to remove the other 3 blades
located on the sides. Rotate the auger when working on the
blades on the back.
3. After 4 blades on the side are removed, move to the two
blade pieces that are fixed on the middle steel plate. Use
the 10 mm wrench to hold the bolt steady, and use the 13
mm wrench to loosen and remove the nut. Repeat on the
other nut and bolt set, and gently remove the blade from the
central plate (Fig. 23).
4. Rotate the auger to expose the other blade on the plate.
Follow the same instruction to remove it.
5. After all old blades are removed, follow the reverse order to
assemble the new blades. Use the original sets of hardware
to secure the blades on the auger.
Replacing Auger Belt
Tools Required (Not Provided):
• 10 mm wrench (2)
• Heavy duty gloves
1. Position unit on a hard, flat, smooth level surface, with the
batteries removed.
Remove the 3 sets of
bolt and nut
Blade to be
removed
Fig. 22
Blade to be
removed
Remove the 2 sets of
screws, washers and nuts
Fig. 23
Loading ...
Loading ...
Loading ...