Loading ...
Loading ...
Loading ...
19INSTALLATION
ENGLISH
Securing Dishwasher to
Countertop
For countertops made of wood or other material that
will not be damaged by drilling, use Method 1.
For countertops made of granite, marble, or other
materials that could be damaged by drilling, use
Method 2.
NOTE
•Cover the lter hole with towels to prevent screws
from falling down into the pump.
•Use a magnetic screwdriver.
Method 1
Using the provided screws, secure the dishwasher to
the countertop through the holes in the bracket.
Screw
Installation bracket
NOTE
•Installation brackets and screws can be found in
the silverware basket. See Attaching Mounting
Hardware section for more information on attaching
installation brackets to dishwasher.
Method 2
1Remove the plastic caps from the mounting
bracket access holes.
2Drive a wood screw through the mounting
bracket and into the cabinet frame.
3Reinstall the plastic caps. Cap
Screw
Connecting Drain Hose
40"
(1016 mm)
max.
12"
(305 mm)
min.
If the end of the drain hose does not t the drain
line, use a heat and detergent resistant adapter
(not supplied). These may be obtained from a local
plumbing supply store.
The two typical connections are shown. To prevent
siphoning, one of the following connections should be
used.
/8"
(16 mm)
5 /4"
(19 mm)
31"
(25 mm)
For air gap connections,
cut off drain hose at dotted
line
For disposal or waste tee
connections
Drain Requirements
•Follow local codes and ordinances.
•Do not exceed 12 ft. (3.65 m) distance to drain.
•Do not connect drain lines from other devices to the
dishwasher drain hose.
•If an extension drain hose is required, use 5/8" or 7/8"
inside diameter, 2-3 ft. length hose and a coupler for
connecting the two hose ends.
Hose clamp
Coupler
Hose clamp
NOTE
•For drain hose installation, use the screw style
clamp provided with this dishwasher in the
silverware basket.
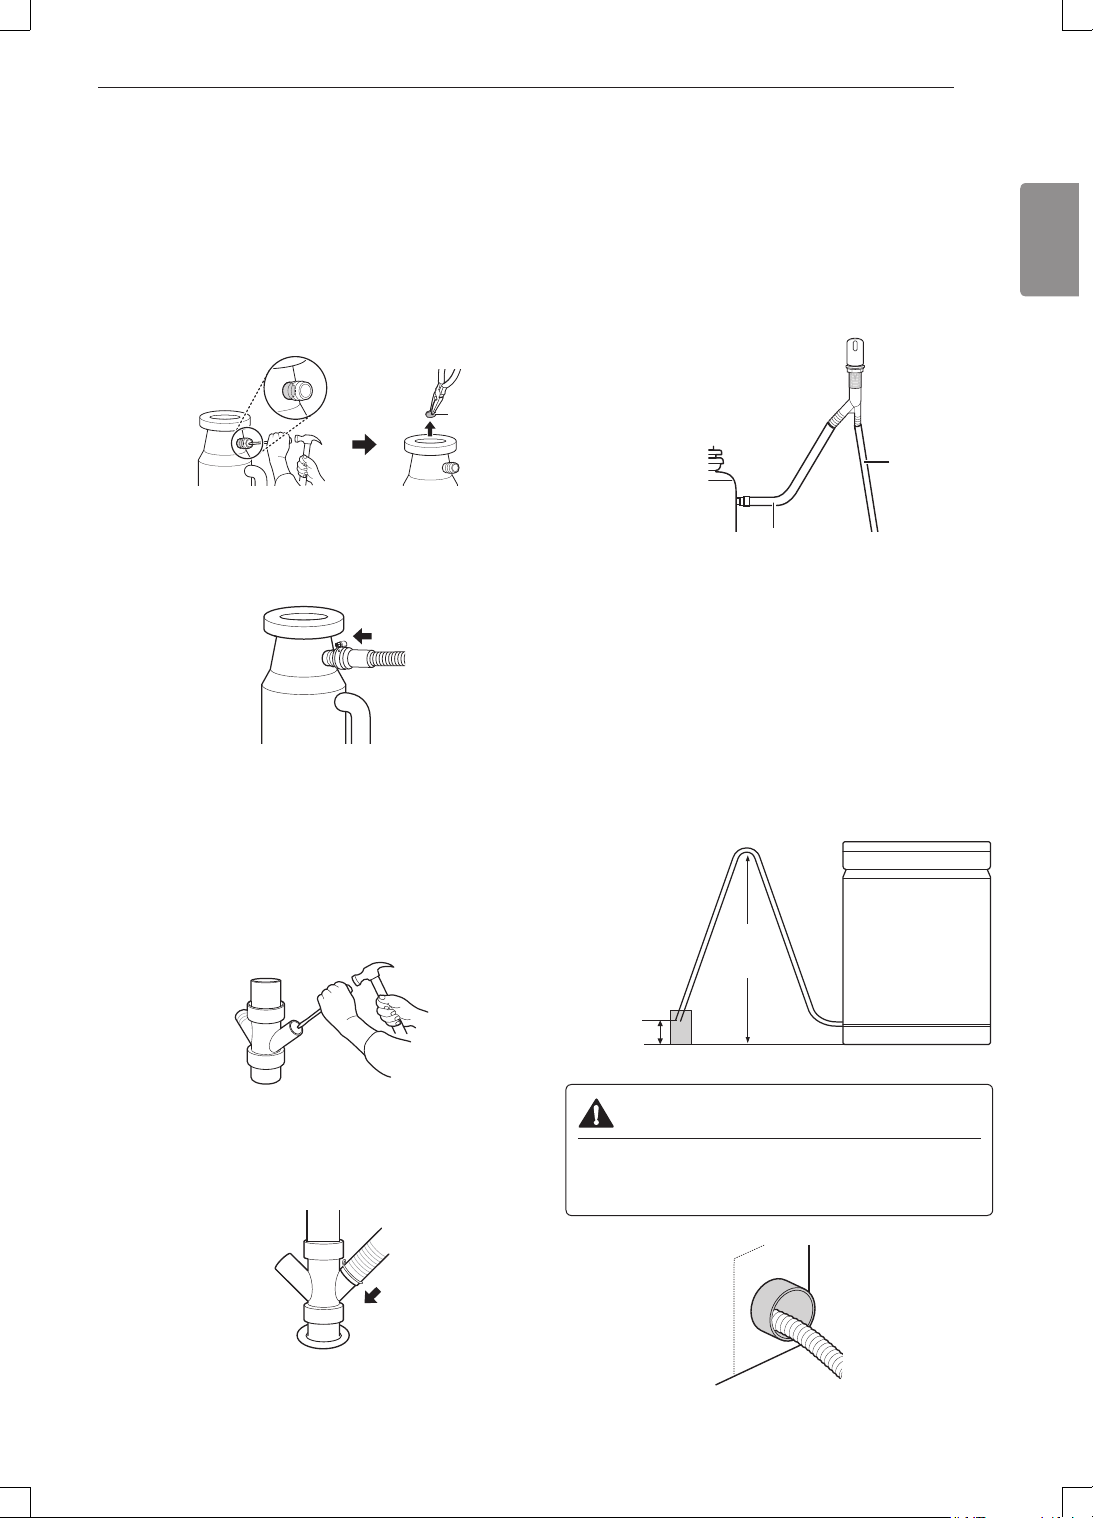
NOTE
•If the knockout plug has not been removed, the
dishwasher will not be able to drain properly.
Connecting to Disposal with No Air
Gap
1Remove the knockout plug with a hammer and
screwdriver.
Knockout plug
2Attach the drain hose to disposal with the hose
clamp provided. Move into position and tighten
the hose clamp.
Connecting Waste Tee with No Air
Gap
1Remove the knockout plug with a hammer and
screwdriver.
2Attach the drain hose to waste tee with the hose
clamp provided. Move into position and tighten
the hose clamp.
Connecting to Disposal or Waste Tee
with Air Gap
1Remove the knockout plug with a hammer and
screwdriver.
2Connect end of the drain hose to the air gap with
hose clamp provided. This avoids water being
siphoned from the tub.
Air gap
Rubber hose
connector
Drain hose
3Attach the rubber connector to disposal or waste
tee with the hose clamp provided. Move into
position and tighten the hose clamp.
Connecting without Air Gap
The height of the drain hose end must be at least 12"
(305 mm) and within 40" (1016 mm) from the base of
the appliance to avoid water being siphoned from the
tub.
12"
(305 mm)
min.
40"
(1016 mm)
max.
Drain pipe
CAUTION
•Hole in side of cabinet may have sharp edges.
Smooth or pad edges to avoid damaging drain
hose.
Loading ...
Loading ...
Loading ...