Loading ...
Loading ...
Loading ...
14 INSTALLATION
Preparing Electrical Wiring
1Operate this appliance with the correct voltage
as shown in this manual and on the rating plate.
Connect it to a dedicated, properly grounded
branch circuit which is protected by a time delay
fuse. Connect the appliance using 3-wires,
including a ground wire.
2If an outlet and other power connector are used,
it should be in an accessible location adjacent
to and not behind the dishwasher and within 4 ft
(1.2 m) of the dishwasher's side.
3The wiring must be grounded properly. If in
doubt, have it checked by a qualied electrician.
Do not connect any other appliance to the same
outlet.
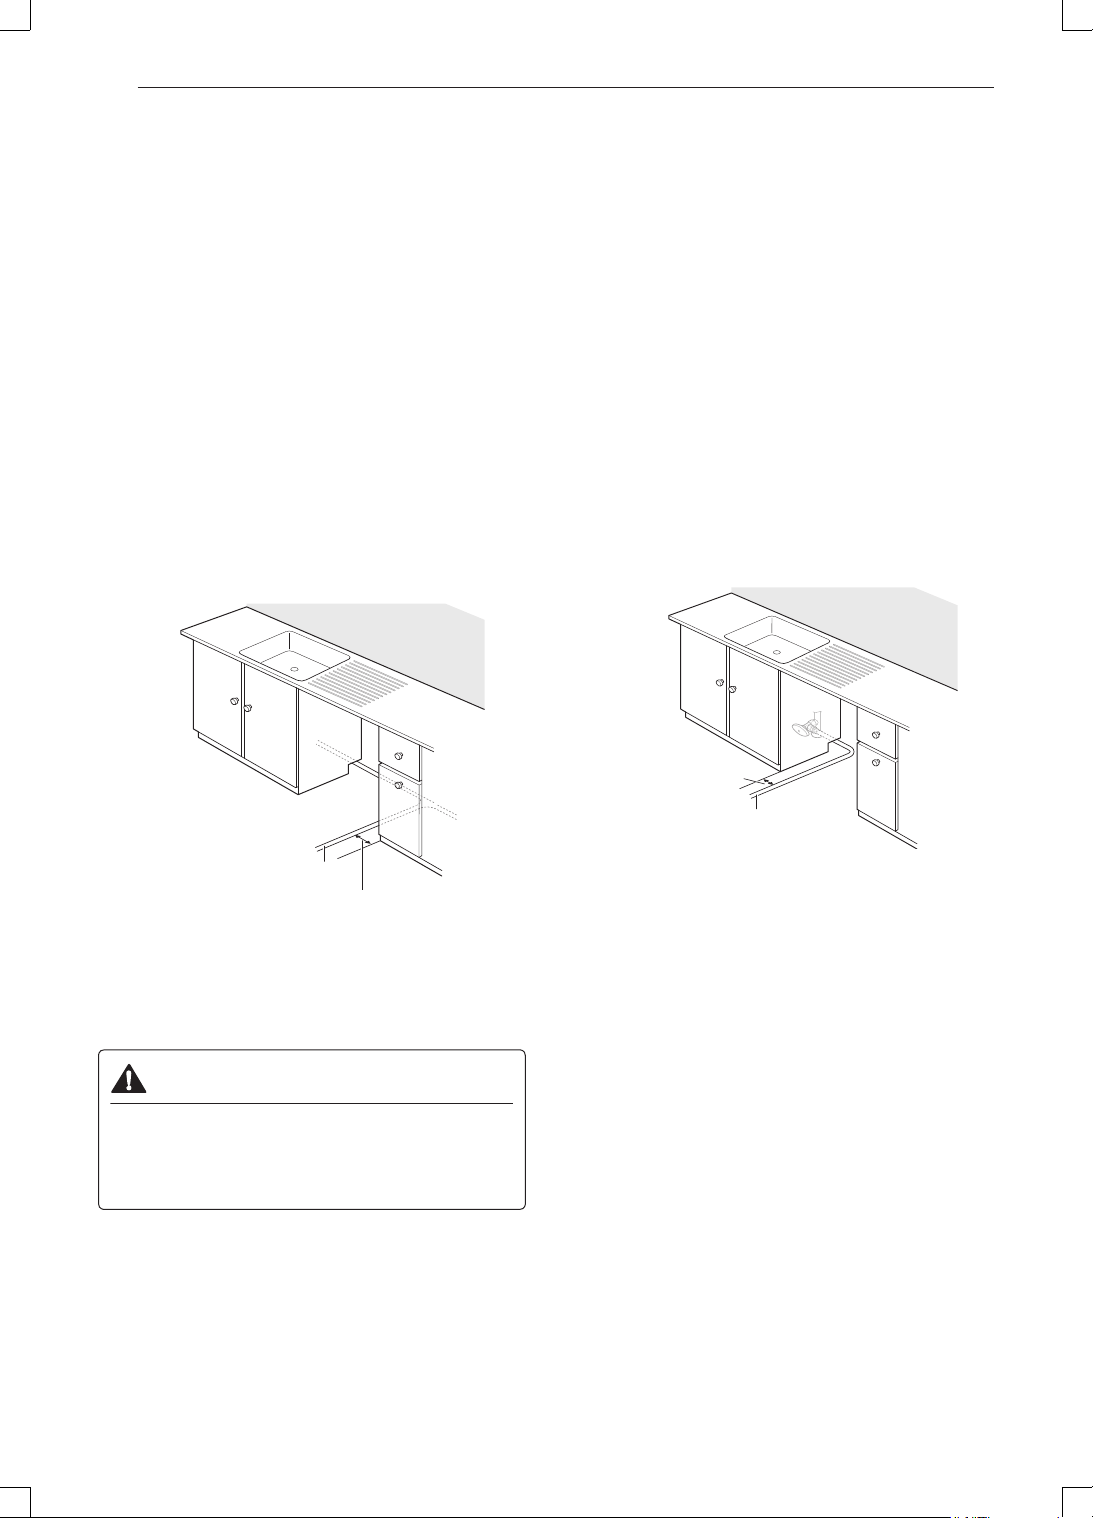
4Route the wiring.
4 /2" - 6”
(115 mm - 152 mm)
1
Electrical cable
5Make sure the electrical cable is oriented in the
right side channel.
WARNING
•For personal safety, remove house fuse or open
circuit breaker before installation.
•Do not use an extension cable or adapter with
this dishwasher.
NOTE
•If you nd any damage to the dishwasher, contact
your retailer or contractor.
•The included wire nut in 16AWG should be used.
Preparing Water Supply
Connection
Make sure the house water supply is turned off
before connecting the dishwasher water lines.
1Connect the dishwasher to a hot water supply
with a temperature range between 120 °F (49
°C) and 149 °F (65 °C). This temperature range
provides the best washing results and shortest
cycle time. To prevent damage to dishes, the
temperature should not exceed 149 °F (65 °C).
2When connecting the dishwasher water line,
sealing tape or compound should be used on
pipe threads to avoid leaks. Tape or compound
should not be used on compression ttings.
3The water supply tube must be located in the left
side channel.
6 /2" - 7 /4"
(165 mm - 197 mm)
1 3
Water supply line
NOTE
•Use new hoses when connecting to the water
supply. Do not reuse old hoses.
Loading ...
Loading ...
Loading ...