Loading ...
Loading ...
Loading ...

4
2. INSTALL DUCTWORK AND ELECTRICAL WIRING
Plan where and how the ductwork will be installed. Access to the top of the hood is preferred
for connection of ductwork.
Install 3¼” x 10” ductwork, elbows and roof or wall cap, according to the installation type. Use
2” metal foil duct tape to seal duct joints.
NOTE: Although the horizontal discharge installation is feasible, this installation type should
be performed in specific situation only since it requires particular knowledge and
technical skills from the installers.
The minimum power pack distance above cooktop must not be less than 24’’.
A maximum of 30” above cooktop is recommended for best capture of cooking
impurities.
Distances over 30” are at the installer and users discretion.
Run 3-wire power supply cable to installation location. Its length should extend at least 4 feet
below the bottom of the custom hood.
Power pack
Roof cap
Wall
cap
HH0119A
3¼” x 10”
adapter & damper
24” to 30”
above
cooking surface
3¼” x 10” duct
TYPICAL DUCTWORK
1. PREPARE THE INSTALLATION
WARNING
!
When performing installation, servicing or cleaning the unit, it is recommended to wear safety glasses and gloves.
NOTE: Before proceeding to the installation, check the contents of the box. If items are missing or damaged, contact the manufacturer.
Make sure that the following items are included:
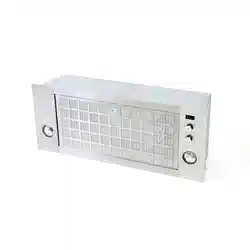
- Power pack
- Accessories: • 1filter
• 3¼” x 10” Adapter/Damper
• 2 Shielded halogen bulbs (120 V, 50 W with GU10 base)
• Bag of parts including: 1 wire clamp, 2 wire connectors, 4 no. 8 x 3/8” screws,
9 no. 8-10 x 1/2” screws, 8 no. 8-32 x 1/4” screws.
Parts sold separately:
- Ducts, elbows, wall and roof caps. Refer to page 3 for a complete list of venting options and model numbers.
NOTE: During installation, protect coutertop and/or cooktop.
Loading ...
Loading ...
Loading ...
