Loading ...
Loading ...
Loading ...
_J
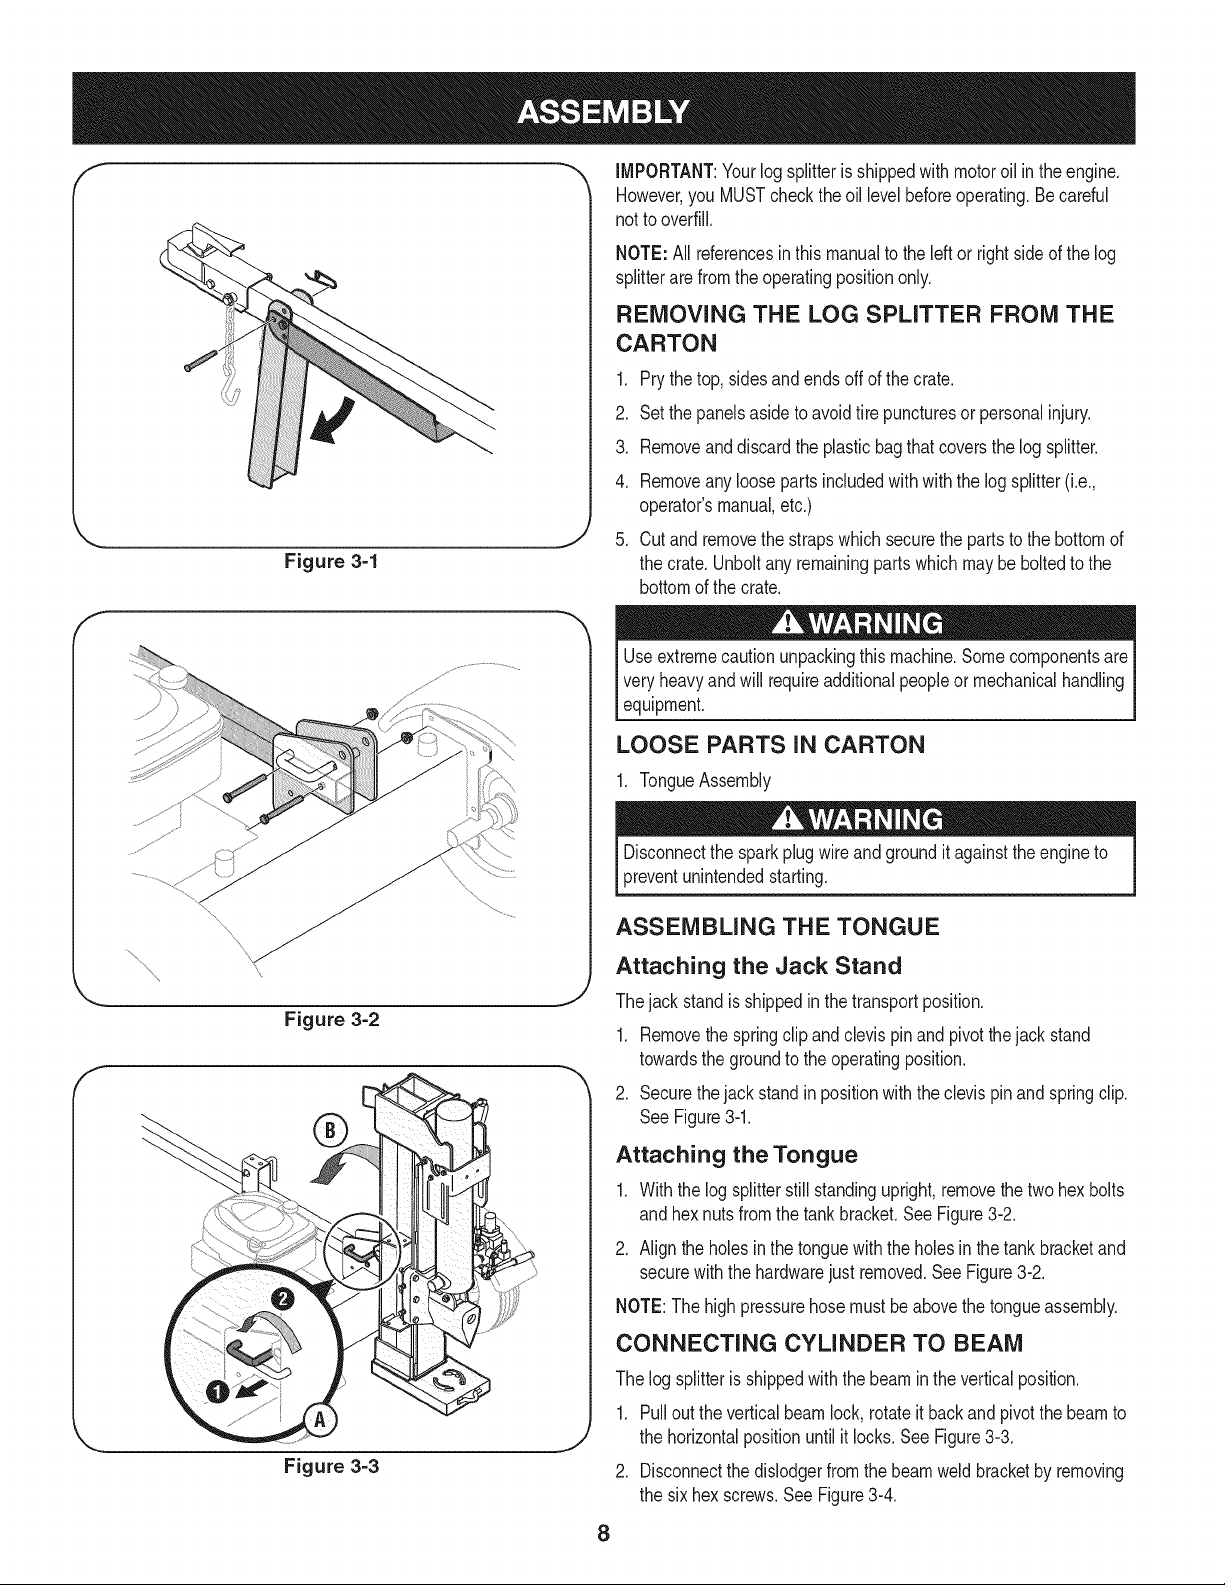
Figure 3=1
\
... j
Figure 3=2
Figure 3=3
IMPORTANT:Your log splitterisshippedwith motoroil in theengine.
However,you MUSTcheckthe oil levelbeforeoperating.Be careful
not to overfill.
NOTE: All referencesin this manualto the left or rightsideof thelog
splitterare from the operatingpositiononly.
REMOVING THE LOG SPLITTER FROM THE
CARTON
1. Prythe top,sidesandends off of the crate.
2. Set the panelsasideto avoidtire puncturesor personalinjury.
3. Removeand discardthe plasticbagthatcoversthe log splitter.
4. Removeany loosepartsincludedwithwiththe log splitter(i.e.,
operator'smanual,etc.)
5. Cut and removethe strapswhichsecurethe partsto the bottomof
the crate.Unboltany remainingparts which maybe boltedto the
bottomof the crate.
Useextremecautionunpackingthismachine.Somecomponentsare
veryheavyandwill requireadditionalpeopleor mechanicalhandling
equipment.
LOOSE PARTS IN CARTON
1. TongueAssembly
Disconnectthe sparkplug wireand groundit againstthe engineto
preventunintendedstarting.
ASSEMBLING THE TONGUE
Attaching the Jack Stand
Thejackstand isshippedin thetransportposition.
1. Removethe springclipand clevis pinandpivotthe jackstand
towardsthe groundto the operatingposition.
2. Securethejackstandin positionwiththeclevis pinandspringclip.
See Figure3-1.
Attaching the Tongue
1. Withthe logsplitterstill standingupright,removethe two hex bolts
and hexnutsfromthe tankbracket.SeeFigure3-2.
2. Align the holesinthe tonguewith the holesinthe tank bracketand
securewiththe hardwarejustremoved.See Figure3-2.
NOTE:The high pressurehosemustbe abovethe tongueassembly.
CONNECTING CYLINDER TO BEAM
The log splitteris shippedwiththe beamin the verticalposition.
1. Pullout the verticalbeamlock, rotateit backand pivot the beamto
the horizontalpositionuntil itlocks.See Figure3-3.
2. Disconnectthe dislodgerfromthe beamweldbracketby removing
the six hexscrews.SeeFigure3-4.
8
Loading ...
Loading ...
Loading ...