
Technical Support and E-Warranty Certificate www.vevor.com/support
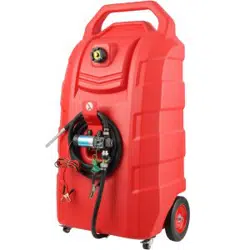
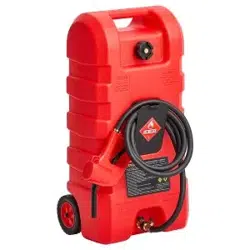
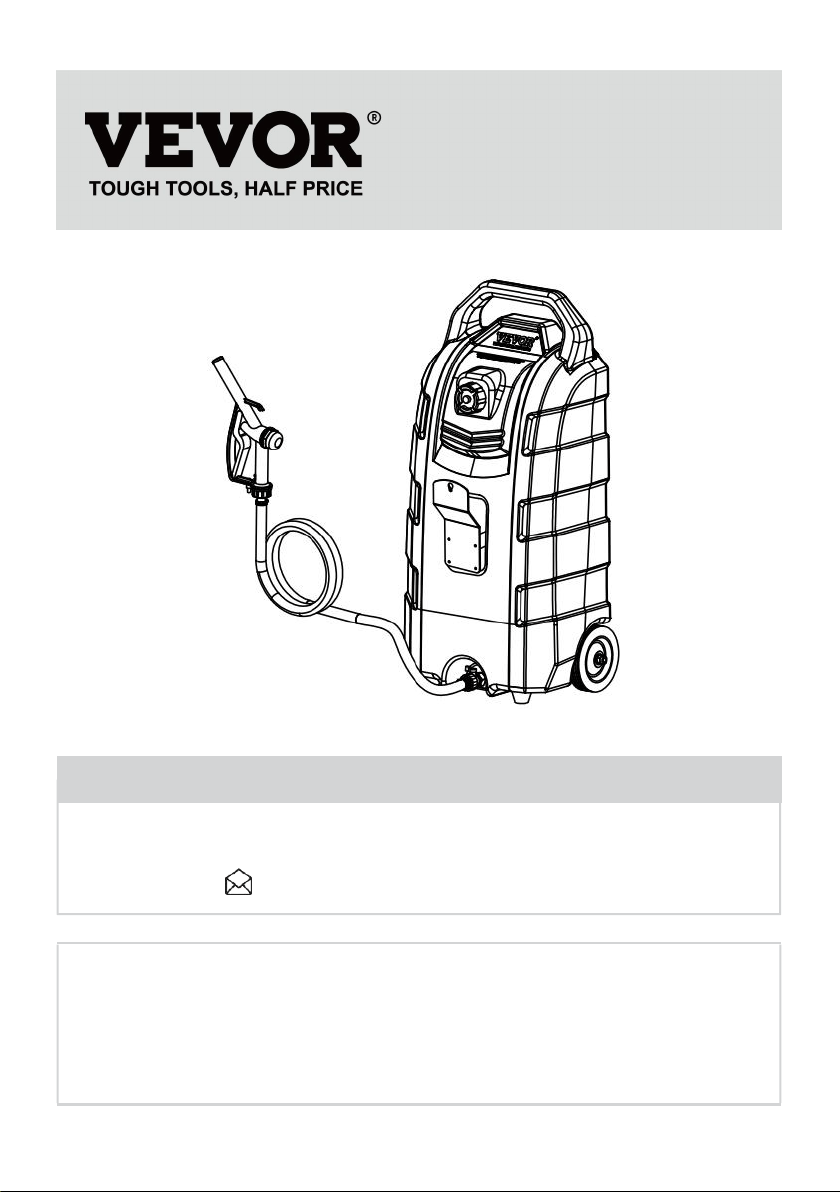
FUEL CADDY
USER MANUAL
Model: JGC16PH,JGC16PH2
We continue to be committed to provide you tools with competitive price.
"Save Half", "Half Price" or any other similar expressions used by us only represents an
estimate of savings you might benefit from buying certain tools with us compared to the major
top brands and doses not necessarily mean to cover all categories of tools offered by us. You
are kindly reminded to verify carefully when you are placing an order with us if you are
actually saving half in comparison with the top major brands.
- 1 -
MODEL: JGC16PH,JGC16PH2
Have product questions? Need technical support? Please feel free to
contact us:
CustomerService@vevor.com
NEED HELP? CONTACT US!
This is the original instruction, please read all manual instructions
carefully before operating. VEVOR reserves a clear interpretation of our
user manual. The appearance of the product shall be subject to the
product you received. Please forgive us that we won't inform you again if
there are any technology or software updates on our product.
FUEL CADDY

- 2 -
1. Read carefully and understand all ASSEMBLY AND OPERATION
INSTRUCTIONS before operating.
2. Failure to follow the safety rules and other basic safety precautions
may result in serious personal injury.
GENERAL SAFETY RULES
When using this product, basic precautions should always be followed,
including the following;
This product is not intended for use by persons (including children)
with reduced physical, sensory, or mental capabilities or lack of
experience and knowledge unless they have been given supervision
or instruction concerning the use of the product by a person
responsible for their safety.
Wear proper protective equipment when installing or using this
product.
Ensure all fittings and threaded connections are tightened and
leak-free before operating.
A DANGER!
Fuels are extremely flammable. Keep away from heat sparks and open
flames.
Do not use electronics or mobile communications devices such as
mobile phones when pumping flammable liquids.
Attach ground wire and bond containers that are being pump from and
into. Ground all containers to a known ground source to dissipate
static electricity before pumping liquids.
Fuel vapors can explode. Harmful or fatal if swallowed. Avoid
breathing in fuel vapors.
Do not smoke near or while using the fuel caddy.
This product is intended for fuel transfer only and is not intended to
transport fuel in any vehicle or trailer.

- 3 -
Do not modify this product.
A WARNING! CAUTION! ATTENTION!
Do not use this product for prop-longed fuel storage.
Use the caddy for one fuel type only to avoid possible damage.
Monitor flow rate and fill level to prevent overflows and spills.
Always empty the pump and hose after using the caddy. Lift the hose
and turn the handle in the opposite direction to empty all remaining
liquid back into the caddy.
Caution when filling the caddy through the fill tube, Monitor closely to
prevent overflows or spills.
This product is unsuitable for placing in a yacht, off-road vehicle, and
another violent vibration place.
Never use the fuel caddy near open flames or heal sources.
SAVE THESE INSTRUCTIONS

- 4 -
MODEL AND PARAMETERS
Model
JGC16PH
JGC16PH2
Capacity
16 Gal
16 Gal(single)
Fuel Type
Diesel,Lubricating Oil,Gasoline
Oil Discharge
Hand oil gun
Hand oil gun
Max. Flow
7.8 L/min(Oil gun is 0.5m below the tank outlet)
Hose
Φ19(Inside
Diameter)x250cm
Φ19(Inside
Diameter)x250cm
Wheel
6"
6"
Package
1
2
Material
PE
PE
Color
Red
Red
- 5 -
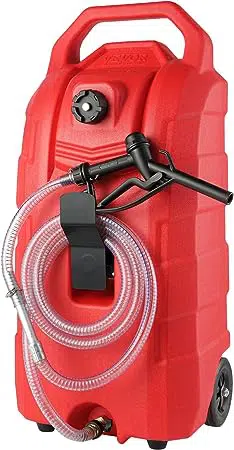
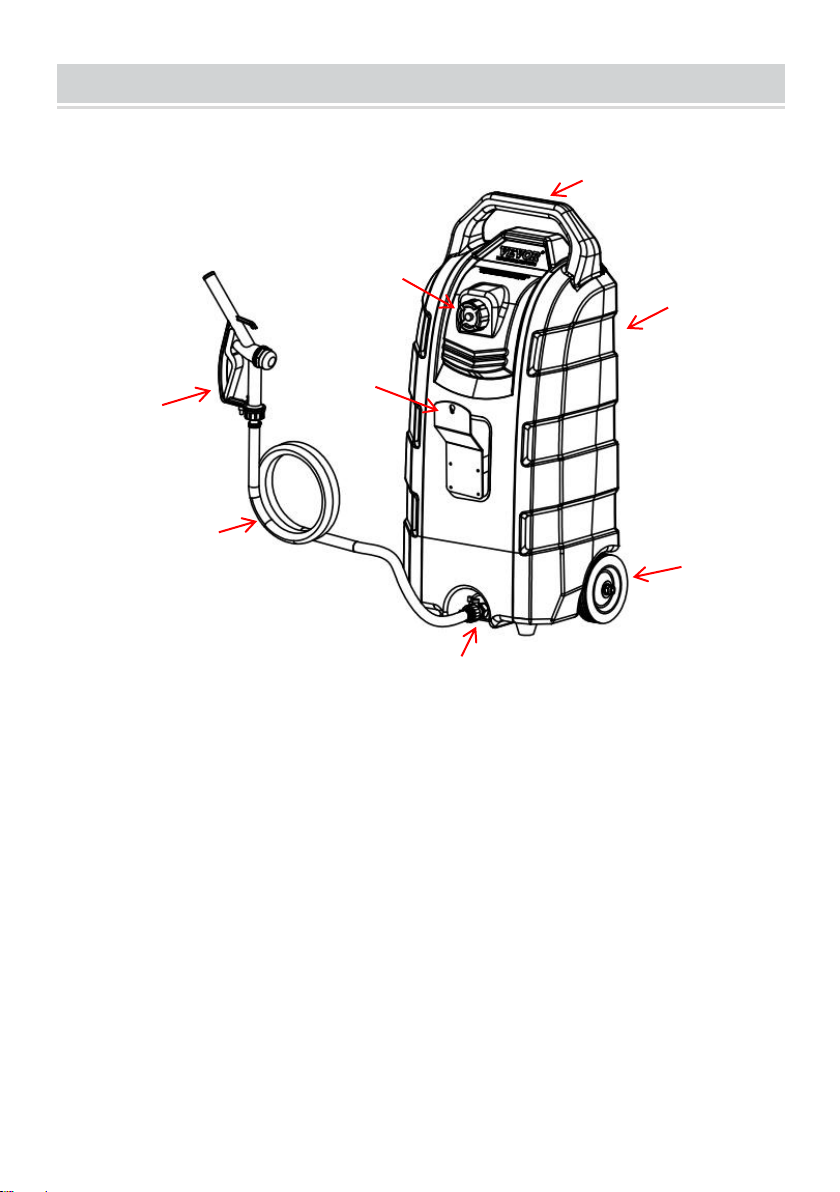
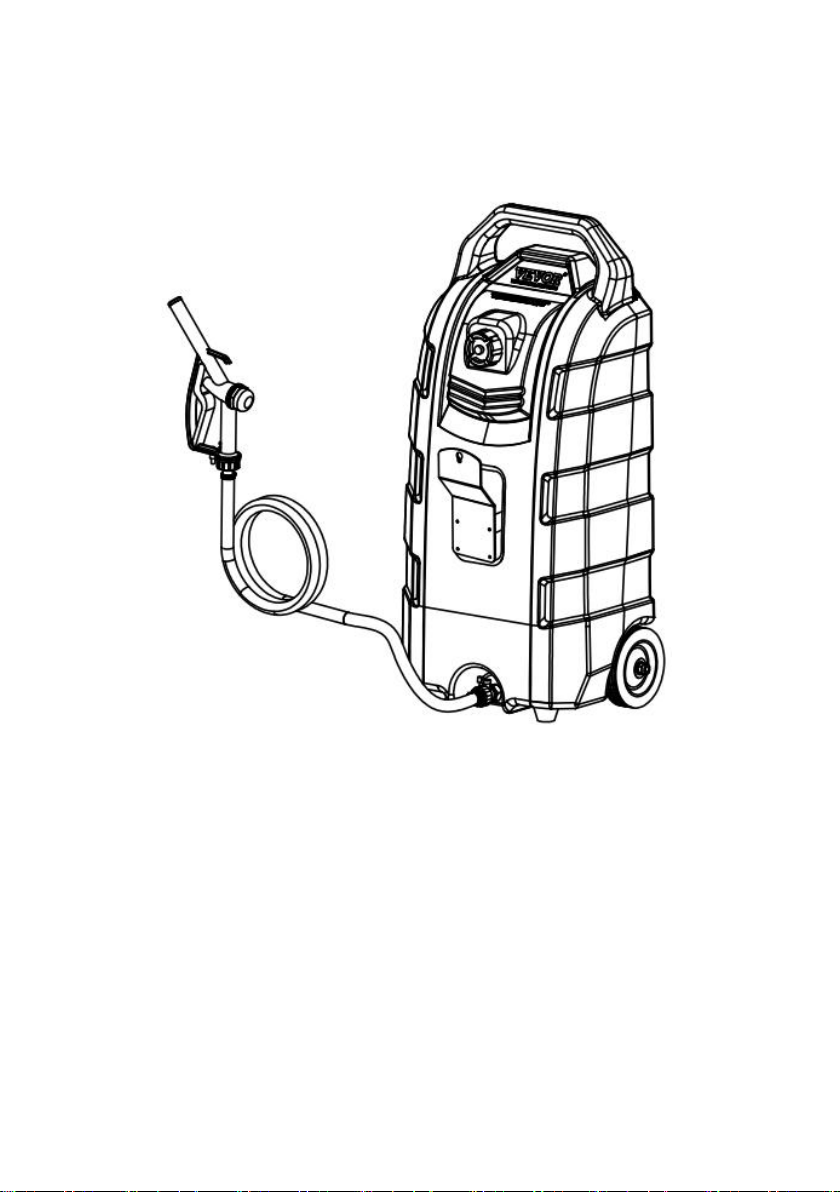
STRUCTURE DIAGRAM
1. Handle 2. Fuel Tank 3. Fixed Wheel 4.Outlet
5. Fixed Mount 6. Fuel Tank Cap 7. Hose 8. Hand Fuel Gun
8
7
2
6
3
5
1
4
- 6 -
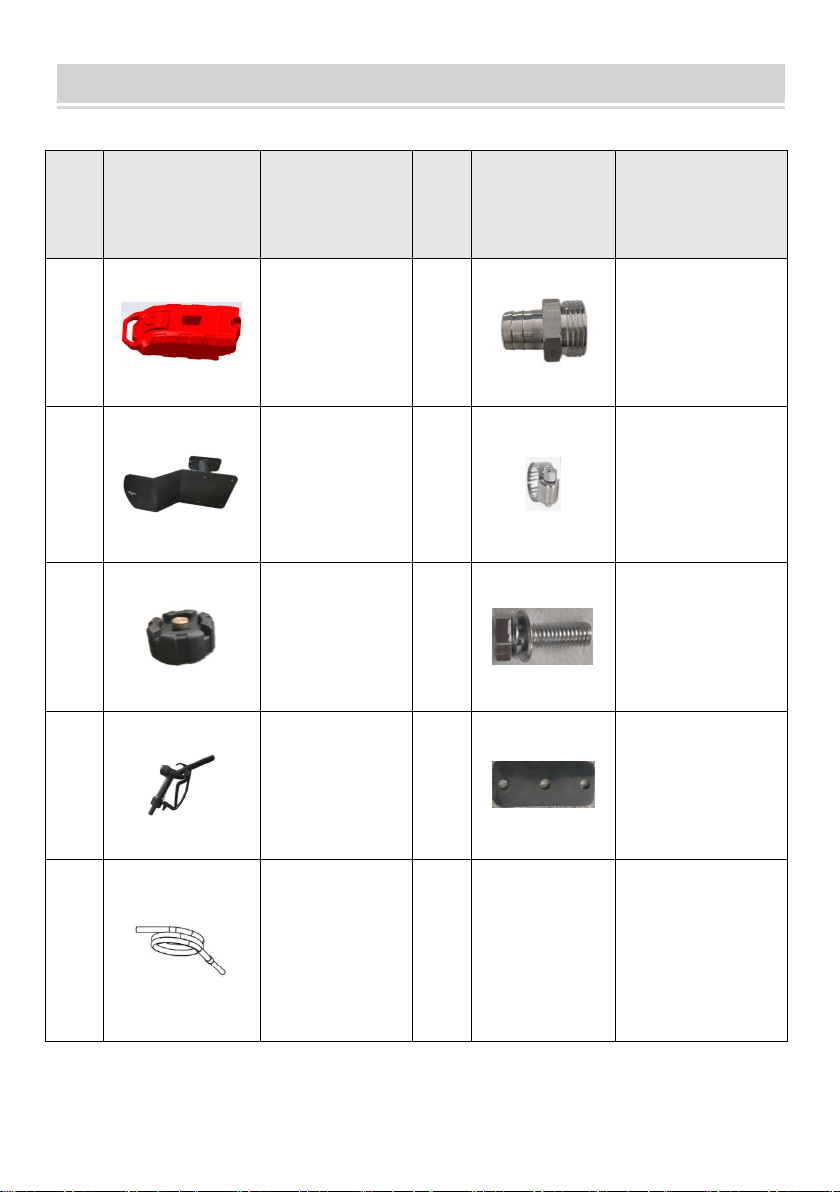
COMPONENTS
(
SINGLE
)
No.
Picture
Name and Qty
No.
Picture
Name and Qty
1
Fuel Tank(x1)
6
Direct Ball Valve
Joint(x1)
2
Fixed
Mount(x1)
7
Hose Clamp(x2)
3
Fuel Tank Cap
(x1)
8
Bolt(x3)
4
Fuel Gun
(x1)
9
Fixing Plate (x1)
5
Long Hose (x1)
10
/
User Manual(x1)
- 7 -
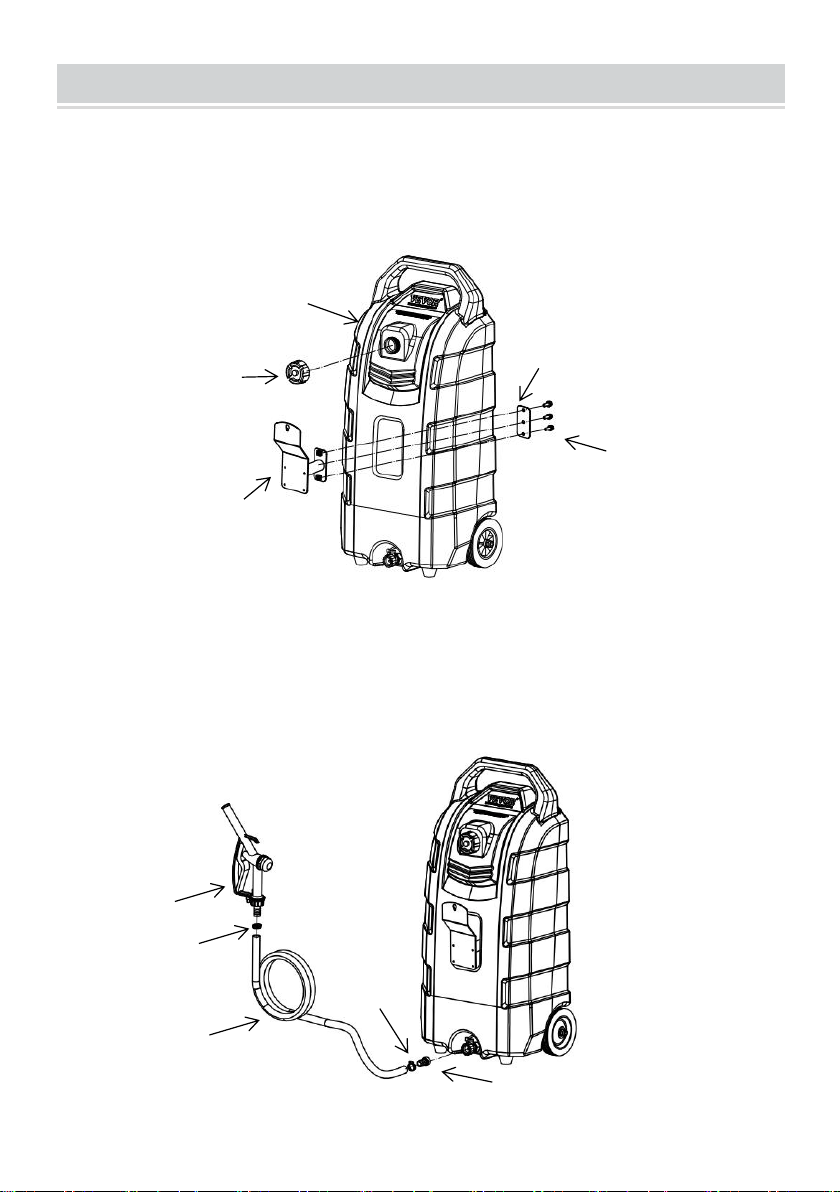
ASSEMBLY
Step1: Install fixed mount(2) and fixing plate(9), lock with bolt (8), as
shown below.
Put on the fuel tank cap(3).
Step2: Install the direct ball valve joint(6) at the bottom outlet of the tank.
Connect the inlet fuel gun and the outlet of the fuel tank with the long
hose(5), and lock them with the hose clamps(7).
4
7
2
9
8
5
7
6
3
1
- 8 -
Step3: Make sure that the components are tightened; The product is
assembled and ready for use.

- 9 -
OPERATION
Refueling operation:
-Please choose the appropriate oil filling, do not fill with chemicals or
another corrosive solvent.
-Lay the tank flat and make sure the direct ball valve joint is closed.
-Open the tank cap and fill the oil.
-During oil filling, pay attention to the filling of the tank to avoid overflow.
-After filling the tank, tighten the cap and place the tank in a safe place.
Pumping operation:
-Place the tank vertically and turn the air valve of the fuel tank cap
counterclockwise.
-Ensure that the oil level in the tank is at least 0.5 m higher than the fuel
gun; Press the fuel gun to refuel. After the oil is discharged, the switch at
the handle of the oil gun can be locked, and the oil will continue to flow out.
-As the oil level in the tank decreases, the oil flow from the oil gun
decreases; Please raise the tank so that the oil level is higher than the oil
gun.
-When refueling, please raise the gun above the tank to recover the
remaining oil in the long hose and return to the tank.
-Close the direct ball valve joint and the air valve of the fuel tank cap.

- 10 -
MAINTENANCE
1.Please clean the measure and filter regularly.
2.Keep away from fire.
3.For different types of oil, cleaning the tank before storing another type of
oil is recommended.
4.If this product is not used for a long time, it is recommended to clean and
store it in a cool and dry environment.
Sanven Technology Ltd.
Address: Suite 250, 9166 Anaheim Place, Rancho Cucamonga, CA 91730
Made in China