Loading ...
Loading ...
Loading ...
Crisper and Meat Drawer System (some
models)
The combined design of the crisper and meat drawers can
keep food fresh longer by creating adjustable environments
for produce, meats, and other food items.
The drawer in the leftside(A) can serve as either a
crisper drawer or a meat drawer.
To use as a crisper drawer:
1. Set temperature control(b) to COLD.
2. Set humidity control(a) to desired level to best suit
contents.
3 Slide control to HIGH for produce with leaves such as
lettuce, spinich or cabbage.
4. Slide control to LOWfor produce with skins such as
cauliflower, corn or tomatoes.
To use as a meat drawer:
1. Set humidity control(a) to HIGH.
2. Set temperature control(b) to COLD for normal
refrigerator temperature and to COLDER for colder
temperature. Adjustment of the the temperature
control(b) allows for more or less freezer air flow
around the pan. Ice crystals may form on drawer or
food on COLDER setting.
The drawer in the right side(B) can be used for produce.
The crisper drawer features an adjustable humidity
control(e).
I,LI
To use as a crisper drawer(B):
1. Slide control to HIGH for produce with leaves such as
lettuce, spinich or cabbage.
2. Slide control to LOWfor produce with skins such as
cauliflower, corn or tomatoes.
3. Set temperature control(E) on crisper frame to COLD.
Lift front of crisper frame(A) and remove plastic
divider(B). Make sure divider pin(C)on plastic
divider is free from frame assembly before
removing from unit.
4. Slide crisper drawers out.
5. Remove crisper frame(A) by lifting hooks(D) free
from metal track on rear wall. Pull forward and out of
unit.
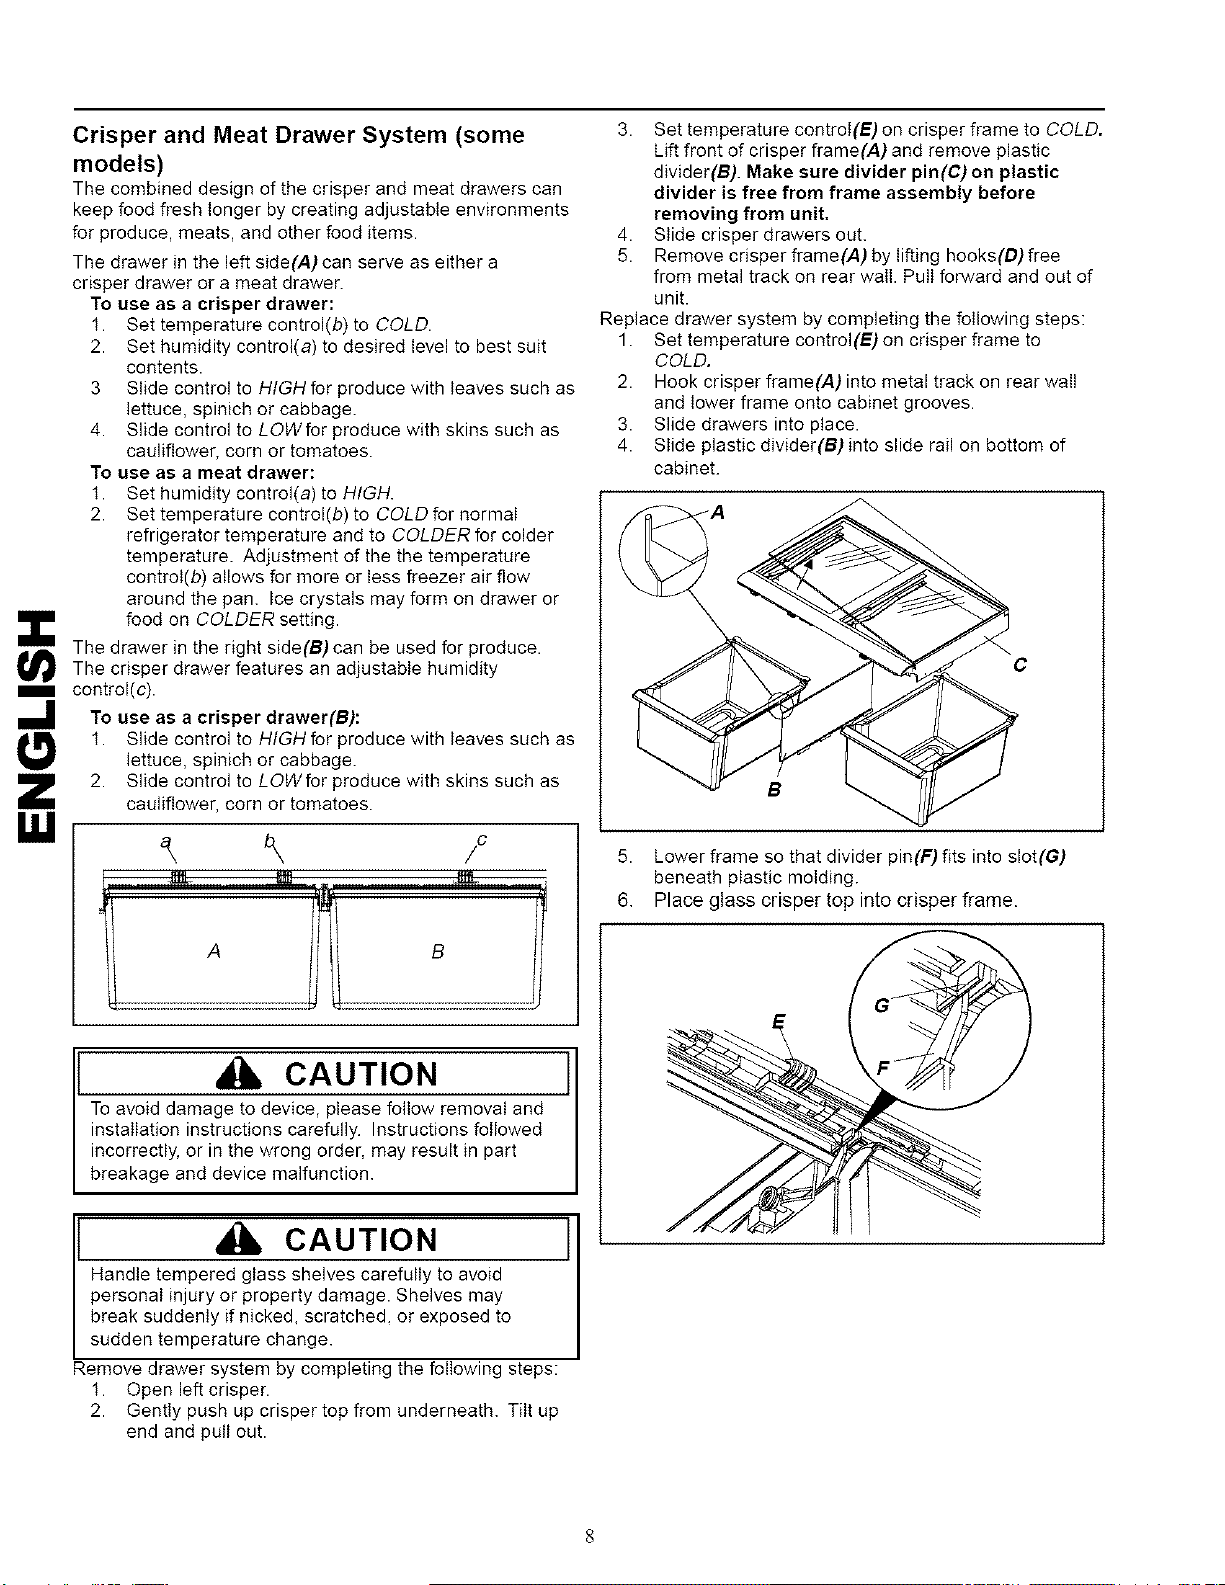
Replace drawer system by completing the following steps:
1. Set temperature control(E) on crisper frame to
COLD.
2. Hook crisper frame(A) into metal track on rear wall
and lower frame onto cabinet grooves.
3. Slide drawers into place.
4. Slide plastic divider(B) into slide rail on bottom of
cabinet.
C
B
5. Lower frame so that divider pin(F) fits into slot(G)
beneath plastic molding.
6. Place glass crisper top into crisper frame.
CAUTION
To avoid damage to device, please follow removal and
installation instructions carefully. Instructions followed
incorrectly, or in the wrong order, may result in part
breakage and device malfunction.
CAUTION ]
Handle tempered glass shelves carefully to avoid
personal injury or property damage. Shelves may
break suddenly if nicked, scratched, or exposed to
sudden temperature change.
Remove drawer system by completing the following steps:
1. Open left crisper.
2. Gently push up crisper top from underneath. Tilt up
end and putt out.
Loading ...
Loading ...
Loading ...