Loading ...
Loading ...
Loading ...
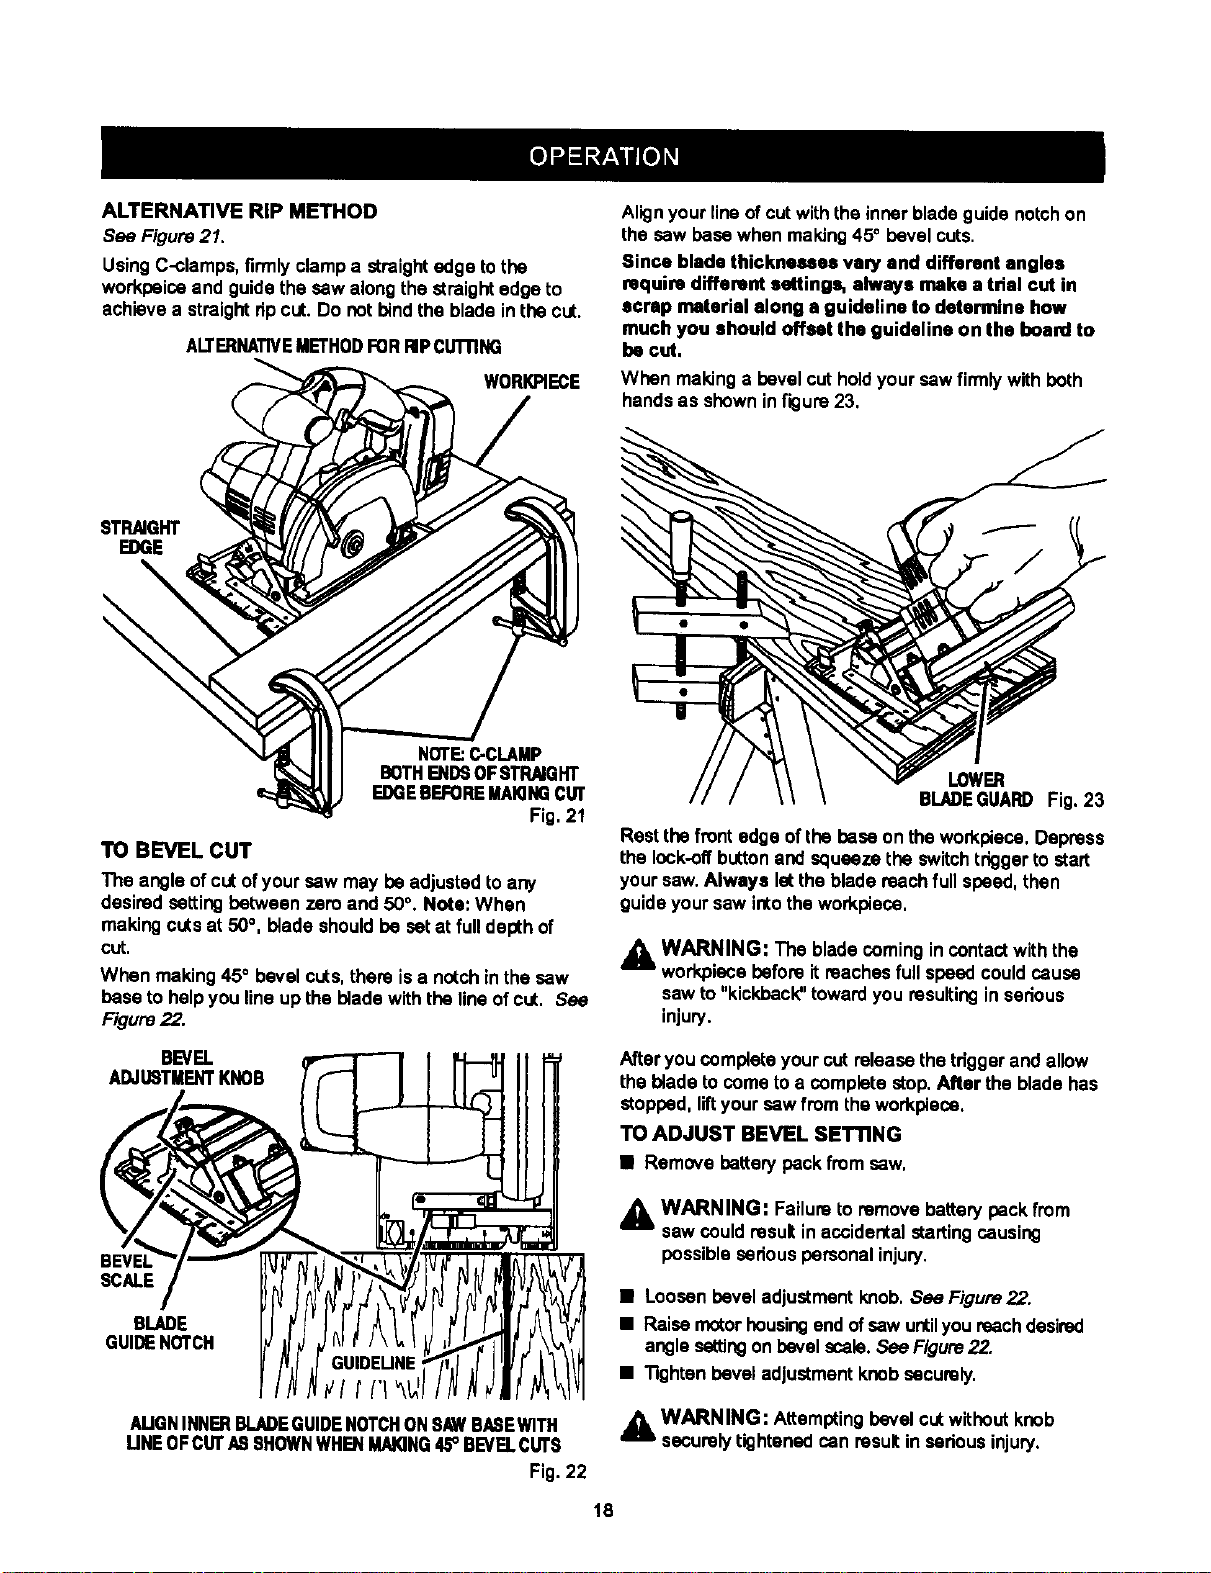
ALTERNATIVE RIP METHOD
See Figure21.
UsingC-clamps, firmlyclamp a straightedge tothe
workbaicaand guidethe sew along the straightedge to
achievea straightdp cut. Do not bindthe bladeinthe cut.
ALTERNATIVEMETHODFORRIPCUTrlNG
WORI_ECE
Alignyour lineofcutwiththe inner bladeguide notchon
the sew base when making45° bevel cuts.
Since blade thicknesses vanj and different angles
require different sottings, always make atdal cut in
scrap materiel along aguideline to determine how
much you should offset the guideline on the board to
be cut,
When makingabevel cutholdyoursew firmly with both
handsas showninfigure23,
STRAIGHT
EDGE
NOTE:C-CLAMP
BOTHENDSOFSTRAIGHT
EDGEBEFOREMAIONGCUT
Fig. 21
TO BEVEL CUT
The angle ofcutofyour sew may beadjusted to any
desired settingbetween zero and 50°. Note: When
makingcutsat 50°, blade shouldbe setat full depthof
cut.
When making45° bevel cuts,there isa notchinthe sew
base to helpyou lineup the bladewith theline ofcut. See
F/gum 22.
BEVEL
ADJUSTMENTKNOB
BeVel W
SCALE
BLADE
GUIDE NOTCH
AUGNINNERBLADEGUIDENOTCHONSAWBASEWITH
UNEOFCUTASSHOWNWHENMAIQNG45° BEVELCUTS
Fig. 22
LOWER
BLADEGUARDFig. 23
Restthe frontedge ofthe base onthe workpieca,Depress
the lock-off buttonand squeezethe switchtrigger to start
yoursaw,Always letthe bladereachfull speed, then
guide yoursaw intotheworkpieco.
AWARNING: The bladecomingin contact withthe
workplacebefore it reachesfull speed couldcause
saw to "kickback" toward you resultinginserious
injury.
Afteryou complete your cut release the triggerand allow
the blade tocome to a complete stop, After the bladehas
stopped, liftyoursew from the workpiece.
TO ADJUST BEVEL SETTING
•Remove batterypackfrom saw,
WARNING: Failureto removebatterypackfrom
saw could resultin accidentalstarting causing
possibleserious personalinjury.
•Loosen bevel adjustmentknob,See Figure22.
•Raise motorhousingend ofsew untilyou reachdesired
anglesettingon bevelscale.See FIgure22.
•Tightenbevel adjustmentknobsecurely.
WARNING: Attemptingbevel cutwithoutknob
securelytightenedcan resultin seriousinjury.
18
Loading ...
Loading ...
Loading ...