Loading ...
Loading ...
Loading ...
CHANGING THE DECK ENGAGEMENT BELT
Shutthe engineoffand removeignitionkey beforeremovingthe
cuttingblade(s)for sharpeningor replacement.Protectyour hands
usingheavygloveswhengraspingbladesand pulleys.
TheV-beltsfoundon yourmowerare speciallydesignedto engageand
disengagesafely.A substitute(non-OEM)V-beltcanbe dangerousby
notdisengagingcompletely.Fora properworkingmachine,useidenti- I
_ca repacementbetsas sted nparts stofthsoperatorsmanua, j
All beltsonyour mowerare subjectto wearand shouldbe replacedif
anysignsof weararepresent. To changeor replacethe deckengage-
mentbelton yourmower,proceedas follows:
1. Removethe cuttingdeck from the moweras instructedearlierin
thissection.
Avoidpinchinginjuries.Neverplaceyourfingerson the idler springor
betweenthe beltand a pulleywhile removingthe belt
2. Removethe beltcoveras instructedearlier in this section.Refer
to Figure20on page19.
3. Removethe beltkeeperas instructedearlier in this section.Refer
to Figure21onpage19.
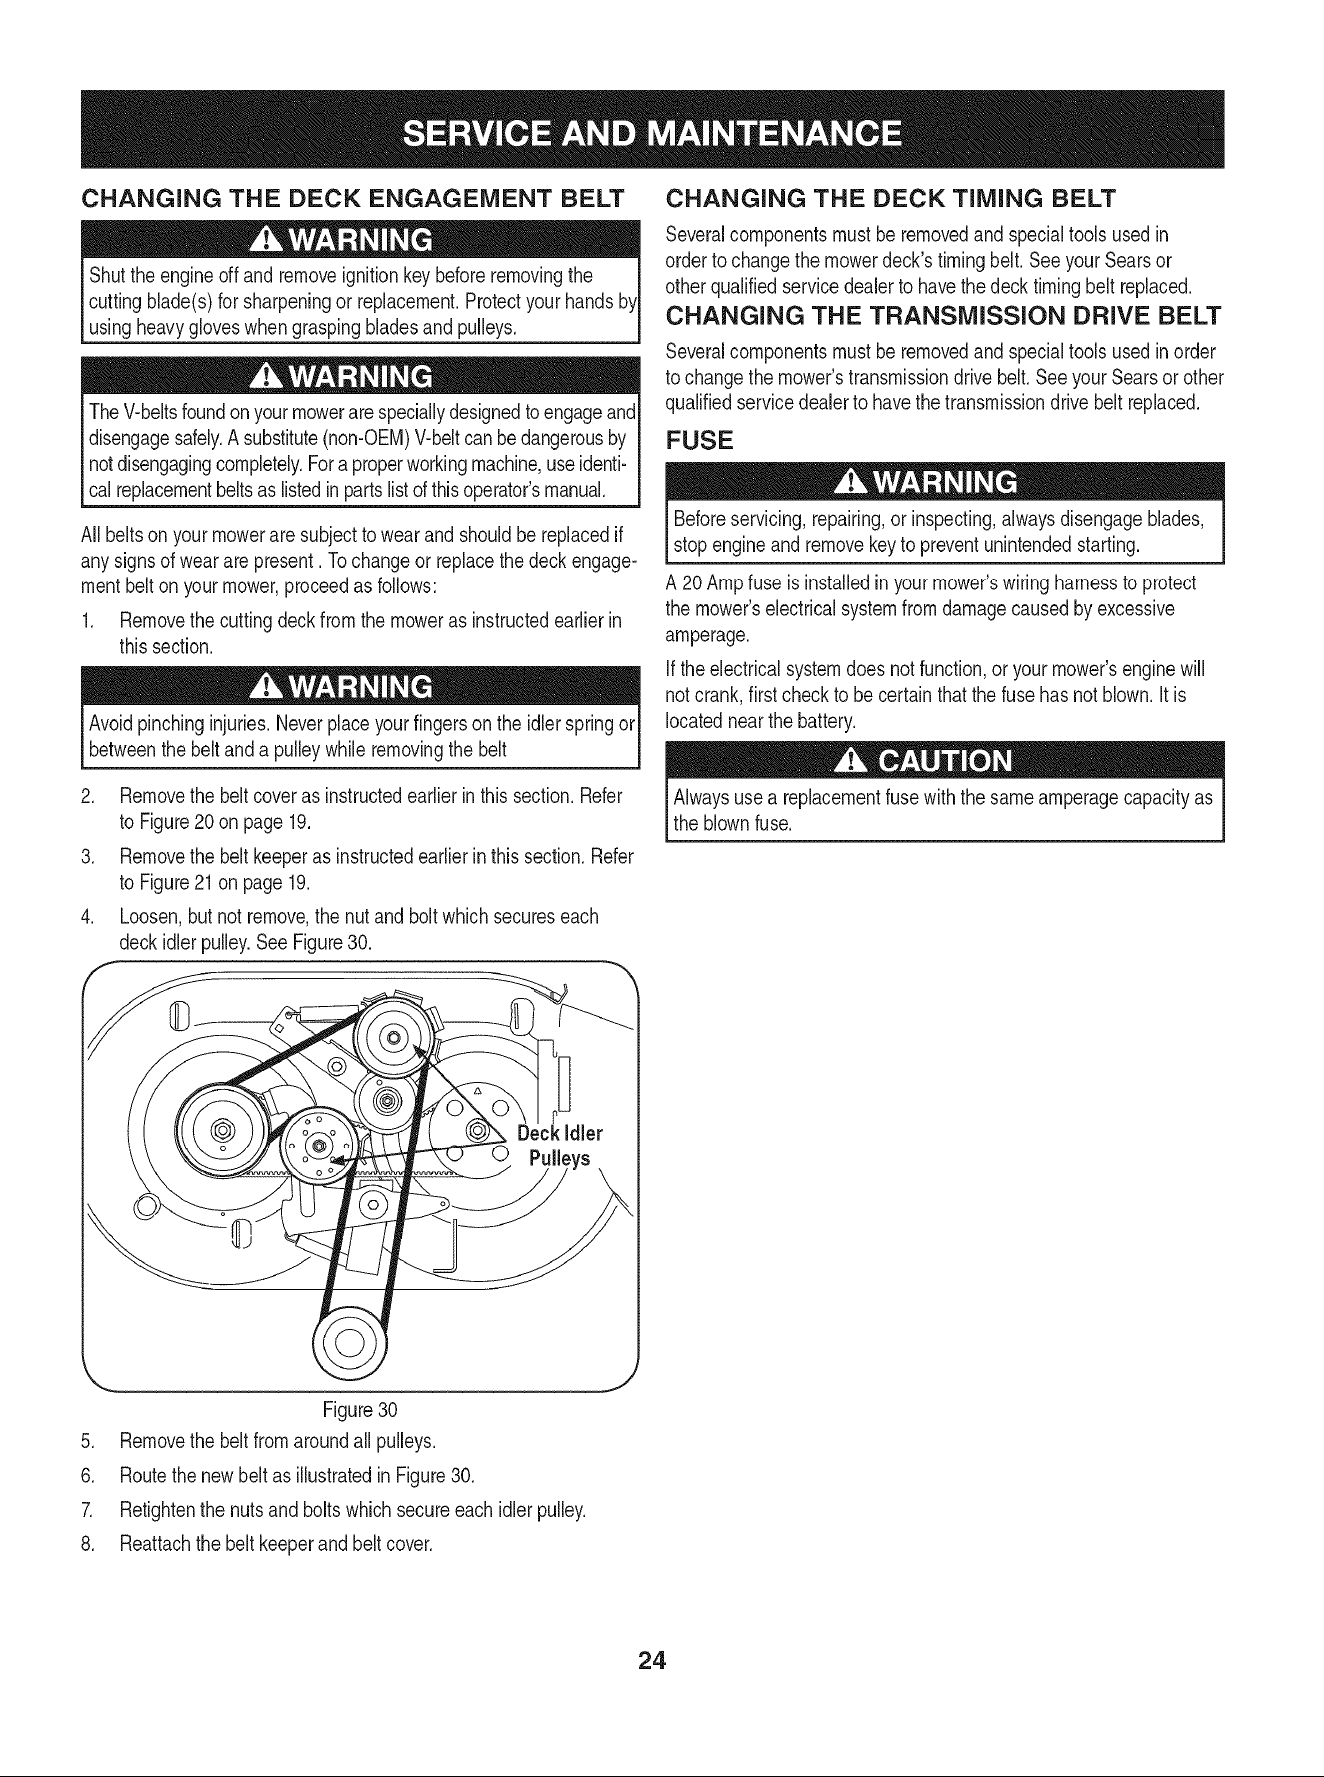
4. Loosen,butnot remove,the nutand bolt which secureseach
deckidler pulley.See Figure30.
CHANGING THE DECK TIMING BELT
Severalcomponentsmustbe removedand specialtools usedin
orderto changethe mowerdeck'stimingbelt.SeeyourSearsor
otherqualifiedservicedealerto havethe deck timing belt replaced.
CHANGING THE TRANSMISSION DRIVE BELT
Severalcomponentsmustbe removedand specialtools usedin order
to changethe mower'stransmissiondrive belt.Seeyour Searsor other
qualifiedservicedealerto havethe transmissiondrivebelt replaced.
FUSE
Beforeservicing,repairing,or inspecting,alwaysdisengageblades,
stopengineand removekeyto preventunintendedstarting.
A 20Amp fuseis installedinyour mower'swiringharnessto protect
the mower'selectricalsystemfromdamagecausedby excessive
amperage.
Ifthe electricalsystemdoes notfunction,or your mower'senginewill
not crank,firstcheckto becertainthat thefusehas notblown.Itis
locatednearthe battery.
Alwaysuse a replacementfusewiththe sameamperagecapacityas
the blownfuse.
Figure30
5. Removethe beltfrom aroundall pulleys.
6. Routethe newbelt as illustratedin Figure30.
7. Retightenthe nuts and bolts which secureeachidler pulley.
8. Reattachthe belt keeperand belt cover.
24
Loading ...
Loading ...
Loading ...