Loading ...
Loading ...
Loading ...
9
Control.
The range hood is designed to remove smoke, cooking vapors
and odors from the cooktop area. For best results, start the hood
before cooking and allow it to operate several minutes after the
cooking is complete to clear all smoke and odors from the kitchen.
The hood controls are located on the center side of the range
hood.
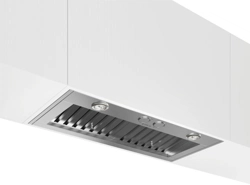
Recessing Knobs
• Youcanhidecontrolknobsbydepressingthemuntilushwith
the hood body.
• Pressingtheknobsagainwilllowertheknobs,andenablethe
user to operate the lights and blower.
Controls
A B
A.Lampsknob
B. Blower knob
Operating the lamps
1 Turn the light switch to the “ON” position to turn the range hood
lights On.
2 Turn the light switch to the “OFF” position to turn the range
hood lights Off.
Operating the blower
1 Turn the blower switch at “1” to turn the range hood on.
2 Turn the blower switch to the desired speed position.
3 Turntheblowerswitchtothe“MAX”positiontoturntherange
hood on max speed.
4 Turn the blower switch to the “OFF” position to turn the range
hood blower Off.
Auto On blower (Heat Guard)
The range hood is equipped with a sensor to automatically turn
on the blower when excessive heat is detected in the control area.
When the blower switch is in the “Off” position, this sensor will
turn the blower to high speed when necessary. When the heat
decreases, the blower will turn off. When the blower switch is in
the On position, the heat sensor is not active and the range hood
functions normally.
Maintenance
Cleaning
Exterior surfaces:
To avoid damage to the exterior surface, do not use steel wool
orsoap-lledscouringpads.Rubindirectionofthegrainlineto
avoid scratching the surface.
Alwayswipedrytoavoidwatermarks.
• StainlessSteelCleanerandPolish.
• Mild liquid detergent and water.
• Wipe with damp soft cloth or non abrasive sponge, then rinse
with clean water and wipe dry.
• Do not use chlorine base cleaners.
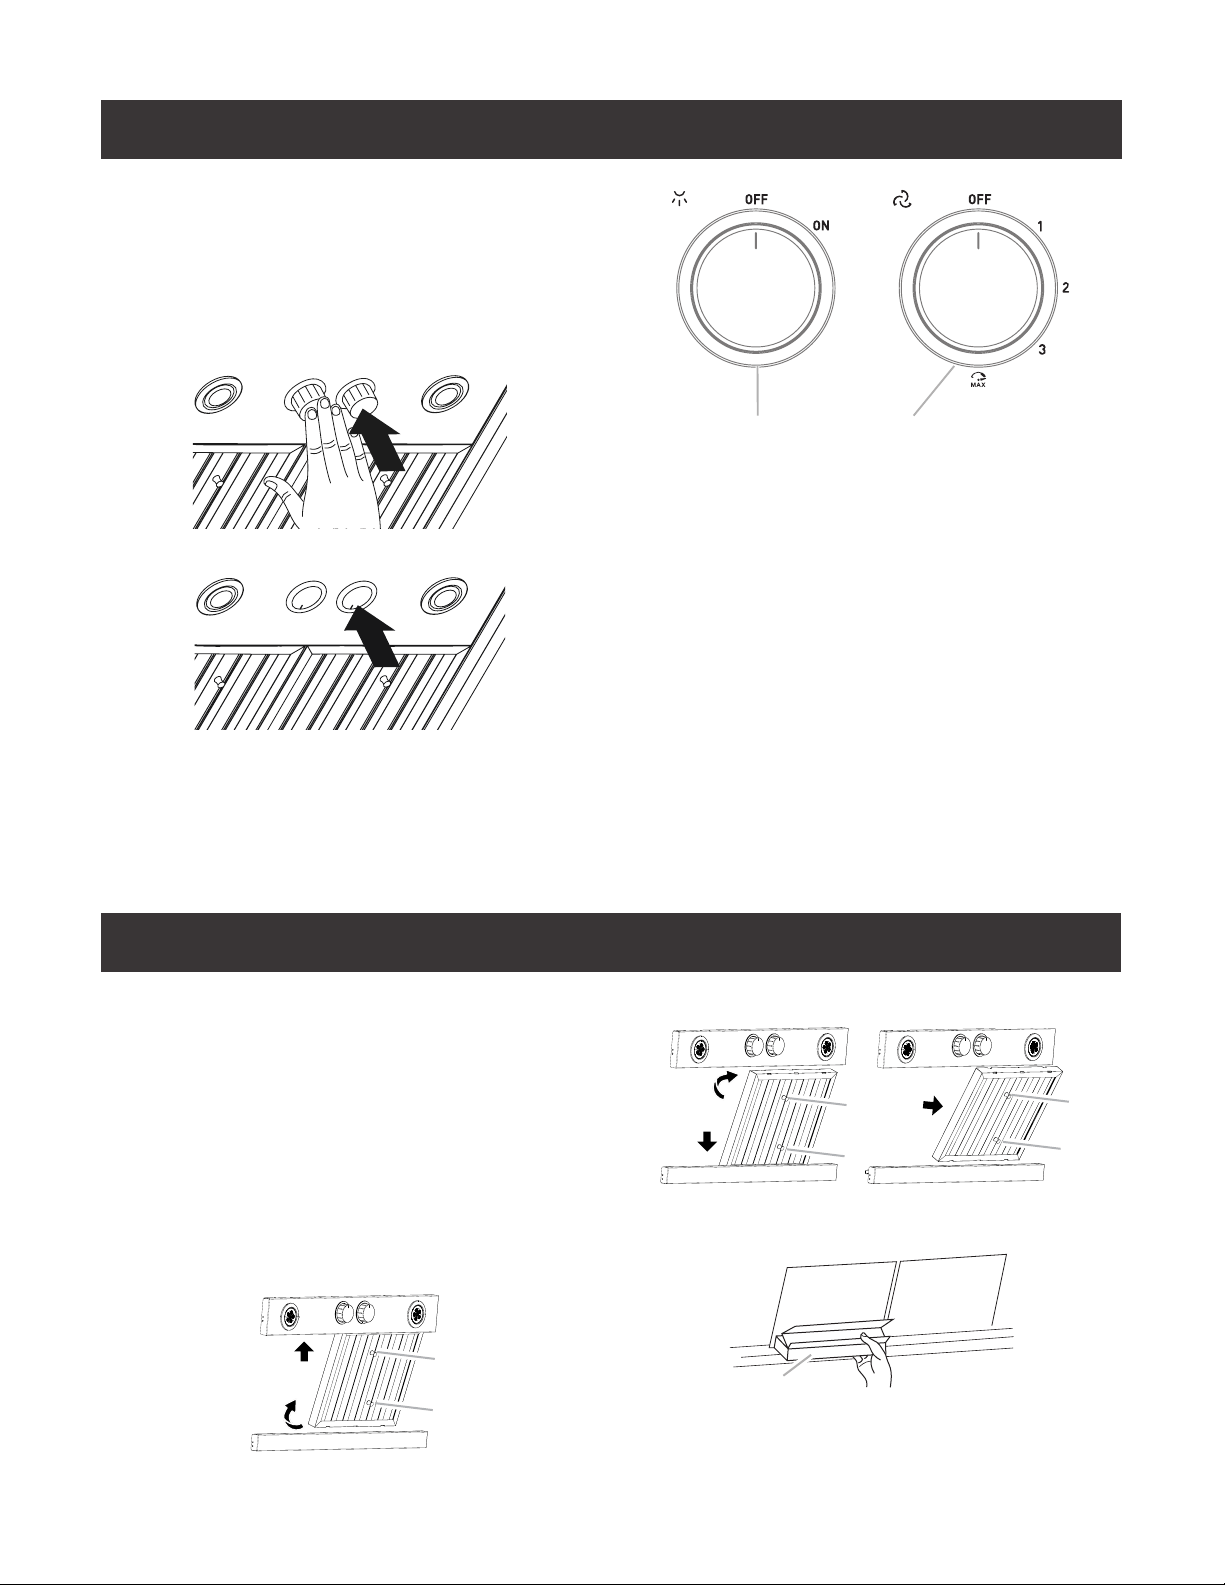
Metal Filters and Drip Trays:
1 Use2handstoremovelters.
2 Graspthelterhandles,pulltowardthefrontofthehoodand
pull up on the rear handle.
A
1
2
B
A.Fronthandle
B. Rear handle
3 Pulldownandforwardonthehoodfronthandletoremovethe
lter.
3
4
A
B
5
A
B
A.Fronthandle
B. Rear handle
4 Remove grease drip tray.
A
A.Driptray
5 Washmetalltersandgreasetraysasneededindishwasher
or hot detergent solution to clean.
6 Replace grease drip tray.
Loading ...
Loading ...
Loading ...