Loading ...
Loading ...
Loading ...
9
800.558.1711 Installation & Operation Instructions
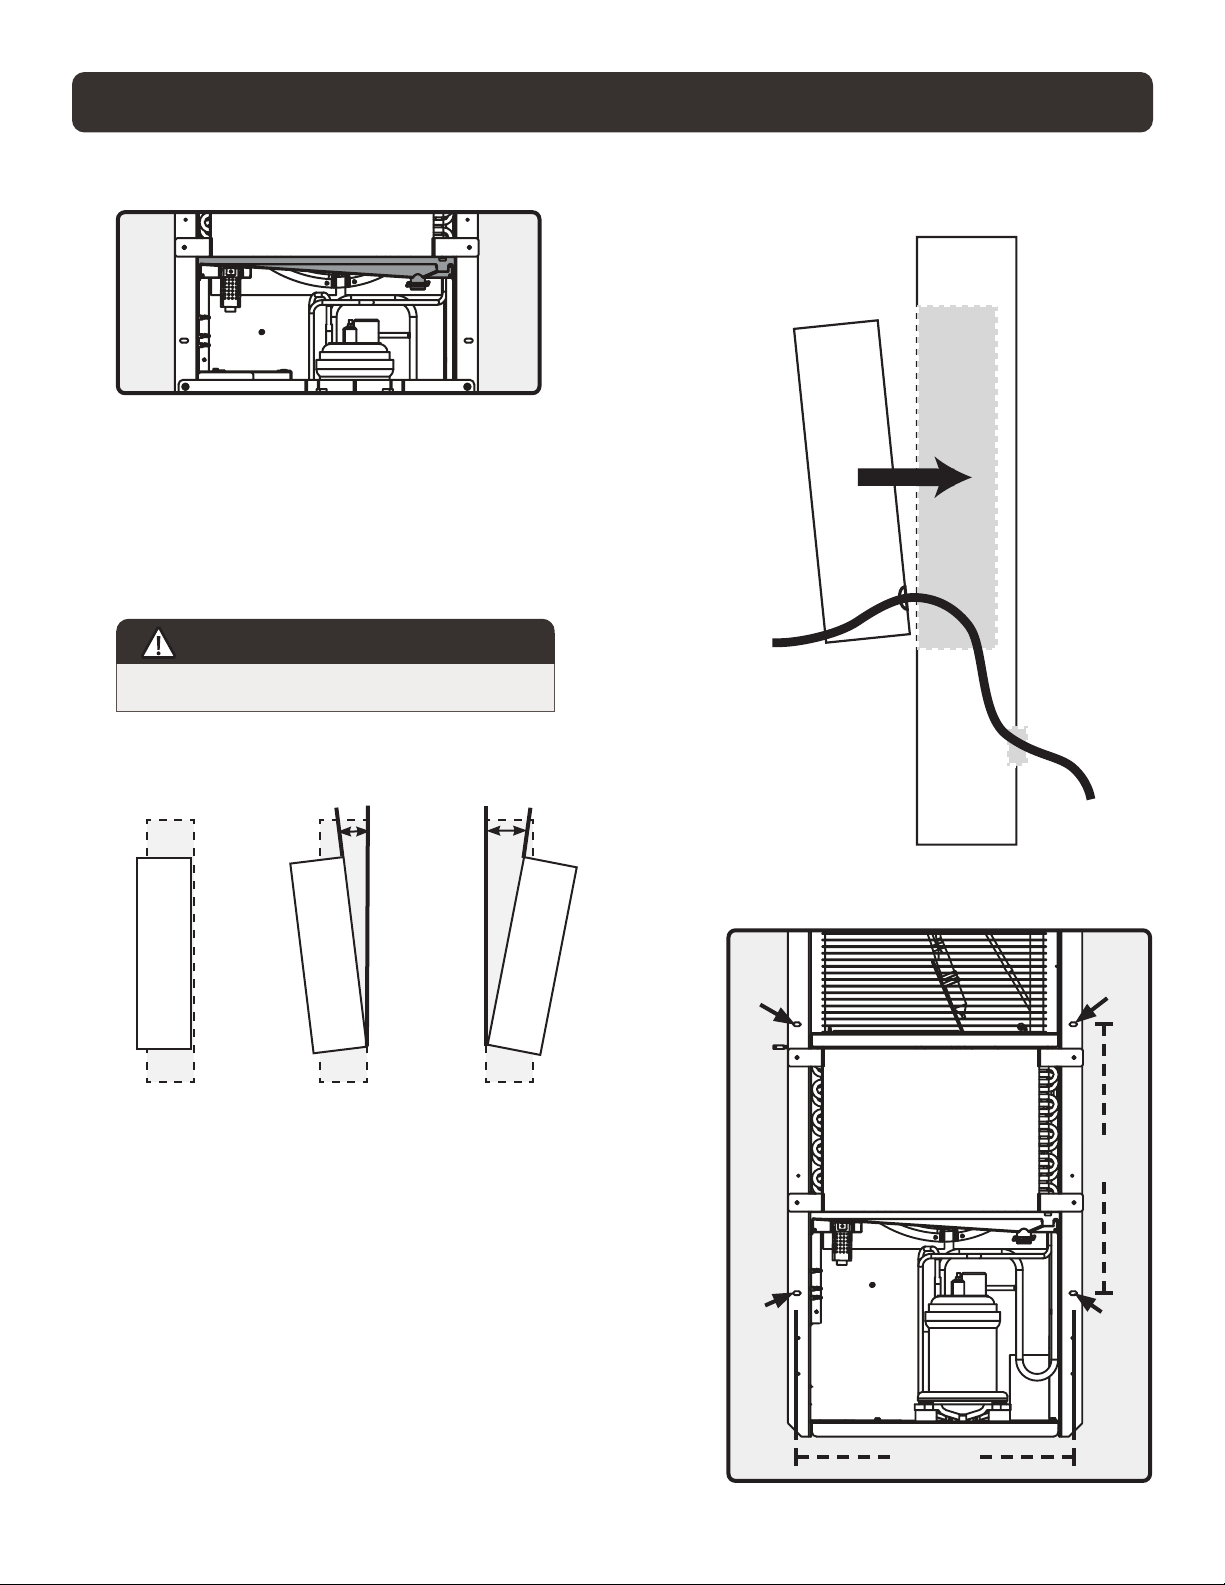
Step 10. Once electrical and drain hose are routed
through the unit, set the unit into the wall.
Step 9. Lift the unit and place it near the wall opening to route
electrical wires and drain hose through appropriate knock outs.
If access cover was not removed, insert grommet into knock out
hole and snap into place before routing drain hose through.
It is recommended to have two people to lift the unit. Place
one hand under the drain pan to support the unit during this step.
Wall
MD33
14 1/2"
Side View
Drain Hose
and Electrical
Steps 9 - 10
DEHUMIDIFIER INSTALLATION
Step 11. Insert the dehumidier into the center of the opening,
allowing for a minimum of 1/8" clearance from framing on both
sides. Additional insulation or sound dampening material (not
provided) may be required if the dehumidier cabinet contacts
the studs, especially in applications involving metal studs.
Fasten the unit to the framing by inserting four of the #10
(wood) or #8 (sheet metal) screws into the slotted holes.
Top and bottom blocking is not necessary for securing the
dehumidier. Any existing blocking, headers or framing
should not intrude into the rough opening and be a minimum
of 1/2" away from the cabinet.
The cabinet is designed to create 1/2" clearance to the back
wall when installed inside a standard 2x6 stud space with
1/2" minimum drywall sheathing.
For alternate installations, maintain 1/2" clearance to back
of wall of dehumidifier cabinet.
11.
Before securing the unit into place, make sure it is level. Level
or slightly forward is acceptable, but never backwards.
15 1/2"
15"
0˚ 1˚-2˚ 1˚
OK
OK
NOT
OK
Front
Front
Front
CAUTION!CAUTION!
THE UNIT IS NOT SECURED YET.
Loading ...
Loading ...
Loading ...