Loading ...
Loading ...
Loading ...

7
800.558.1711 Installation & Operation Instructions
DEHUMIDIFIER INSTALLATION
Tools Required:
• Phillips Screwdriver
• 1/4" Hex Nut Screwdriver
• Level
• Square or Ruler
• Stud Finder
• Wire Stripper
• Drywall Saw
• Side Cutters or Carpenters Knife
• Tape Measure
• Pen or Pencil
Other Materials To Consider:
• Electrical wire (depends on
installation and distance of
wiring requirements)
• Additional hose length or PVC
pipe (depends on drain location)
• Materials to repair drywall
(depends on installation)
• Condensate Pump Kit
(depends on drain location)
• GFCI Outlet (if using supplied
power cord)
Step 1. Remove the shipping bracket by carefully
cutting the two zip ties with side cutters or shears.
Remove the four screws from the shipping bracket
using a 1/4" hex nut screwdriver.
Step 2. Remove electrical box cover from the unit by
removing the two screws on the cover using a 1/4" hex
nut screwdriver.
WARNING!WARNING!
SHUT OFF BREAKER / POWER BEFORE BEGINNING INSTALLATION.
1.
2.
Electrical
Box
Shipping
Bracket
AVERTISSEMENT!AVERTISSEMENT!
FERMEZ LE DISJONCTEUR/ALIMENTATION AVANT DE COMMENCER L’INSTALLATION.
Items Included in Box:
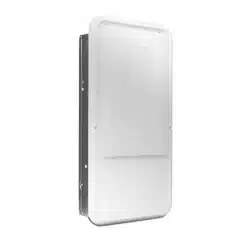
• B33DHW Dehumidier
• Diuser Cover with Filter
• B33DHW Installation Instructions
• Drain Hose (10')
• Power Cord (10')
• Hose Clamp
• Grommet for Drain Hose
• Non-Metallic Cable Clamp
• Bag A: #10 Wood Screws (5)
• Bag B: #8 Sheet Metal Screws (5)
• Bag C: Tamper Resistant Screws for
Diuser Cover (5) and 1/4" Hex T-15
Torx Security Bit
• Bag D: Phillips Screws for Diuser
Cover (5)
The B33DHW can be installed in a variety of applications:
• 2x6 16" O.C. Stud Wall Installation
• 2x4 16" O.C. Stud Wall Installation
- If penetrating both walls and the opposite side is a mechanical room, no additional accessories are needed.
- If back wall is functional space, installation requires 2x4 Wall Mount Bezel Kit (PN 4037767).
- If the other side of the wall goes into an unconditioned space, it may require the 2x4 Rear Panel Kit (PN
4037768) to add a layer of insulation to prevent condensation.
• Surface Mount Installation
- Surface Mount Kit (PN 4037766) required for installation.
Surface Mount, Bezel Kit and Rear Panel installations can be viewed at www.inwalldehumidier.com/accessories
Loading ...
Loading ...
Loading ...
