Loading ...
Loading ...
Loading ...

English | 9
To set the rough routing depth, proceed as follows:
– Place the power tool with a fitted router bit onto the work-
piece you want to machine.
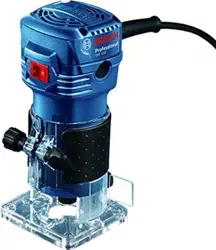
– Open the wing bolt(10) on the routing base(2).
– Move the drive unit(1) to the required depth using the
scale for setting the routing depth(12) as a guide.
– Close the wing bolt(10) on the routing base(2).
– Check the routing depth you have set by carrying out a
practical test and correct it if required.
Starting Operation
Switching on/off
To switch on the power tool, set the on/off switch(11) to I.
To switch off the power tool, set the on/off switch(11) to 0.
Working Advice
u Protect router bits against shock and impact.
u Pull the plug out of the socket before carrying out any
work on the power tool.
Routing direction and routing process (see figureD)
u Routing must always be carried out with the work-
piece being moved against the direction in which the
router bit (6) is turning (up cut). If the workpiece is
moved in the same direction as the router bit is turning
(down cut), the power tool may be pulled out of your
hands.
u Only use the power tool when the routing base(2) is
fitted. Losing control of the power tool can cause injur-
ies.
Note: Be aware that the router bit(6) always protrudes
slightly from the base plate(9). Do not damage the template
or the workpiece.
Set the routing depth you want.
Switch on the power tool and guide it to the point you want
to machine.
Switch off the power tool after routing.
u Do not put the power tool down before the router bit
has come to a complete stop. Application tools that are
still running can cause injuries.
Routing with guide bushing (see figure E1 – E3)
Using the guide bushing(17), you can transfer contours
from templates or patterns to the workpiece.
Select the guide bushing that is suitable for the thickness of
the template or pattern. Due to the protruding height of the
guide bushing, the template must have a minimum thickness
of 8mm (see figureE1).
u Select a router bit with a diameter that is smaller than
the interior diameter of the guide bushing.
Unscrew the four cylinder screws on the underside of the
guide plate(8) and remove the guide plate.
Insert the guide bushing(17) into the guide plate (see fig-
ureE2).
Loosely screw the guide plate back onto the base plate(9).
It must still be possible to move the guide plate freely.
To ensure that the distance between the centre of the router
bit and the edge of the guide bushing is uniform, the guide
bushing and guide plate must (if necessary) be centrally
aligned with each other.
– Align the guide plate such that the router bit and guide
bushing are centred on the opening in the guide plate
(see figureE3).
– Hold the guide plate in this position and firmly tighten the
fastening screw.
To rout with the guide bushing(17), proceed as follows:
– Place the power tool with the guide bushing(17) onto the
template.
– Guide the power tool with the protruding guide bushing
along the template using lateral pressure.
Edge or profile routing (see figure F)
For edge and profile routing without a parallel guide, the
router bit must be fitted with a pilot pin or a ball bearing.
While it is switched on, guide the power tool towards the
workpiece from the side until the pilot pin or the ball bearing
of the router bit is touching the side of the workpiece edge
that you want to machine.
Guide the power tool along the workpiece edge. Pay atten-
tion that the router is positioned perpendicularly. Too much
pressure can damage the edge of the workpiece.
Routing with a parallel guide (seefigureG)
You can fit a parallel guide(18) for when cutting parallel to
an edge.
Fit the parallel guide(18) to the routing base(2) using the
knurled screw(4).
Set the required stop depth using the wing bolt on the paral-
lel guide(19).
While it is switched on, guide the power tool along the work-
piece edge with a uniform feed and while applying lateral
pressure to the parallel guide.
Routing with a pilot (see figure H)
The pilot(20) helps when routing edges with router bits
without a pilot pin or ball bearing.
Fit the pilot to the routing base(2) using the nut(4).
Guide the power tool along the workpiece edge with a uni-
form feed.
Lateral clearance: To change the amount of material being
removed, you can adjust the lateral clearance between the
workpiece and the guide roller(23) on the pilot(20).
Loosen the wing bolt(21), set the lateral clearance you want
by turning the wing bolt(22), then retighten the wing
bolt(21).
Height: Set the vertical alignment of the pilot according to
the router bit you are using and the thickness of the work-
piece you want to machine.
Loosen the nut(4) on the pilot, slide the pilot into the de-
sired position and retighten the bolt.
Bosch Power Tools 1 609 92A 5JG | (14.01.2020)
Loading ...
Loading ...
Loading ...