Loading ...
Loading ...
Loading ...

8 WWW.SENIXTOOLS.COM
UNPACKING
INSTALL THE HANDLE
POWER HEAD SHAFT/LOWER SHAFT
ASSEMBLY
ASSEMBLY
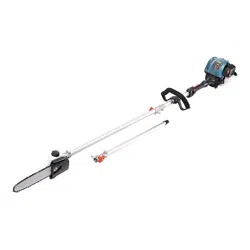
INCLUDED PARTS
This product requires assembly. Carefully remove the
product and any accessories from the box. Make sure
that all items listed in the packing list are included.
Inspect the product carefully to make sure no breakage
or damage occurred during shipping.
Do not discard the packing material until you have
carefully inspected and satisfactorily operated the
product. If any parts are damaged or missing, please
call 1-800-261-3981 for assistance.
Do not use this product if any parts on the packing
list are already assembled to your product when you
unpack it. Parts on this list are not assembled to the
product by the manufacturer and require customer
installation. Use of a product that may have been
improperly assembled could result in serious personal
injury.
To prevent an accidental start that could cause serious
personal injury, always disconnect the engine spark
plug wire from the spark plug when assembling parts.
Never install, remove, or adjust any attachments while
power head is running. Failure to stop the engine can
cause serious personal injury.
Do not allow familiarity with this product to make you
careless. Remember that a careless fraction of a
second is sufcient to inict serious injury.
Always wear eye protection with side shields marked to
comply with ANSI Z87.1, along with hearing protection.
Failure to do so could result in objects being thrown into
your eyes and other possible serious injuries.
If any part of the pole saw is missing or damaged, do
not operate the pole saw until the damaged part is
repaired or replaced.
Disconnect the spark plug wire before performing
maintenance or assembly procedures.
1. Screw the handle and holder using the hex wrench
provided. The screws and holder are pre-attached to
the front handle.
2. Tighten the 4 screws until the handle is secure.
1. Set the engine assembly on a level surface. Loosen
the clamping knob.
2. Pull locator pin out and turn counter-clockwise 1/4
Screw
DO NOT discard box or packing material until all parts
are examined.
NOTE: Chain and Bar Oil is not included. You must ll
the Chain Saw with SAE30 oil BEFORE use.
NOTE: Remove the Chain/Bar/Blade Protective Cover
before use.
Quantity Item
1 Operator’s manual
1 Handle and mounting hardware
1 Chain protective cover
1 Spark plug wrench
1 Bar nut wrench
1 Hex wrench
1 60 ml bottle
1
Harness
WARNING:
WARNING:
WARNING:
WARNING:
WARNING:
WARNING:
WARNING:
Locator pin
Clamping
Knob
Shaft hole
Coupler
Extension tube
Loading ...
Loading ...
Loading ...
