Loading ...
Loading ...
Loading ...
14
Default model: Automatic
TIMER
CLEAN ON/OFF
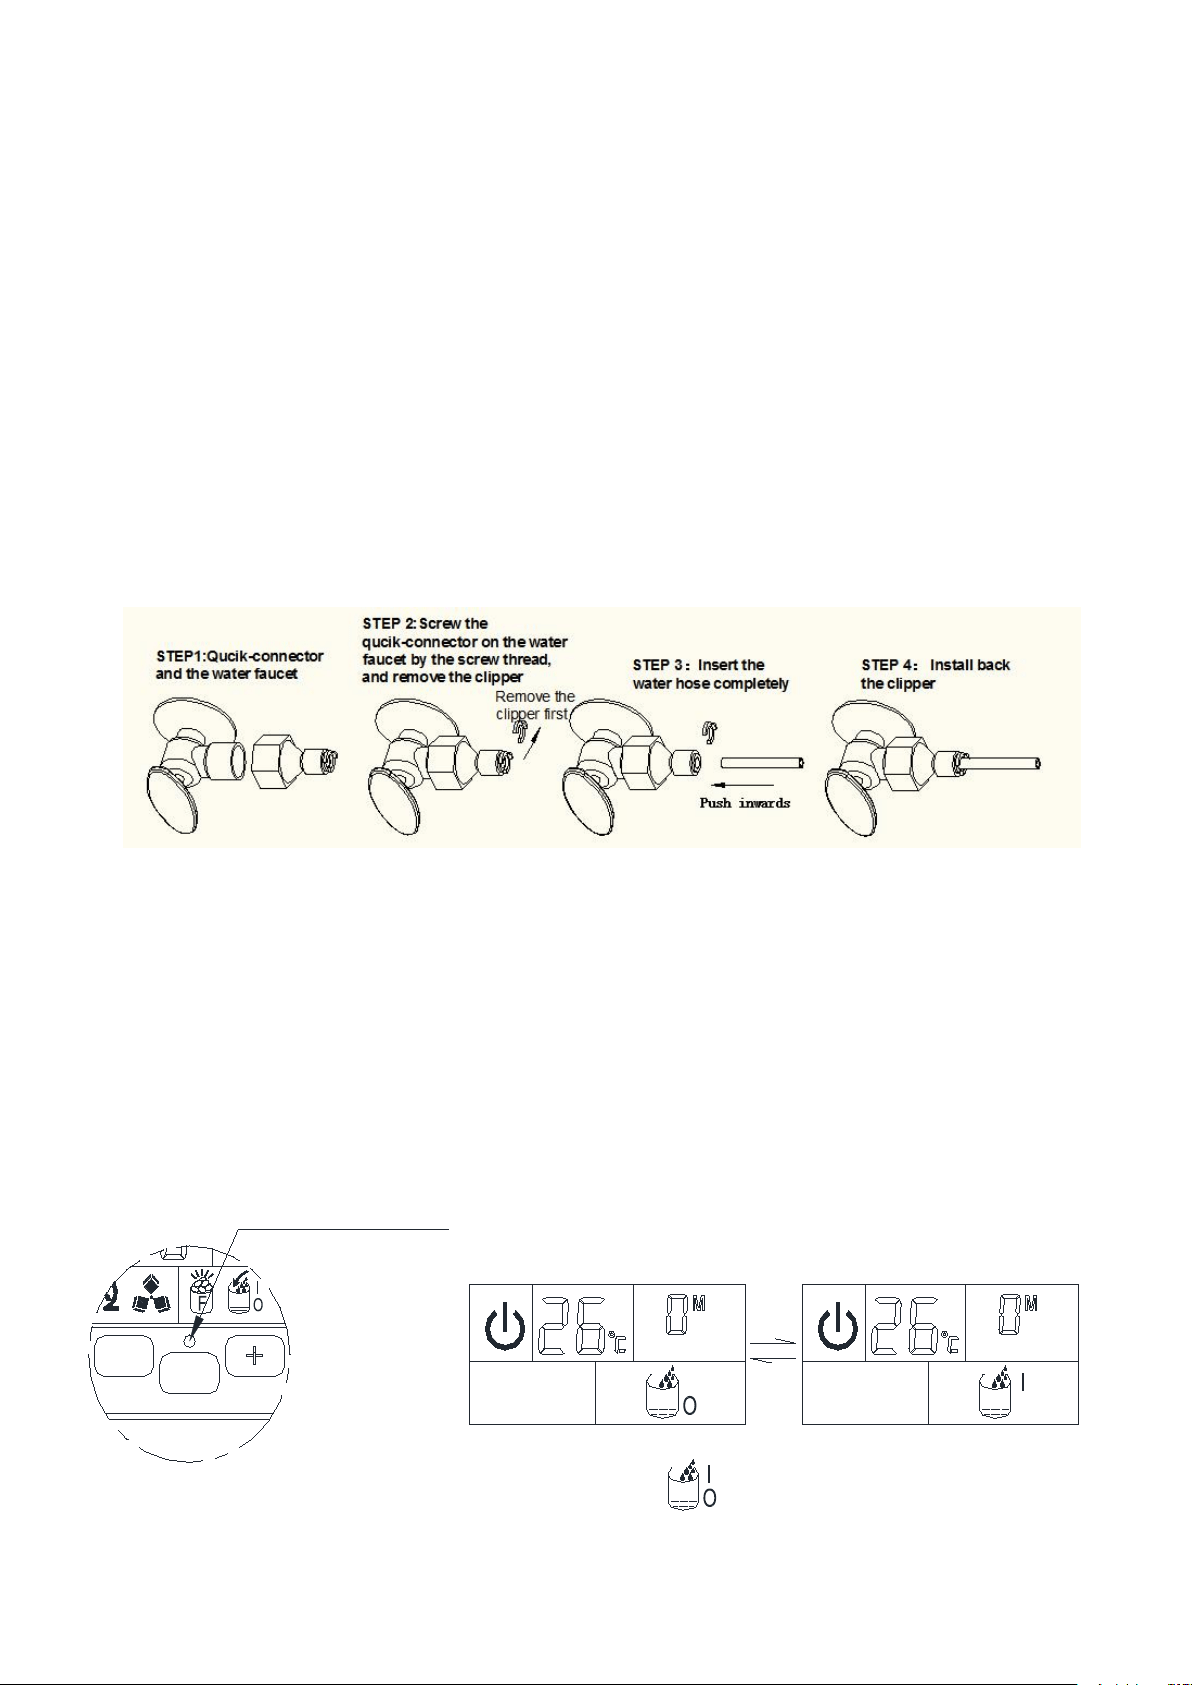
Water supplying
Mode Setting Switch
After setting once:Manual
Use a thin pole
to press the
switch in this
little hole, to
change the water
supplying mode
between automatic
and manual.
I:Symbol of Manual water suppling
O:Symbol of Automatic water supplying
2、Connecting the water drainage pipe
Pull out the water drainage cap with black color (indicated ○
Ain above illustration), then
connect the white drainage pipe included in accessory, again connect the other end of this
drainage to the main water drainage pipeline. Make sure not to set the drainage pipe too high.
3. Connect the water hose to the water faucet of the water main supply system (For
automatic water supplying)
First, install the supplied water quick-connector(from 1/4 to 1/2 inch, with black sealing circle) to
the water faucet by screw thread; Second, remove the clipper from the water quick-connector,
insert the another end of the water hose into this quick-connector port completely, then install back
the clipper, also this step is completed. Note: The water faucet should be supplied by the customer
himself.
Important: The water pressure of main water supply system must be 0.04-05 MPa at least and
0.6 Mpa at largest. If the pressure is too big (like bigger than 0.8 Mpa), it should be installed with
pressure decreasing valve first.
Note: If you set the unit supplied by manual water filling, don’t need to do step 1 and 3.
If you choose the automatic water supplying, the ice maker requires a continuous water
supply with pressure 1-6 Bar as required in above specification table.
Operation the ice-making process
Selecting the water supplying mode
Plug on the unit , press the button in the little hole of the control panel, you can change the water
supplying mode of your unit.
Loading ...
Loading ...
Loading ...