Loading ...
Loading ...
Loading ...
13
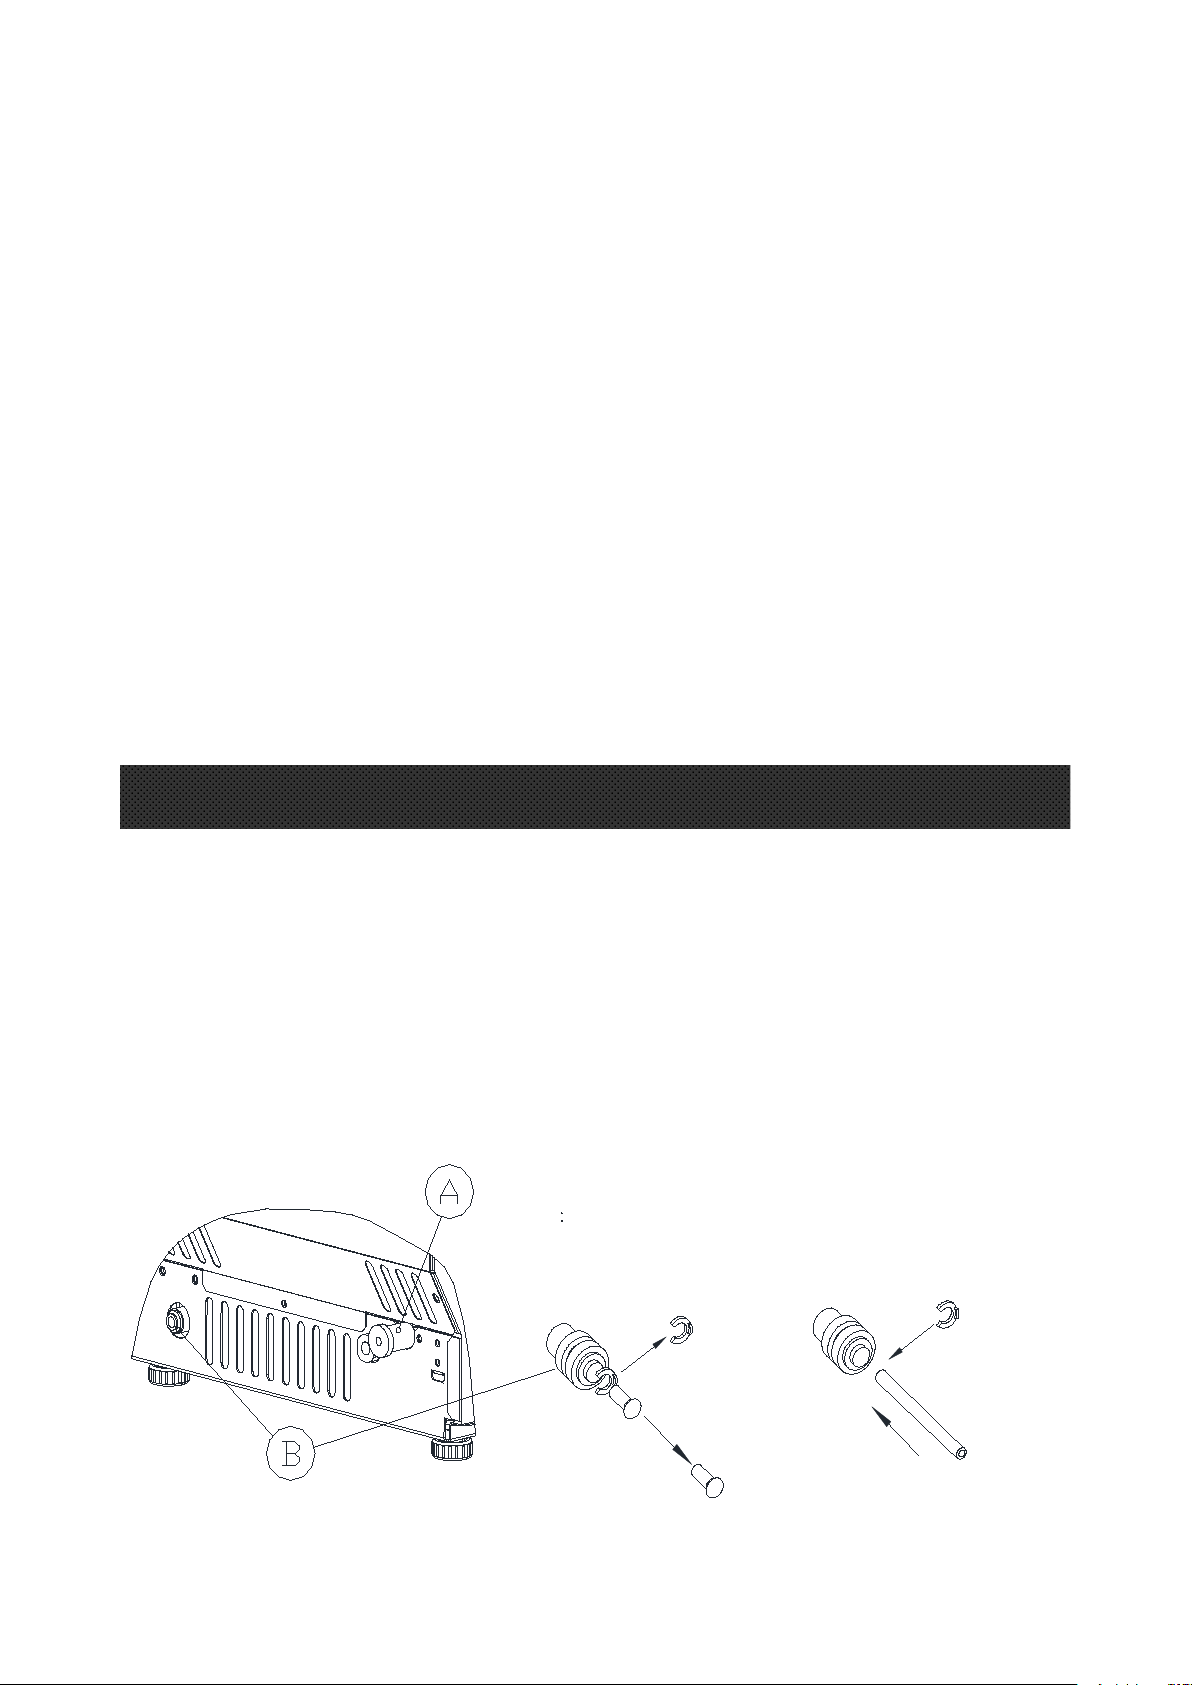
Unit Back View
Press inward the
active out circle,
then remove the
anti-dusty plug.
Remove the
clipper first
Then install back
the clipper
White water supplying
hose (accessory)
First insert the
water supplying hose
inward completely
Water inlet port on the
unit back
STEP 1 Remove the
tape first.
STEP 2: Insert the
water hose
CLEANING
CLEANING YOUR
YOUR ICE
ICE MAKER
MAKER BEFROE
BEFROE FIRST
FIRST USING
USING
Before using your ice maker, it is strongly recommended to clean it thoroughly.
1. Open the ice taking door.
2. Clean with diluted detergent, warm water and a soft cloth.
3. Repeatedly clean the water contacting inner parts, use the water or the wet clothe to scrub the
relevant parts, then use the dry clothe to dry them.
4. You can pull the Water drain pipe of the water tank indicating “H” in above illustration to drain out
the cleaned water in the water tank, then next to clean inner ice-storing bin, till all of inner parts are
cleanly, then drain out all of the cleaned water from the water drain port located at unit back
indicating “8”in above illustration. And must to install back the water drain pipe of the water tank
and the cap of the unit water drain port, otherwise, the unit will not make the ice normally. And
suggest that you should discard the ice-cube made by the first ice making cycle after
cleaning. Note: Please see the section “Water Drainage” in this manual to drain out the cleaned
water.
5. The outside of the ice maker should be cleaned regularly with a mild detergent solution and warm
water.
6. Dry the interior and exterior with a clean soft cloth.
OPERATION YOUR UNIT
WATER CONNECTION FOR YOUR ICE MAKER
Important: Be sure to use the new hose-sets supplied with the appliance to
connect to water mains and that old hose-sets should not be reused.
1、Connect the water supplying hose to the unit (For automatic water supplying)
Step 1: First remove the clipper on the water inlet port for main water supplying (indicated in
the following illustration “B”) located at unit back, then pushing inwards the anti-dusty plug, use your
other hand’s finger to press the out circle to fix the anti-dusty plug, then take down the anti-dusty plug;
Step 2: Insert the one end of the white water supplying hose into the water inlet port, and push inward
completely, and install back the clipper, then water supplying hose connection is completed.
Loading ...
Loading ...
Loading ...