Loading ...
Loading ...
Loading ...
assembly
MOUNTING BELT AND DISC SANDER
TO WORKBENCH
If belt and disc sander is to be used in a permanent
location, it should be fastened securely to a firm sup-
porting surface such as a workbench. A 5/16" bolt, flat-
washer, Iockwasher, and hex nut (not included) should
be used at each mounting hole to secure the belt disc
sander to the workbench.
If mounting to a workbench, holes should be drilled
through supporting surface of the workbench as follows:
1. Set the belt disc sander on the workbench in the
exact position where it is to be mounted,
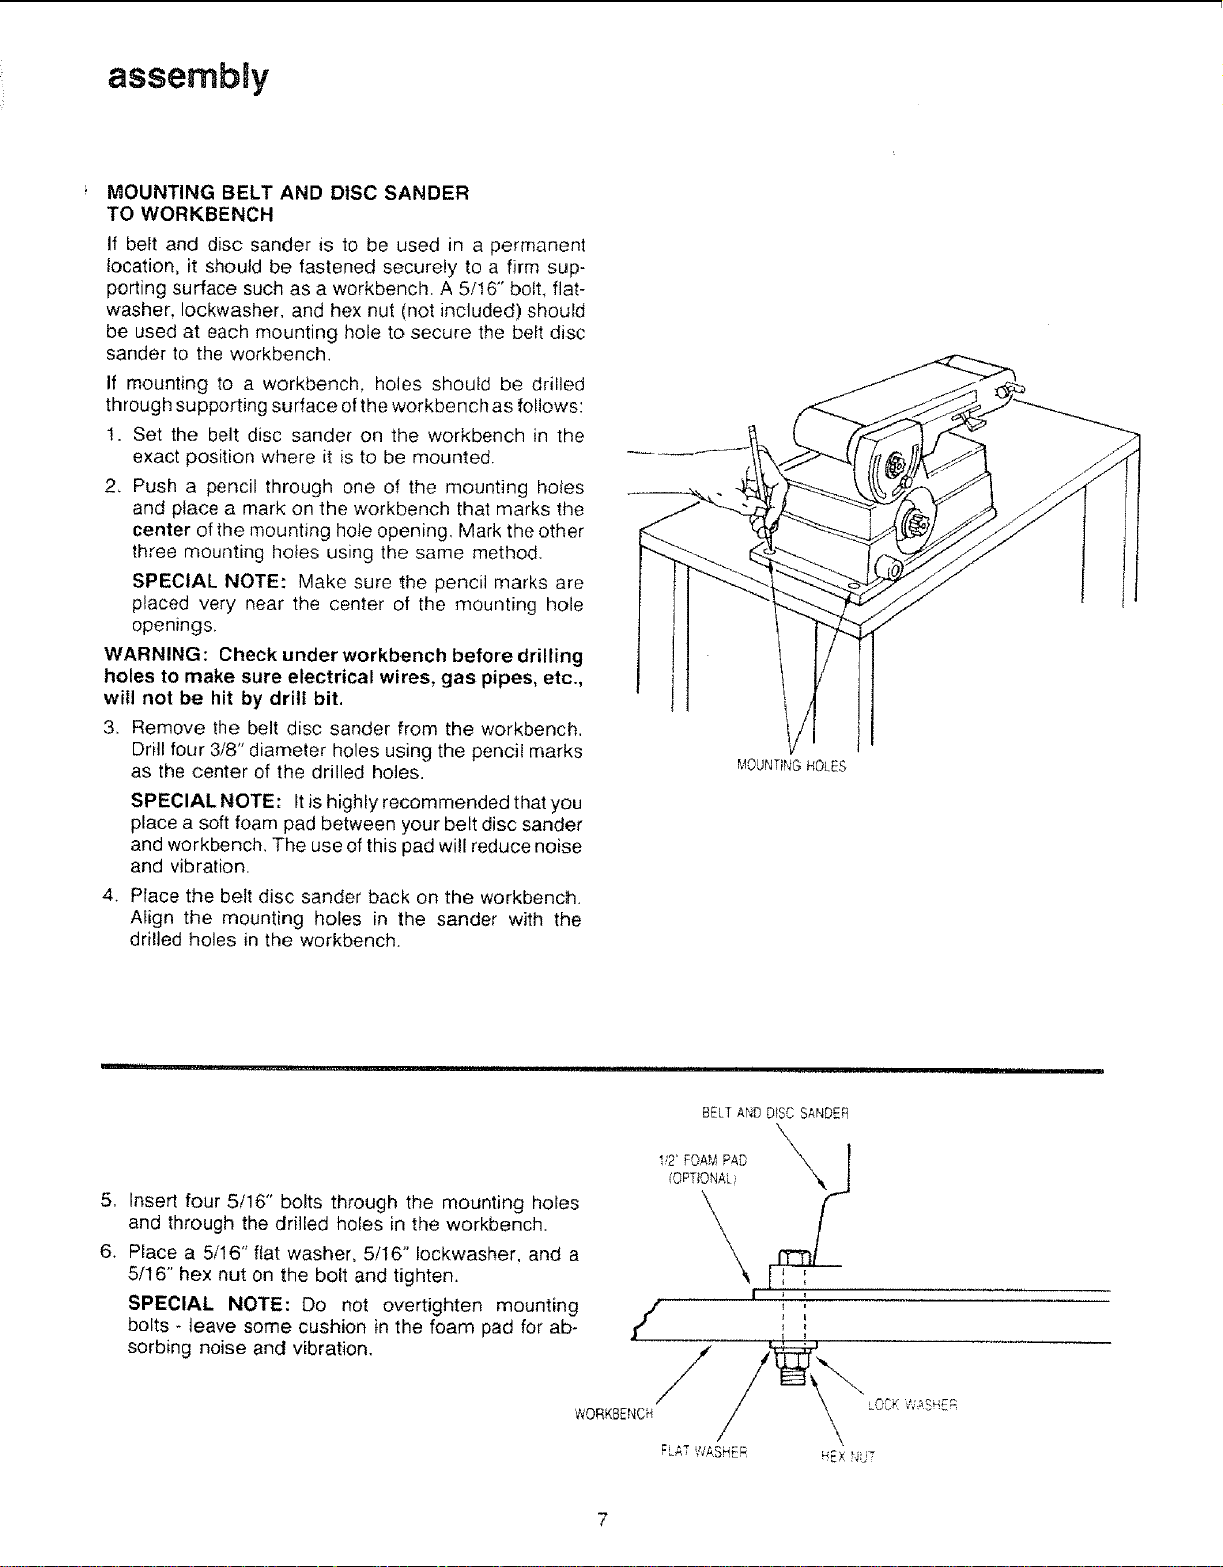
2, Push a pencil through one of the mounting holes
and place a mark on the workbench that marks the
center of the mounting hole opening. Mark the other
three mounting hotes using the same method.
SPECIAL NOTE: Make sure the pencil marks are
placed very near the center of the mounting hole
openings,
WARNING: Check under workbench before drilling
holes to make sure electrical wires, gas pipes, etc.,
will not be hit by drill bit.
3. Remove the belt disc sander from the workbench.
Drill four 3/8" diameter holes using the pencil marks
as the center of the drilled holes.
SPECIAL NOTE: It is highly recommended that you
place a soft foam pad between your belt disc sander
and workbench. The use of this pad will reduce noise
and vibration.
4. Place the belt disc sander back on the workbench.
Align the mounting holes in the sander with the
drilled holes in the workbench.
MOUNTING HOLES
.
6,
Insert four 5/16" bolts through the mounting holes
and through the dritled holes in the workbench.
Place a 5/16" flat washer, 5116"lockwasher, and a
5/16" hex nut on the bolt and tighten,
SPECIAL NOTE: Do not overtighten mounting
bolts - leave some cushion in the foam pad for ab-
sorbing noise and vibration.
BELT AND DISC SANDER
I!2' FOA_ PAD X,X_. J
/OPTIONAL
/ ,
i
WORKBENCH
Loading ...
Loading ...
Loading ...