Loading ...
Loading ...
Loading ...
5
STEP 2 - EXHAUST DUCT ASSEMBLY INSTALLATION
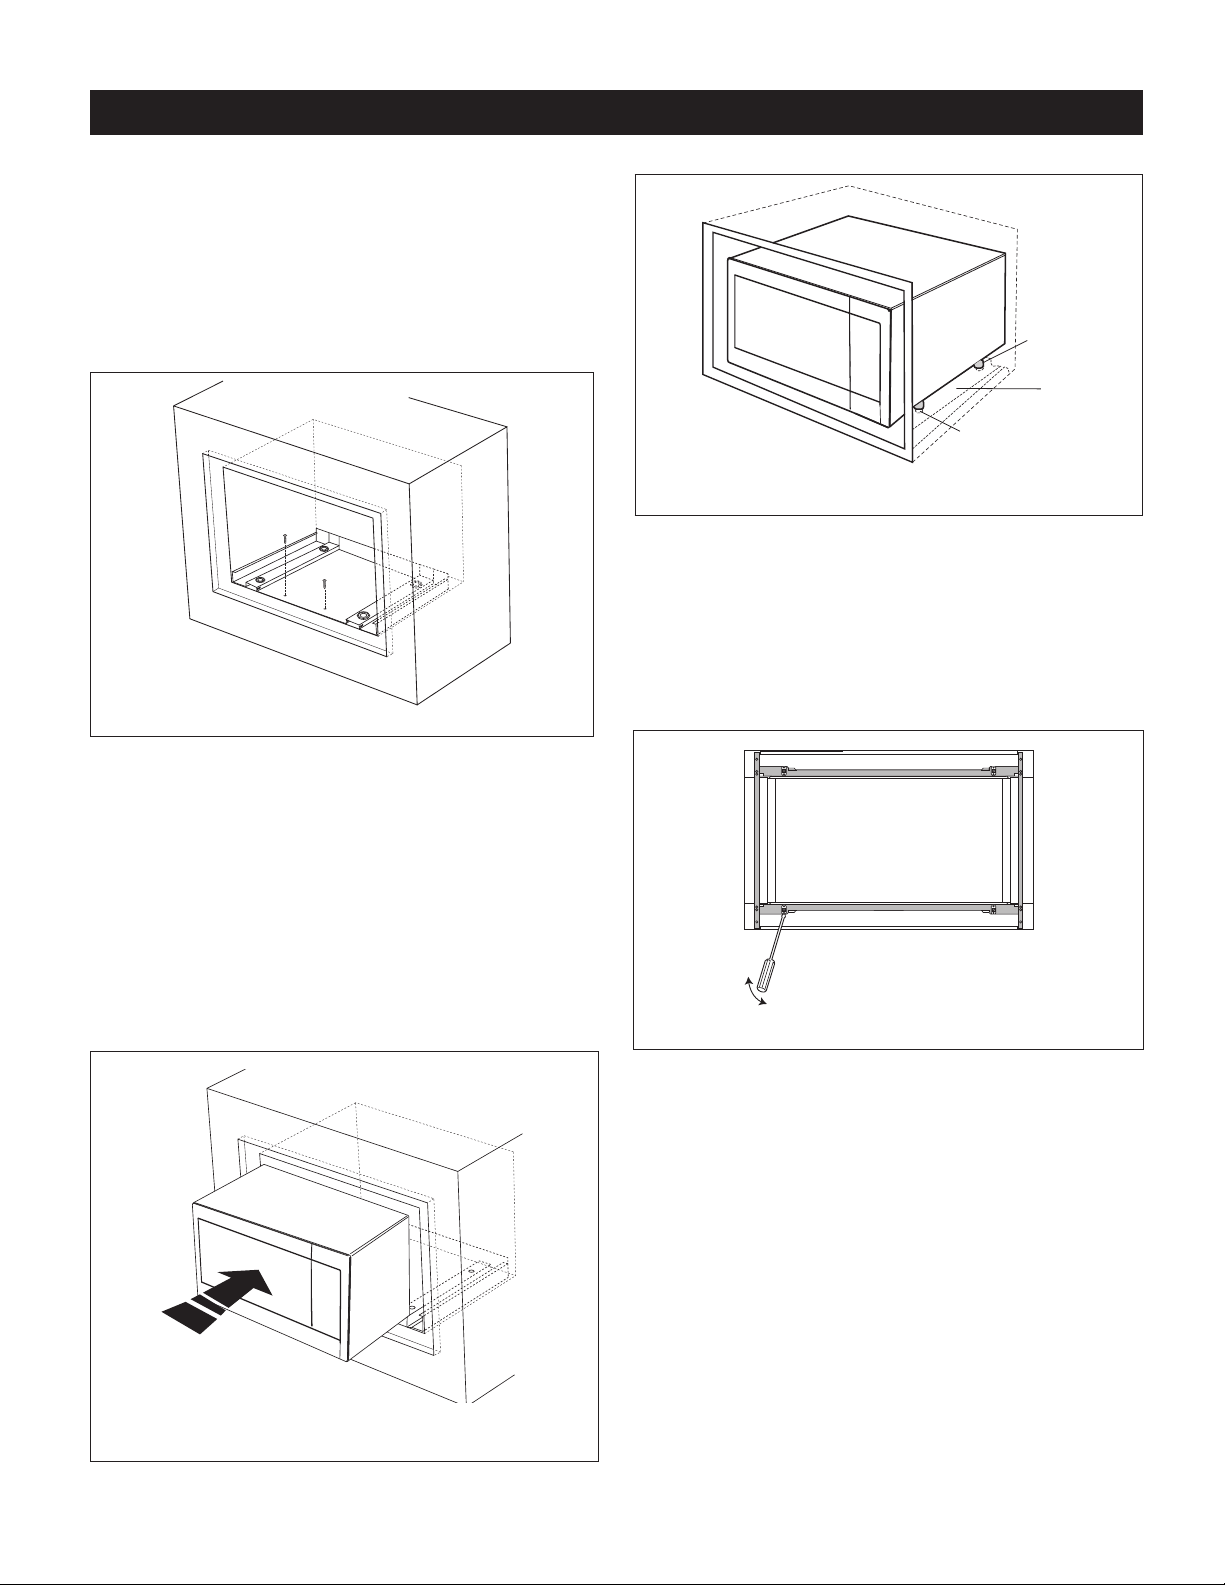
1.Place the Exhaust Duct Assembly in the center of the
opening. Align the frontedge of the duct with the front
ofthecabinet.Alignthefrontedgeoftherightsideofthe
ductwiththefrontoftheshelf.SeeFigure3.
2.Secure the Exhaust Duct Assembly with 2 SCREWS D.
SeeFigure3.
Screw D
Screw D
Figure 3
STEP 3 - FRAME INSTALLATION
1.Place theoven adjacentto thewall or cabinetopening.
Plugthepowercordintotheelectricaloutlet.
2.Carefully guide the assembled oven into the prepared
opening. Slide the oven onto the EXHAUST DUCT
ASSEMBLY. Avoid pinching the cord between the oven
andthewall.SeeFigure4.
Adjustthepositionoftheovensothefeetoftheovenare
ttedintotherecessesoftheEXHAUSTDUCTASSEMBLY
andthedooropensproperly.SeeFigure5.
Screw D
Screw D
Figure 4
FLUSH INSTALLATION INSTRUCTIONS
Exhaust
duct
assembly
Foot
Duct recess
Figure 5
3.DISASSEMBLY:The FRONT FRAMEand BACK FRAME
come pre-assembled with ball studs engaged in the
receivers.Separate the FRONT FRAME from the BACK
FRAME.Placetheassemblyfacedownontoaprotected
surface.Atthelocationoftheballstud,insertaathead
screwdriverbetweentheFRONTFRAMEandtheBACK
FRAMEandgentlypryuptodisengagetheballstudfrom
thereceiver.Repeatforeachcorner.SeeFigure6.
Figure 6
Loading ...
Loading ...
Loading ...